Customising the interface for faster service delivery.
NeroPOS: Customising Your EPOS Product Layout
Tailor your POS interface to fit your hardware and menu size by adjusting the product grid and category visibility.
1. Accessing POS Settings
- Log In: Access your account at NeroPay Account.
- Navigate: From the main dashboard, click on “NeroPOS” in the left sidebar.
- Open Settings: From the dropdown menu, select “POS Settings”.
2. Adjusting the Product Grid
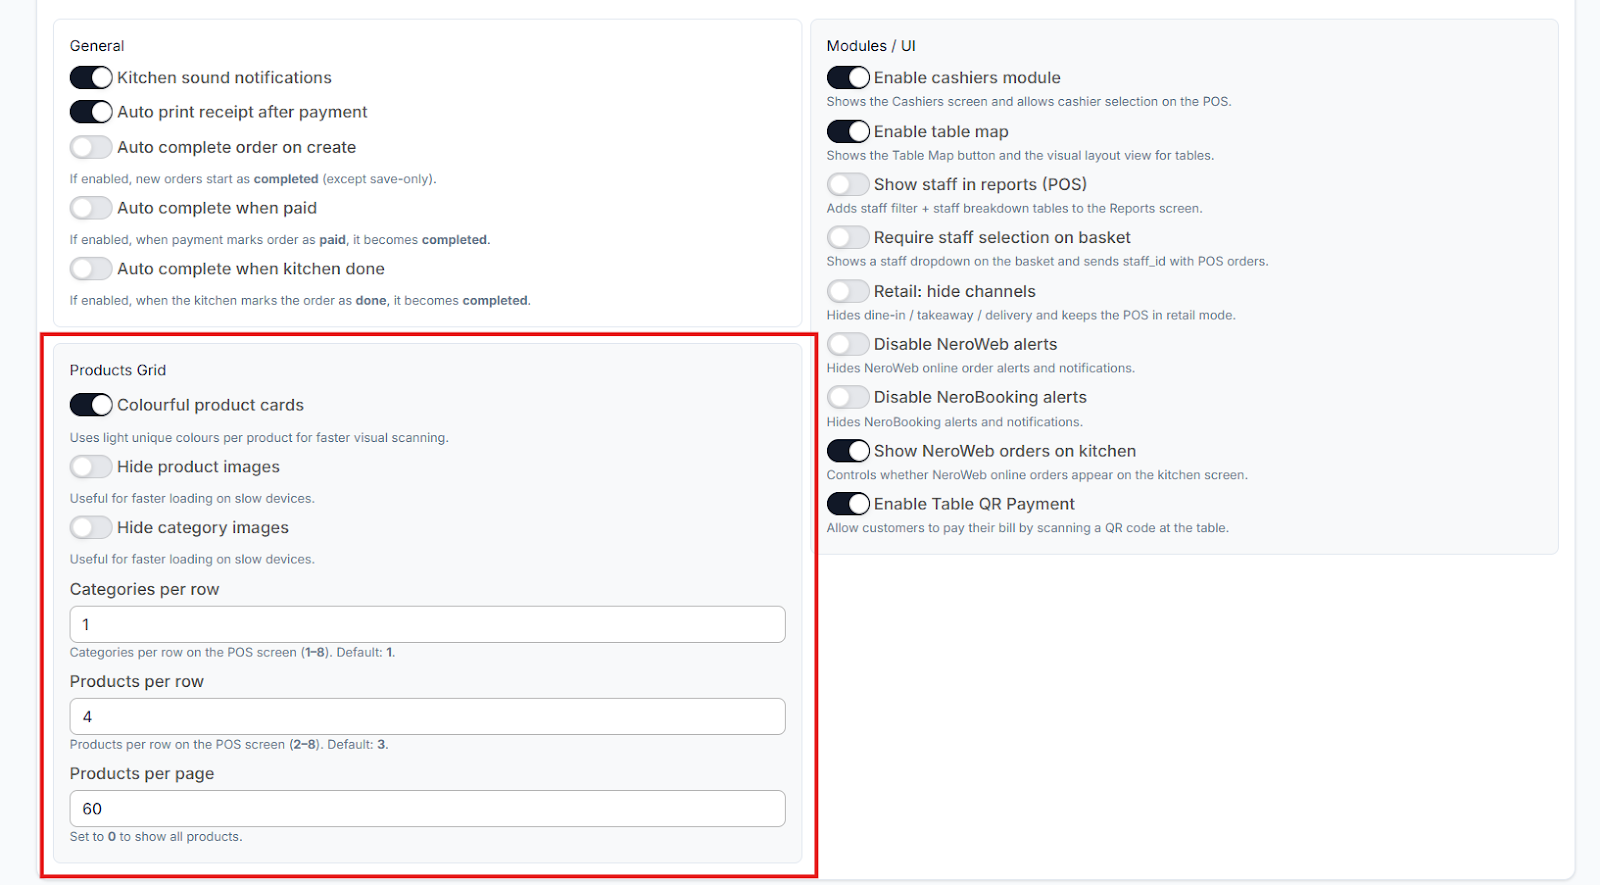
Inside the "General" tab, scroll down to the Product Grid section. This area controls how many items your staff sees at once on the ordering screen.
- Increase Products Per Page: Change the number in the “Products per page” field. A higher number means less scrolling for your team during busy periods.
- Adjust Products Per Row: Change this value to fit more items horizontally. This is perfect for optimising the view on larger tablet screens.
- Expand Category Rows: If you have a large menu, increase the number of Category Rows. This allows more category buttons (like "Drinks" or "Mains") to be visible at the top of the screen simultaneously.
3. Saving Your Changes
Any changes made to the product grid or row counts will not take effect until they are manually saved.
- Save Settings: Once you have adjusted the numbers to your liking, scroll to the top right (or bottom) of the page and click the “Save Settings” button.
- Syncing to Device: After saving on the dashboard, you may need to refresh the NeroPOS app on your tablet or terminal to see the new layout in action.
[!IMPORTANT]
Always click "Save Settings" before navigating away from the page. If you click back to the dashboard or a different tab before saving, your layout adjustments will be reset to the previous defaults.
If you have any questions, please contact us via email at support@neropay.app