Step-by-Step Instructions
Choose Your Account Type
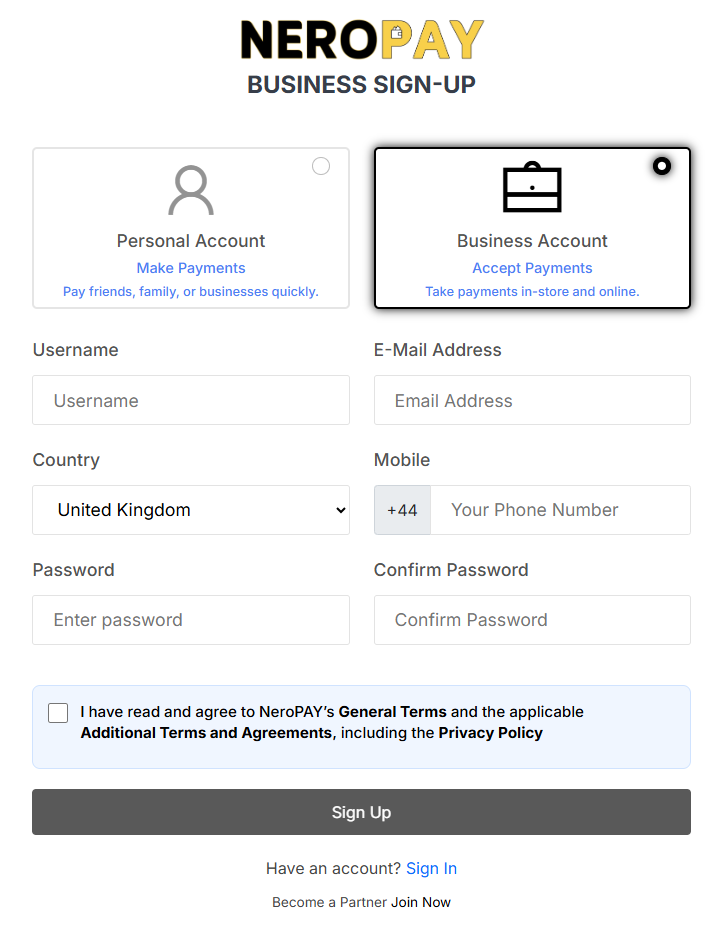
When visiting the NeroPAY sign-up page, you will see two account options:
- Personal Account: Use this to make payments to friends, family, or businesses.
- Business Account: Select this option if you want to accept payments.
- Ensure you click on Business Account to proceed with setting up a merchant profile.
Enter Your Username
Input your desired username in the designated field. This name may be used for account identification within the NeroPAY platform.
Provide Your E-Mail Address
Enter a valid and active email address. This will be used for account notifications, verification, and support.
Select Your Country
From the dropdown menu, choose the country where your business is based (e.g., United Kingdom). This ensures accurate regional settings and compliance.
Input Your Mobile Number
Enter your mobile number, including the country code (prefilled as +44 for the UK). Ensure the number is accurate, as it may be used for two-factor authentication or support.
Create a Secure Password
- Type your chosen password into the "Enter password" field.
- Re-enter the same password in the "Confirm Password" field to ensure accuracy.
- Use a strong password containing upper and lower case letters, numbers, and symbols for best security.
Agree to Terms and Conditions
Tick the checkbox to confirm you have read and agree to:
- NeroPAY’s General Terms
- Additional Terms and Agreements
- Privacy Policy
You must agree to these terms before your registration can be completed.
Complete the Sign-Up
Once all fields are filled and the terms have been accepted:
- Click the Sign Up button to create your account.
- You will receive confirmation via email or SMS, with further instructions to activate your account.