Before you start
- You have an active NeroPay account with NeroPOS enabled
- You have decided how your areas are laid out — for example, First Floor, Second Floor, Garden
Part 1 — Enable table management
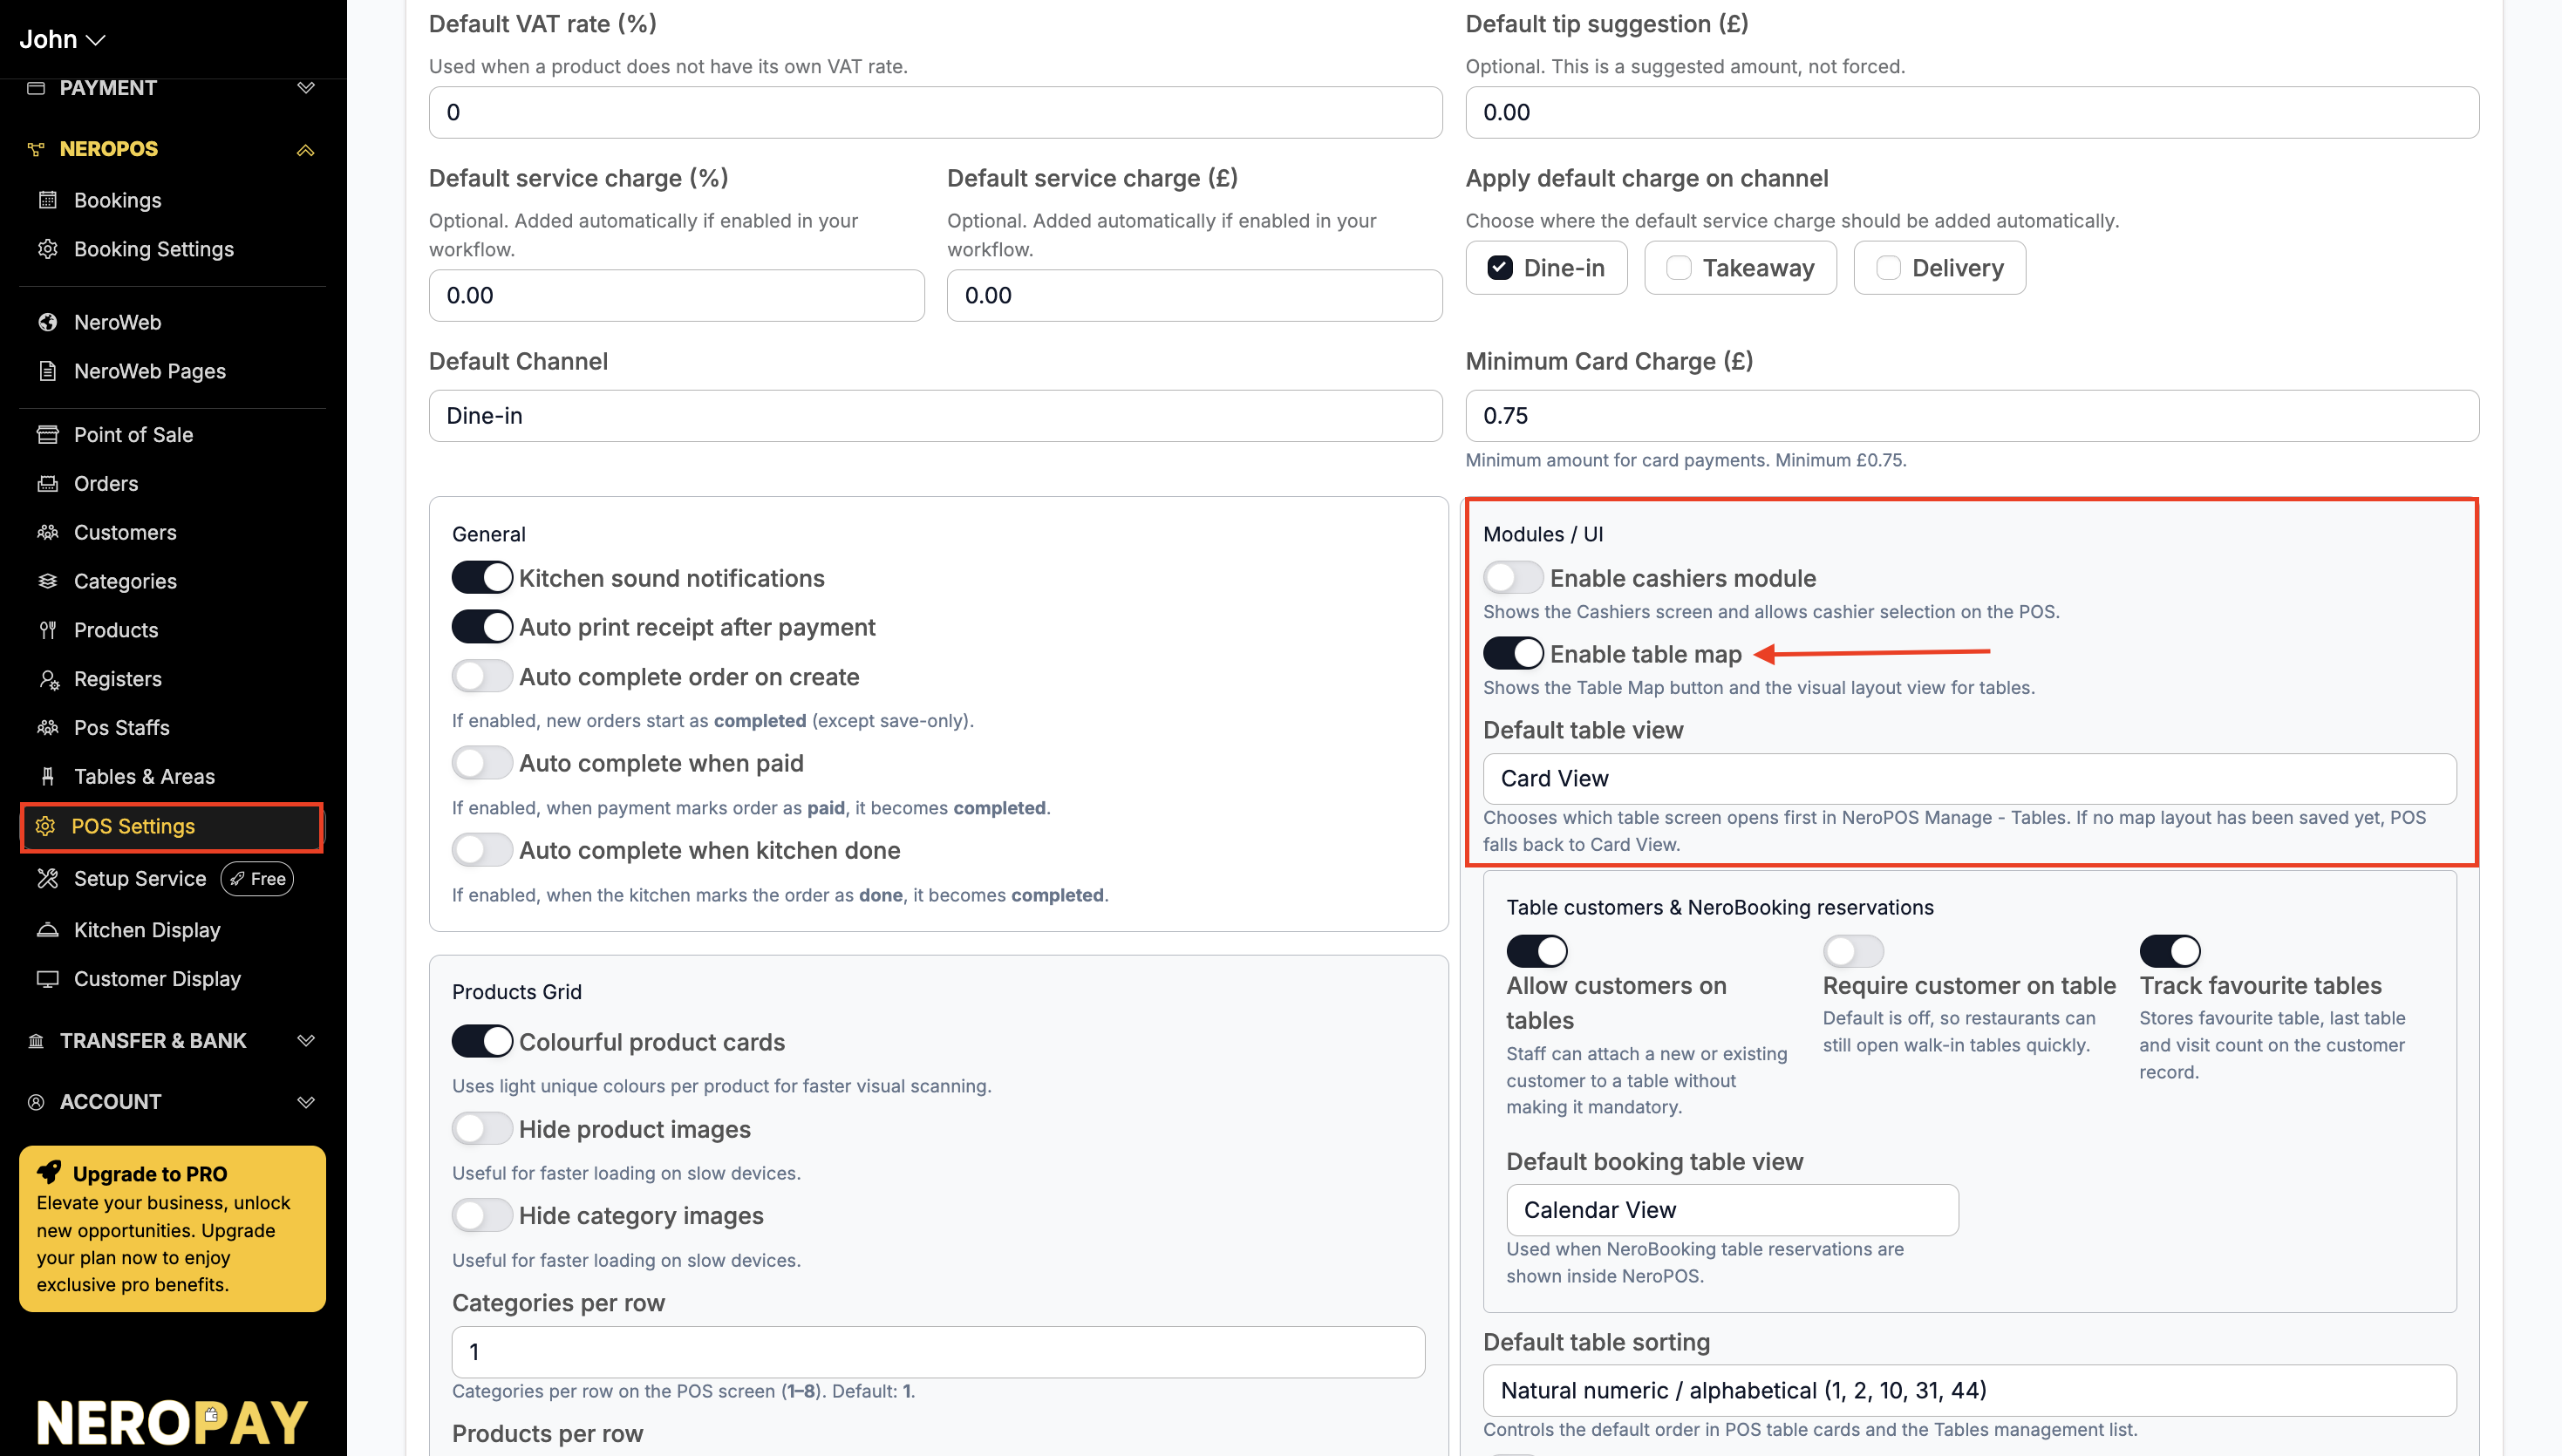
Step 1 — Go to POS Settings
From your dashboard, follow this path:
NeroPOS → POS Settings
Step 2 — Enable table customers
Scroll down to the section called Table customers & NeroBooking reservations.
Switch on Allow customers on tables.
⚠️ Note: Make sure this toggle is switched on before moving to the next step — the Tables and Areas section will not work correctly without it.
📸
Part 2 — Set up your areas and table map
Step 3 — Go to Tables and Areas
From your dashboard, follow this path:
NeroPOS → Tables and Areas
Step 4 — Add your areas
Before creating your table map, you need to set up your areas first. An area is a section of your venue — for example:
- First Floor
- Second Floor
- Garden
- Bar
Click + Add Area and enter the name of your first area. Repeat for each area in your venue.
📸
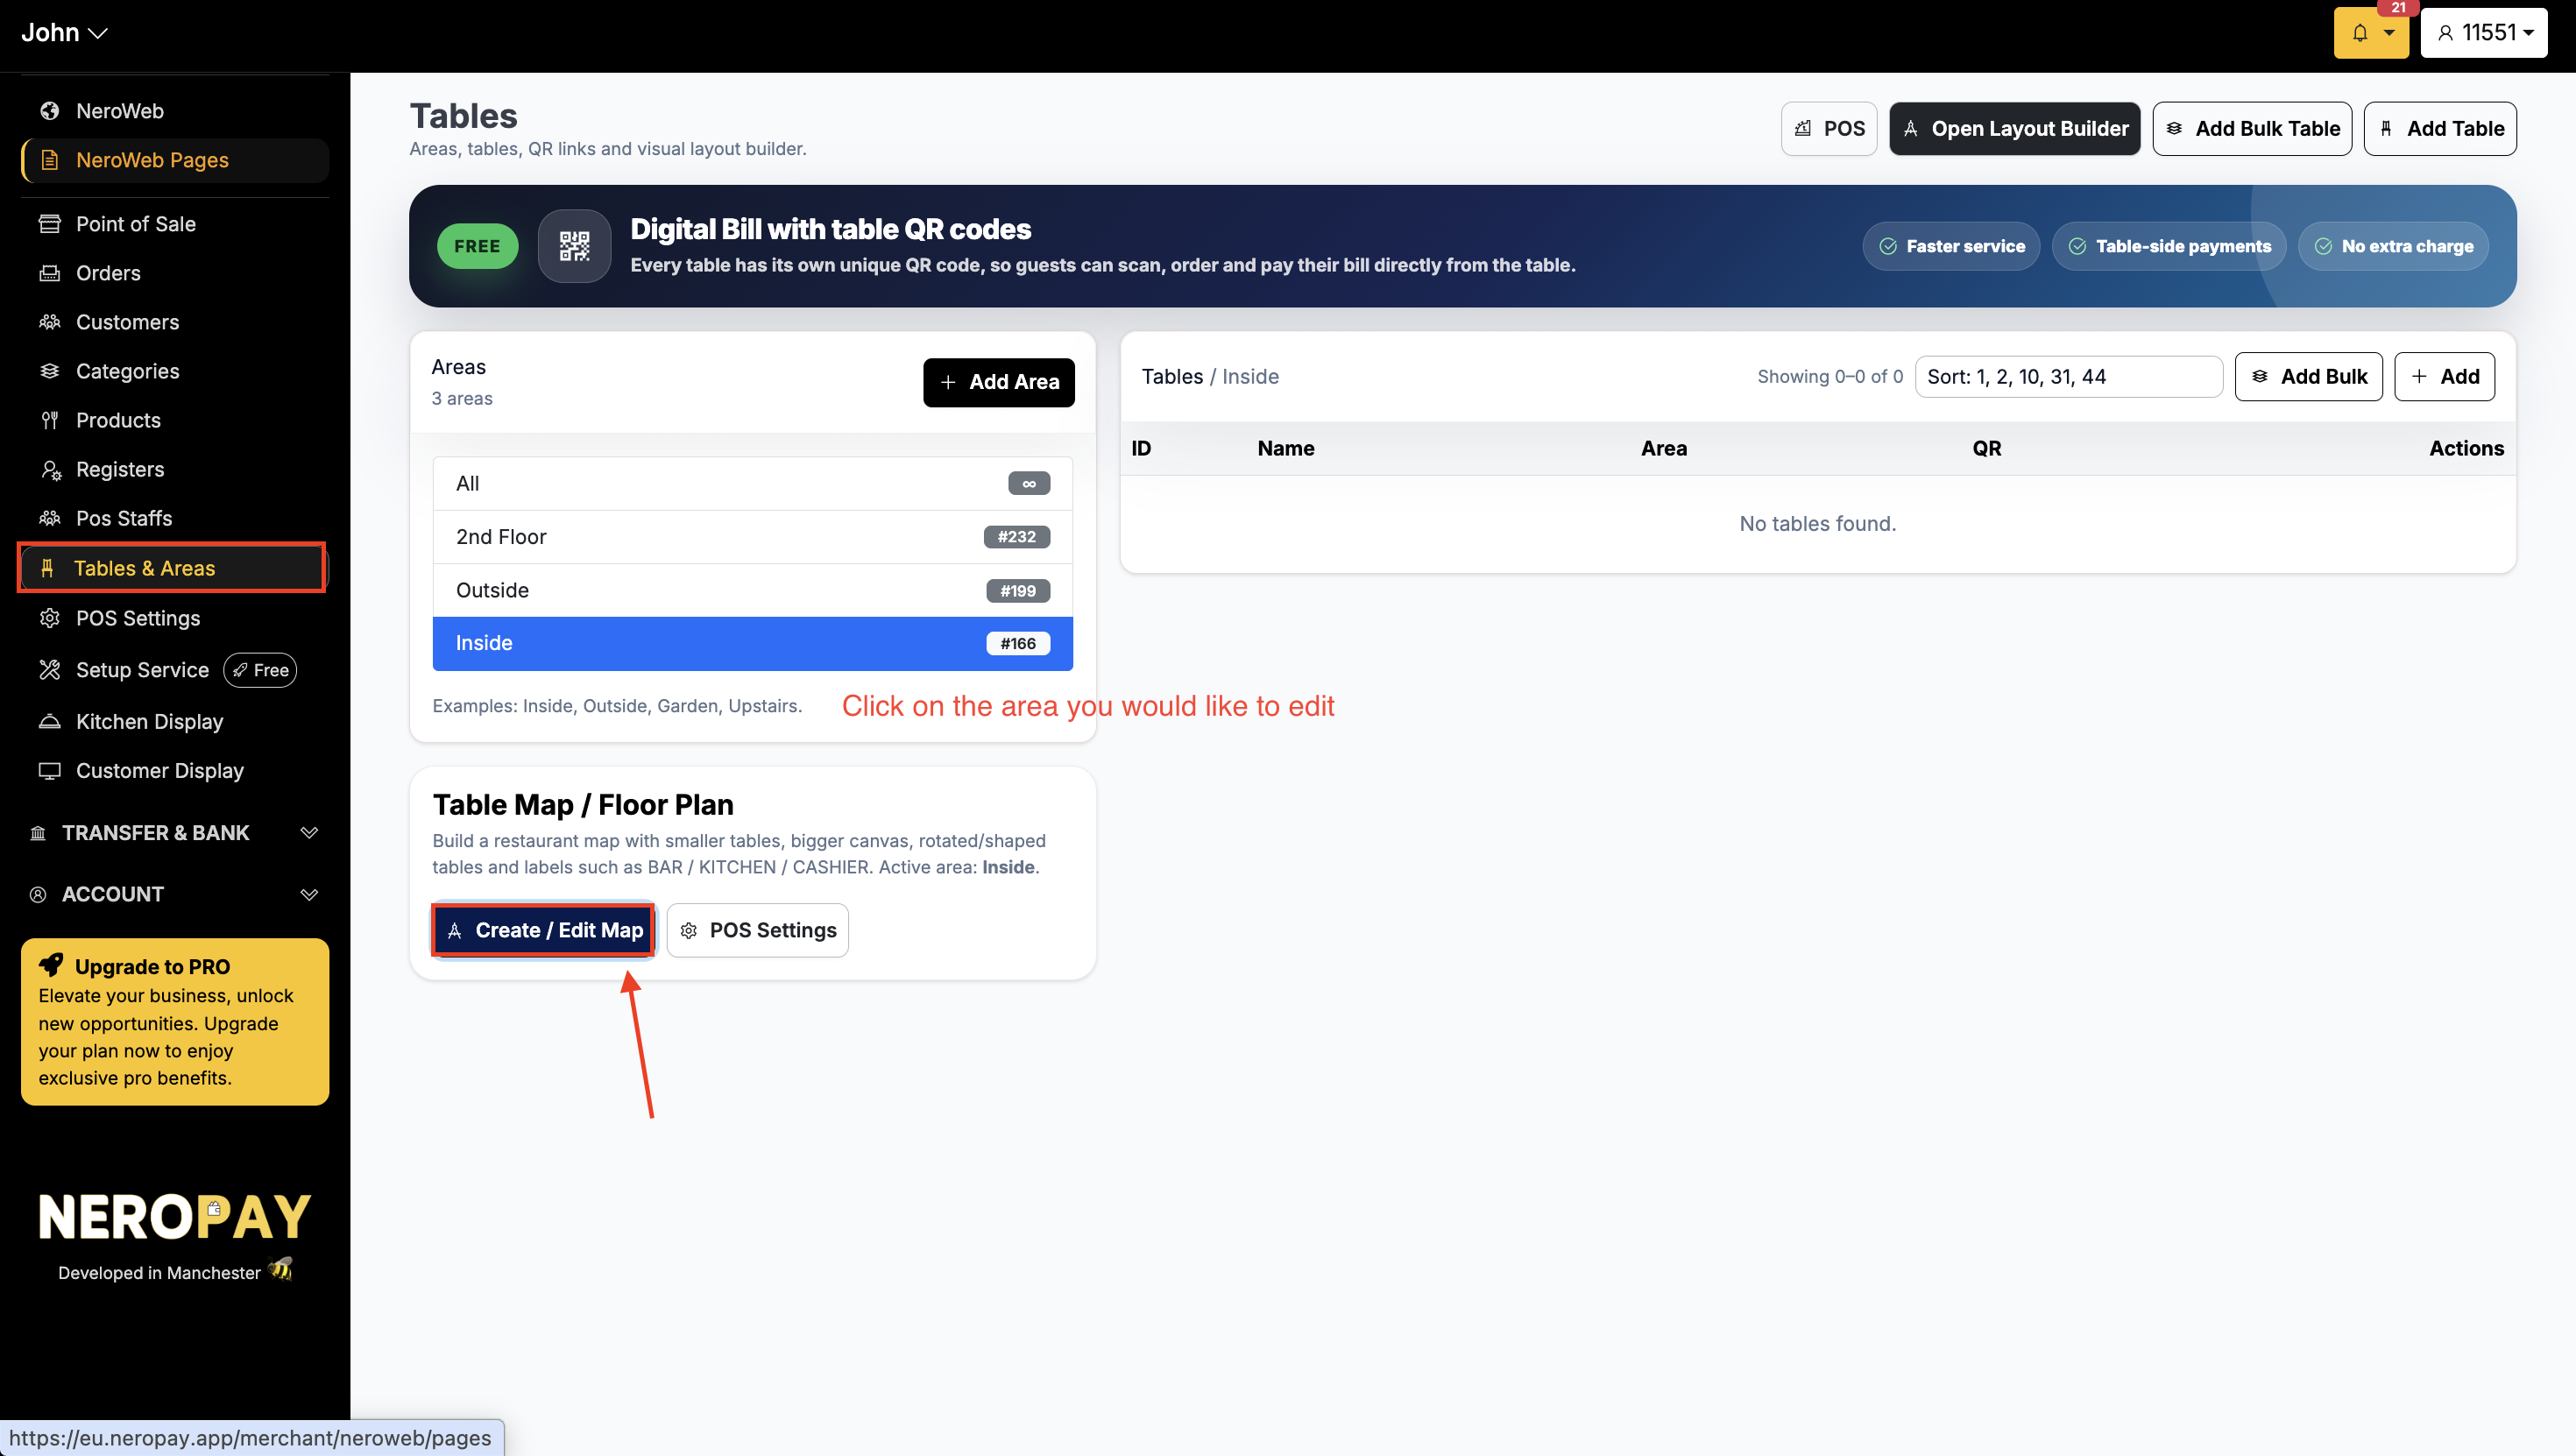
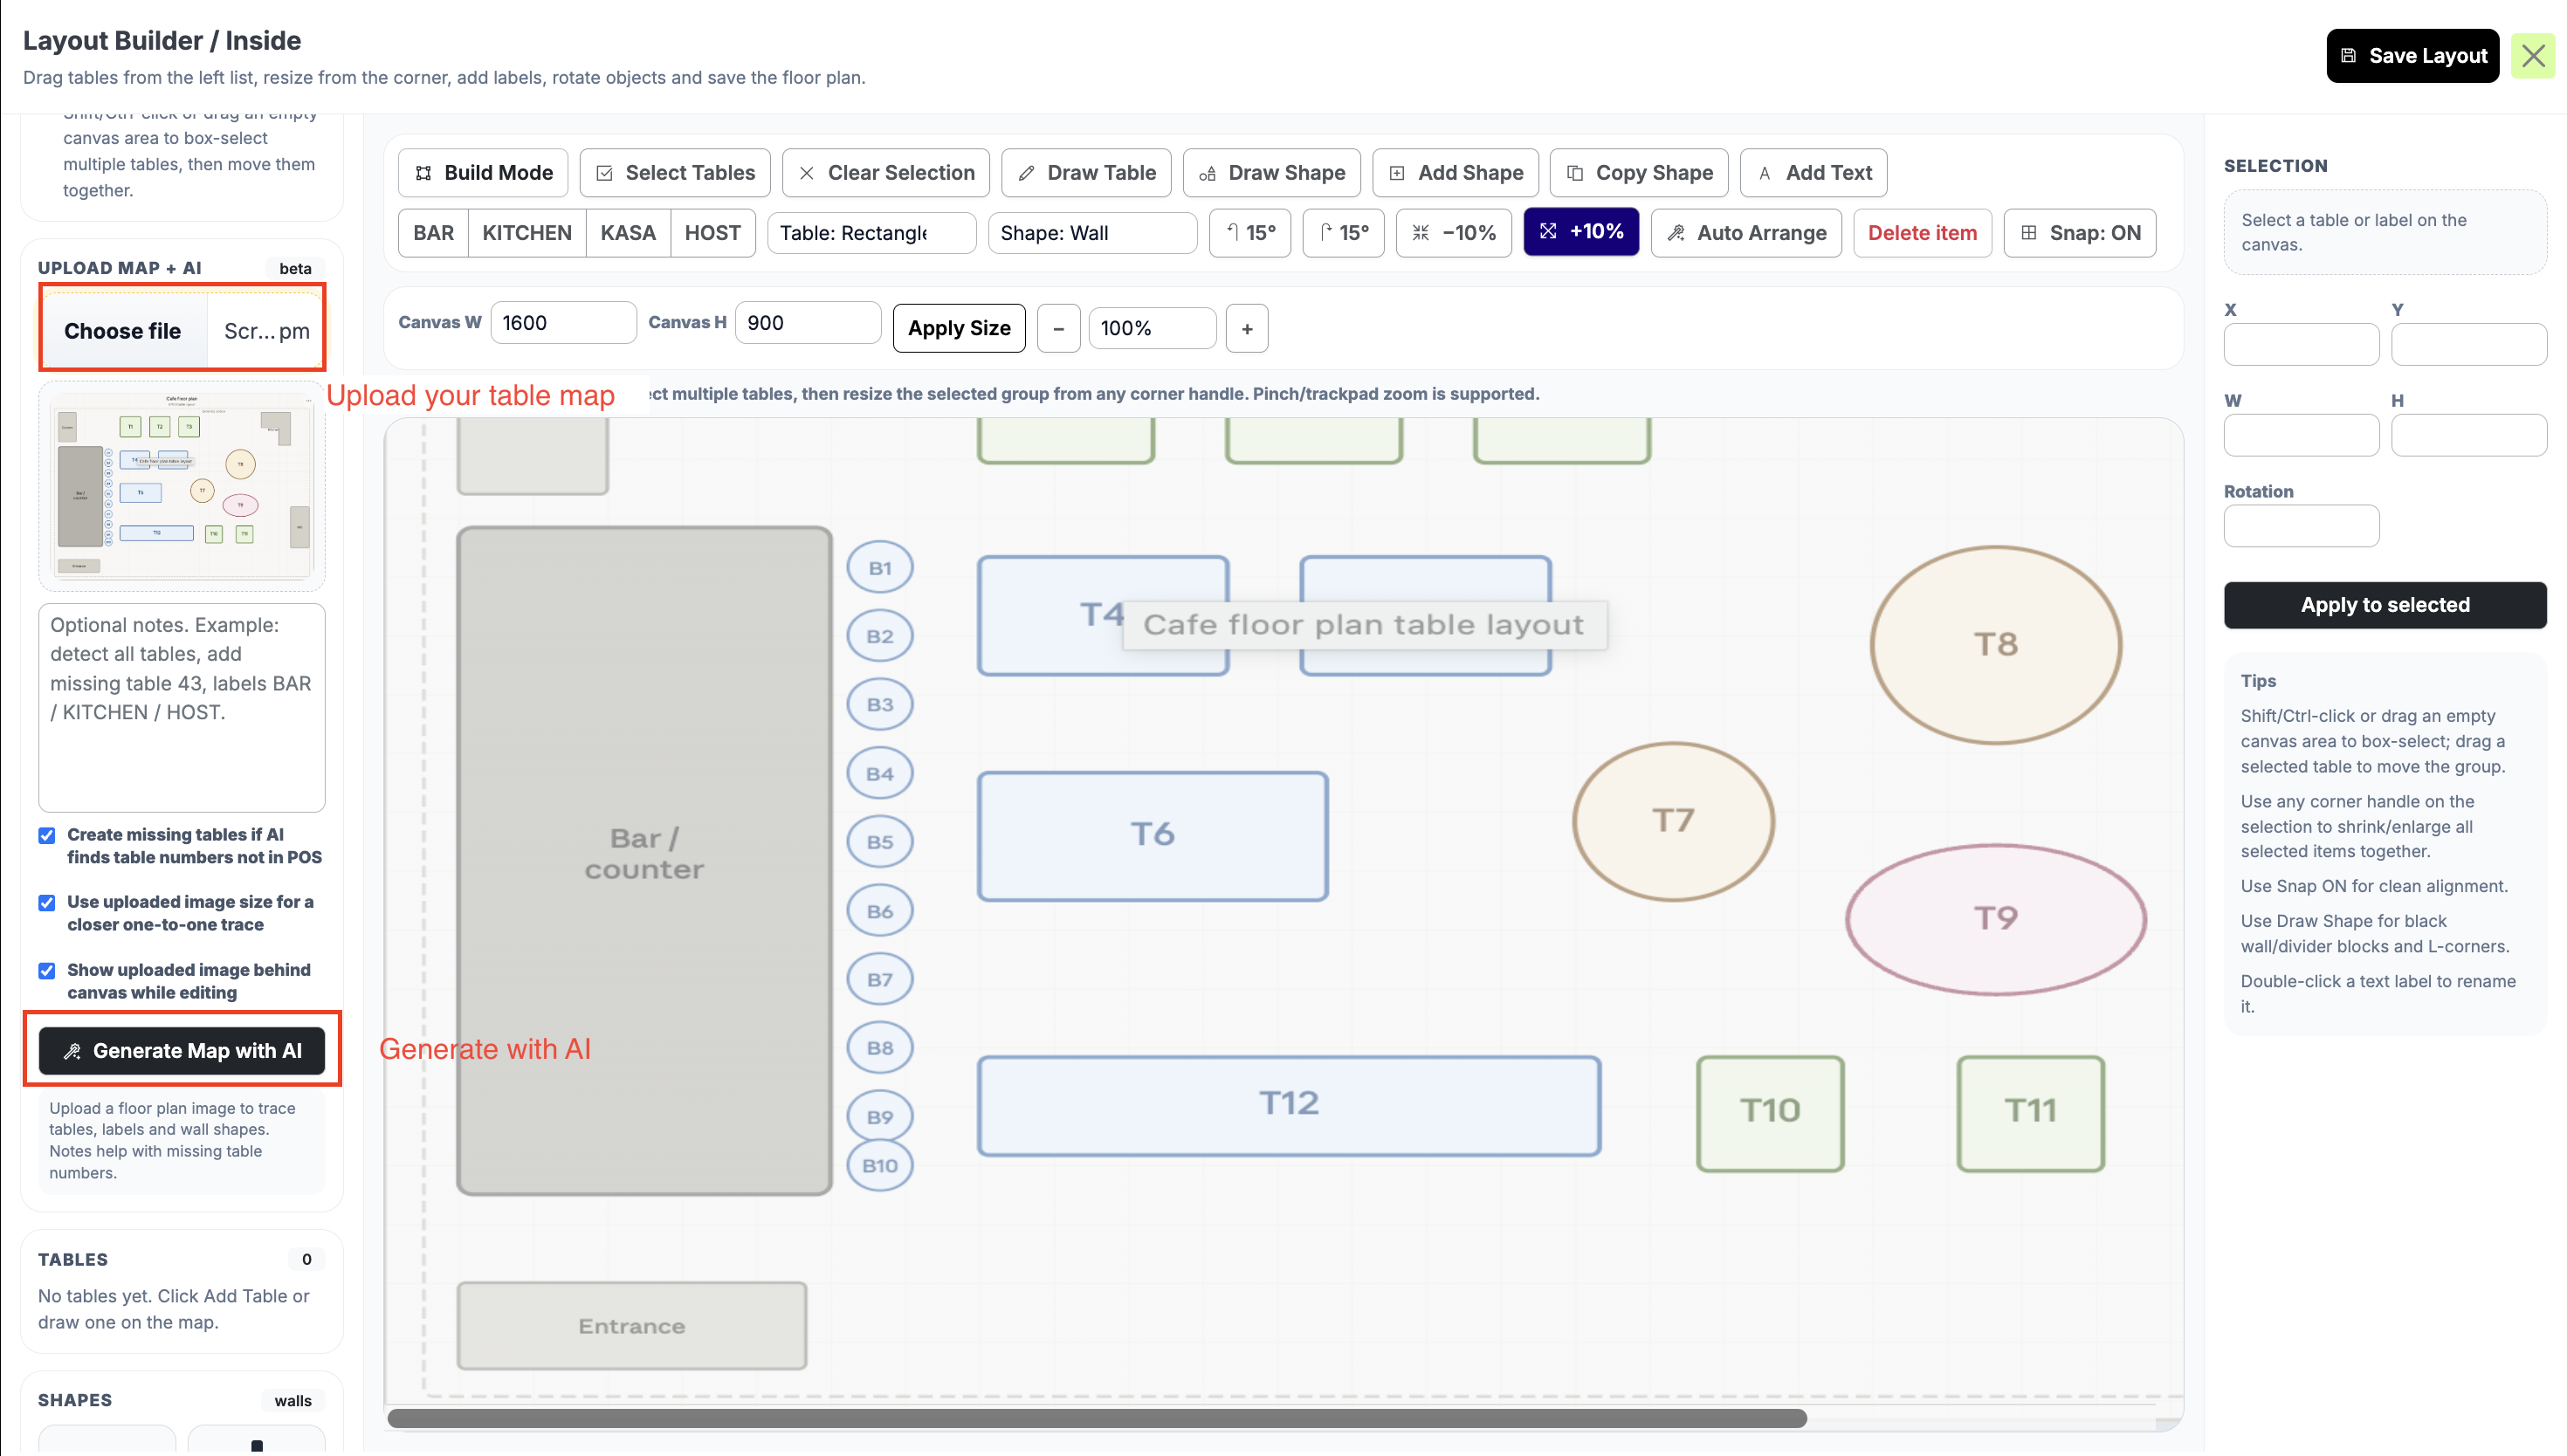
Step 5 — Build your table map
Once your areas are set up, click Create / Edit Map for the area you want to configure.
You have two options to build your table layout:
Option A — Build manually Add tables one by one and position them on the map to match your venue layout.
Option B — Upload a floor plan and let AI do it for you Click Choose file to upload an image of your floor plan. The AI will automatically generate your table map based on the layout.
💡 Tip: The AI option saves time if you already have a printed or digital floor plan. Just make sure the image is clear and easy to read for the best result.
📸
Frequently asked questions
Q: Do I need to set up areas before creating a table map? A: Yes. Areas must be created first — you then build a separate table map for each area.
Q: Can I have different table maps for different areas? A: Yes. Each area has its own map, so you can set up First Floor, Second Floor, and Garden as completely separate layouts.
Q: What file format should I use for the AI floor plan upload? A: Use a clear image file such as PNG or JPG. The clearer the floor plan, the more accurate the AI result will be.
Q: Can I edit the table map after it's been created? A: Yes. Go back to NeroPOS → Tables and Areas and click Create / Edit Map at any time to make changes.
Q: Will enabling table management affect my existing orders? A: No. Enabling the feature simply adds table management to your EPOS — it does not affect any orders already in progress.
Still need help? Contact us at support@neropay.app or create a ticket