How to get there
From your dashboard, follow this path:
Payment → Contracts
📸 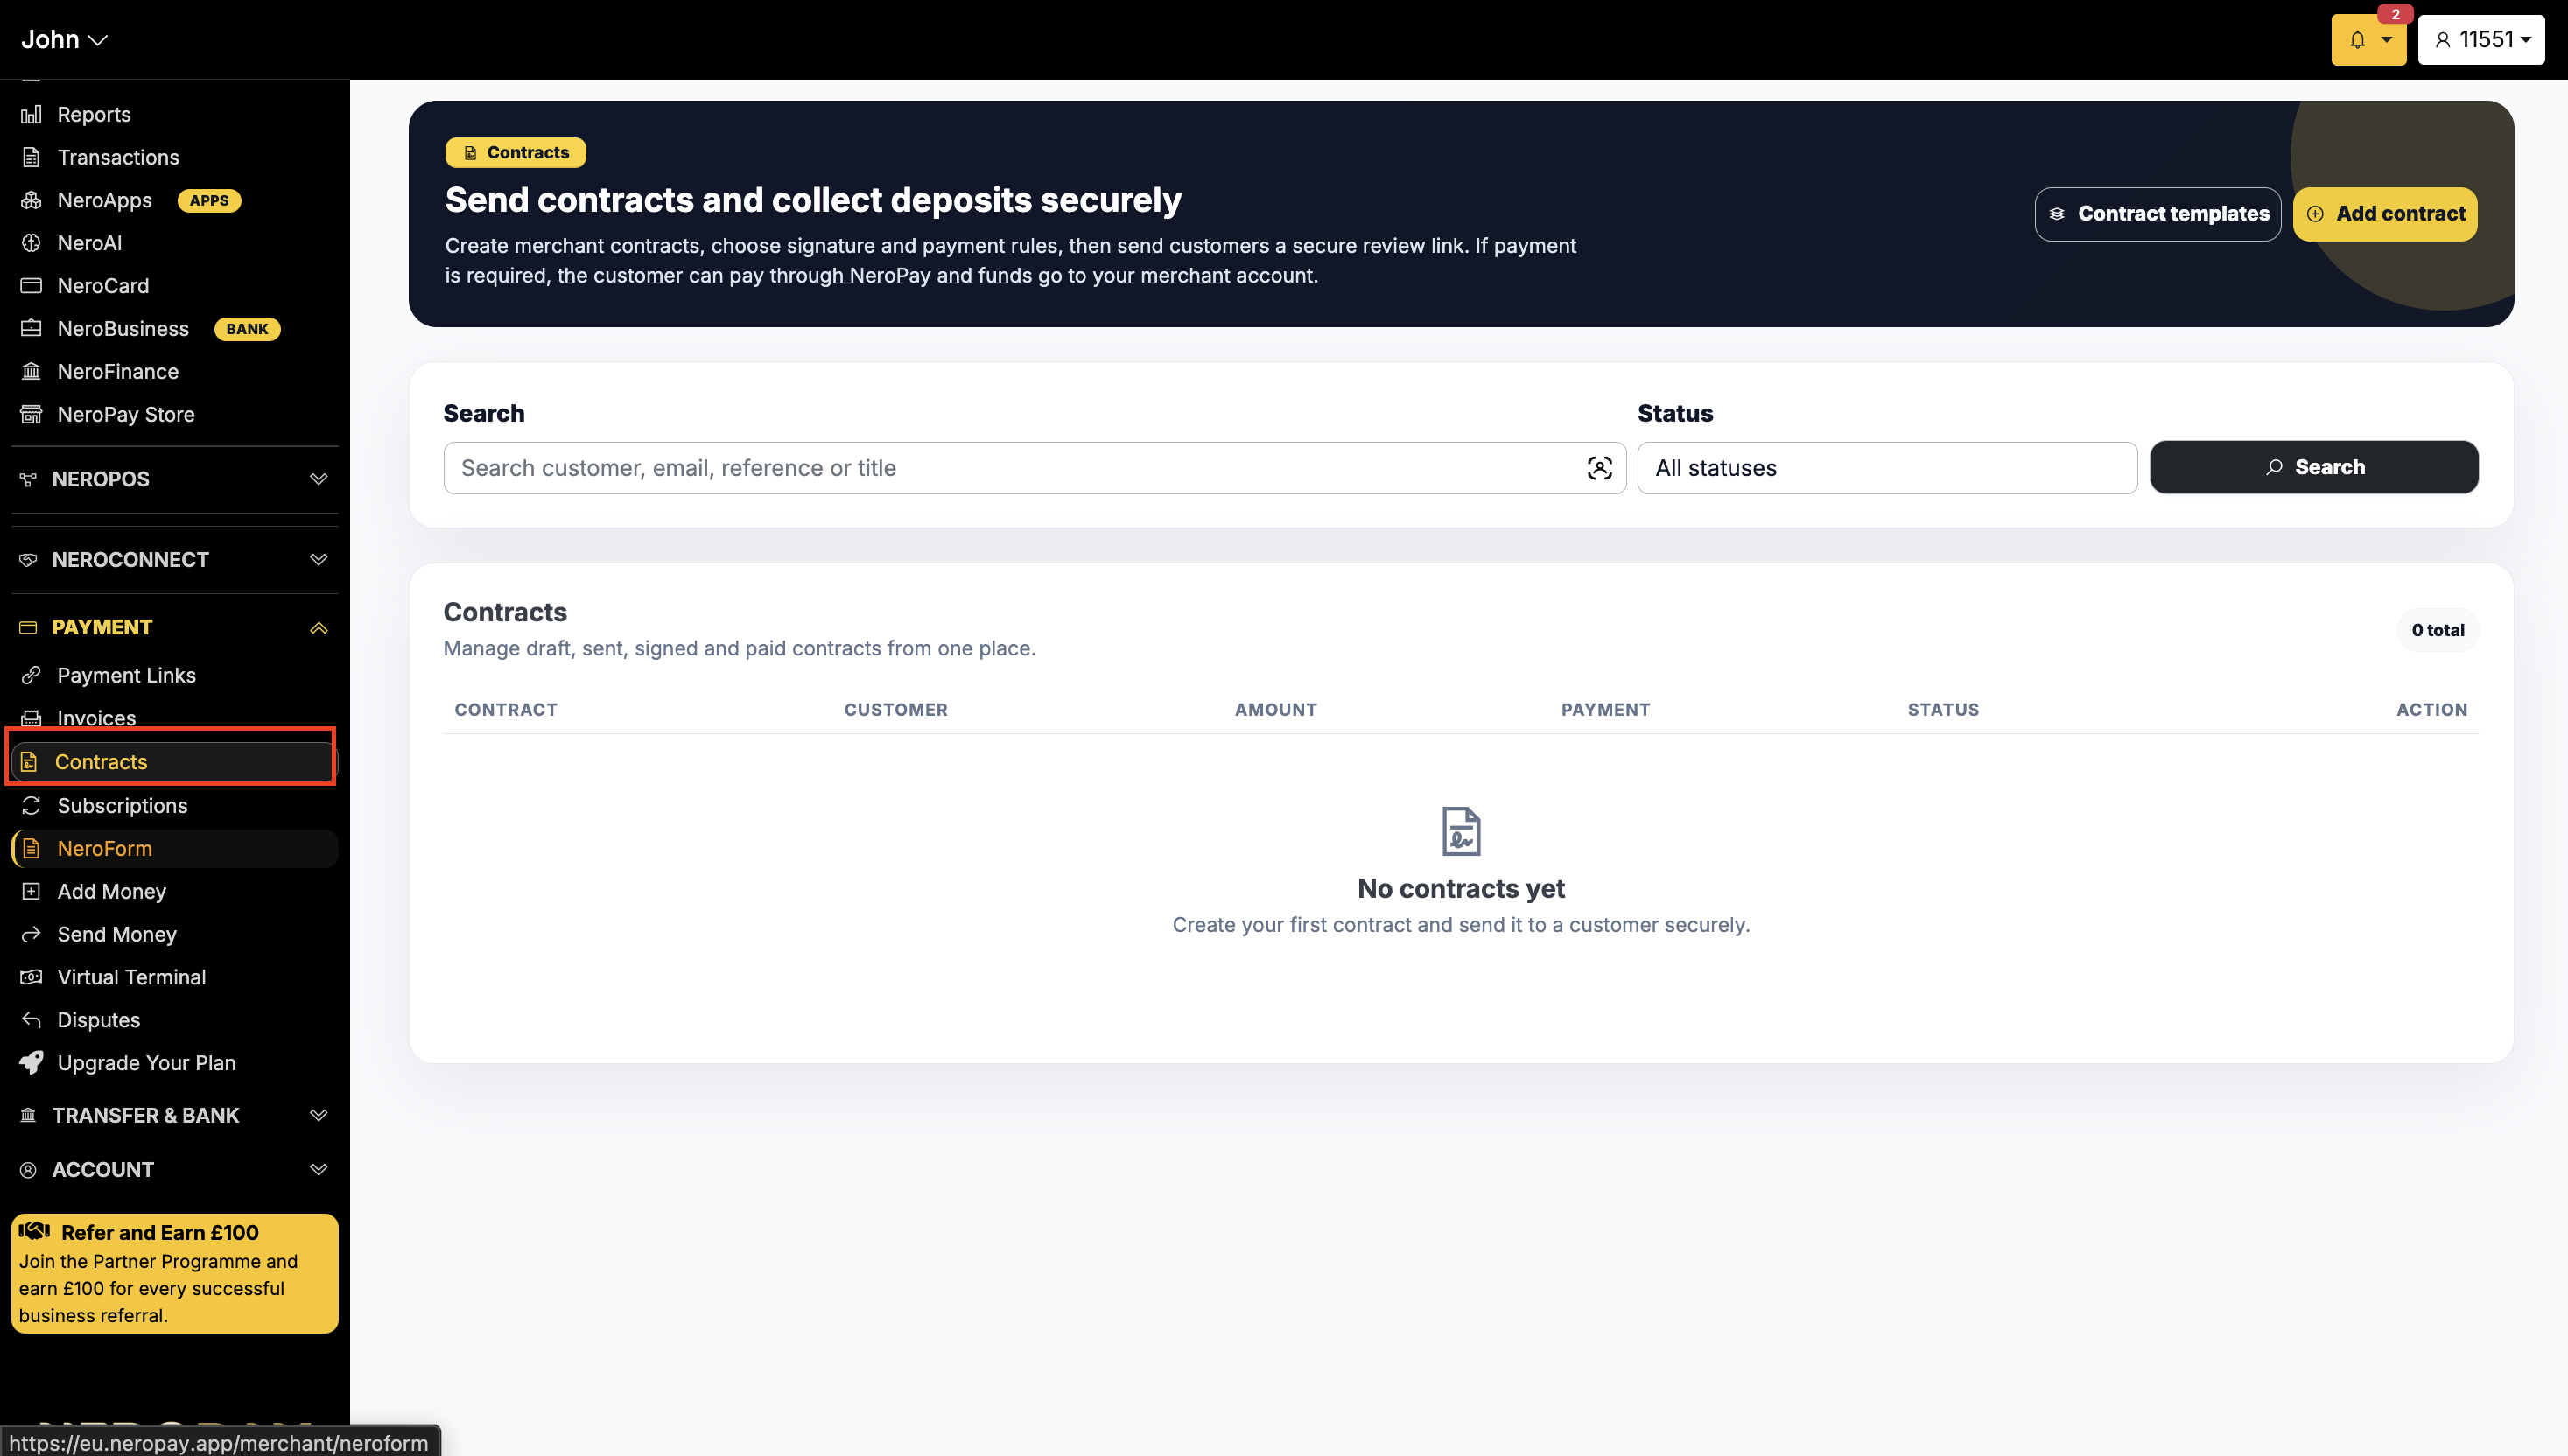
The Contracts page
The contracts table shows all your draft, sent, signed, and paid contracts in one place. Each row displays:
| Column | What it shows |
|---|---|
| Contract | The contract title and reference |
| Customer | The customer name the contract was sent to |
| Amount | The contract value |
| Payment | The payment status |
| Status | The current contract status — e.g. Draft, Sent, Signed, Paid |
| Action | Options to view, edit, or manage the contract |
You can search for any contract by customer name, email, reference, or title, and filter by status using the dropdown.
Contract templates
Before creating a contract, you can set up reusable templates to save time. Click Contract templates in the top right corner to create and manage your templates.
Once a template is saved, you can apply it when creating a new contract — all fields will be pre-filled and can be adjusted as needed.
How to create a contract
Click + Add contract in the top right corner. The Add contract panel will open on the right side of the screen.
📸 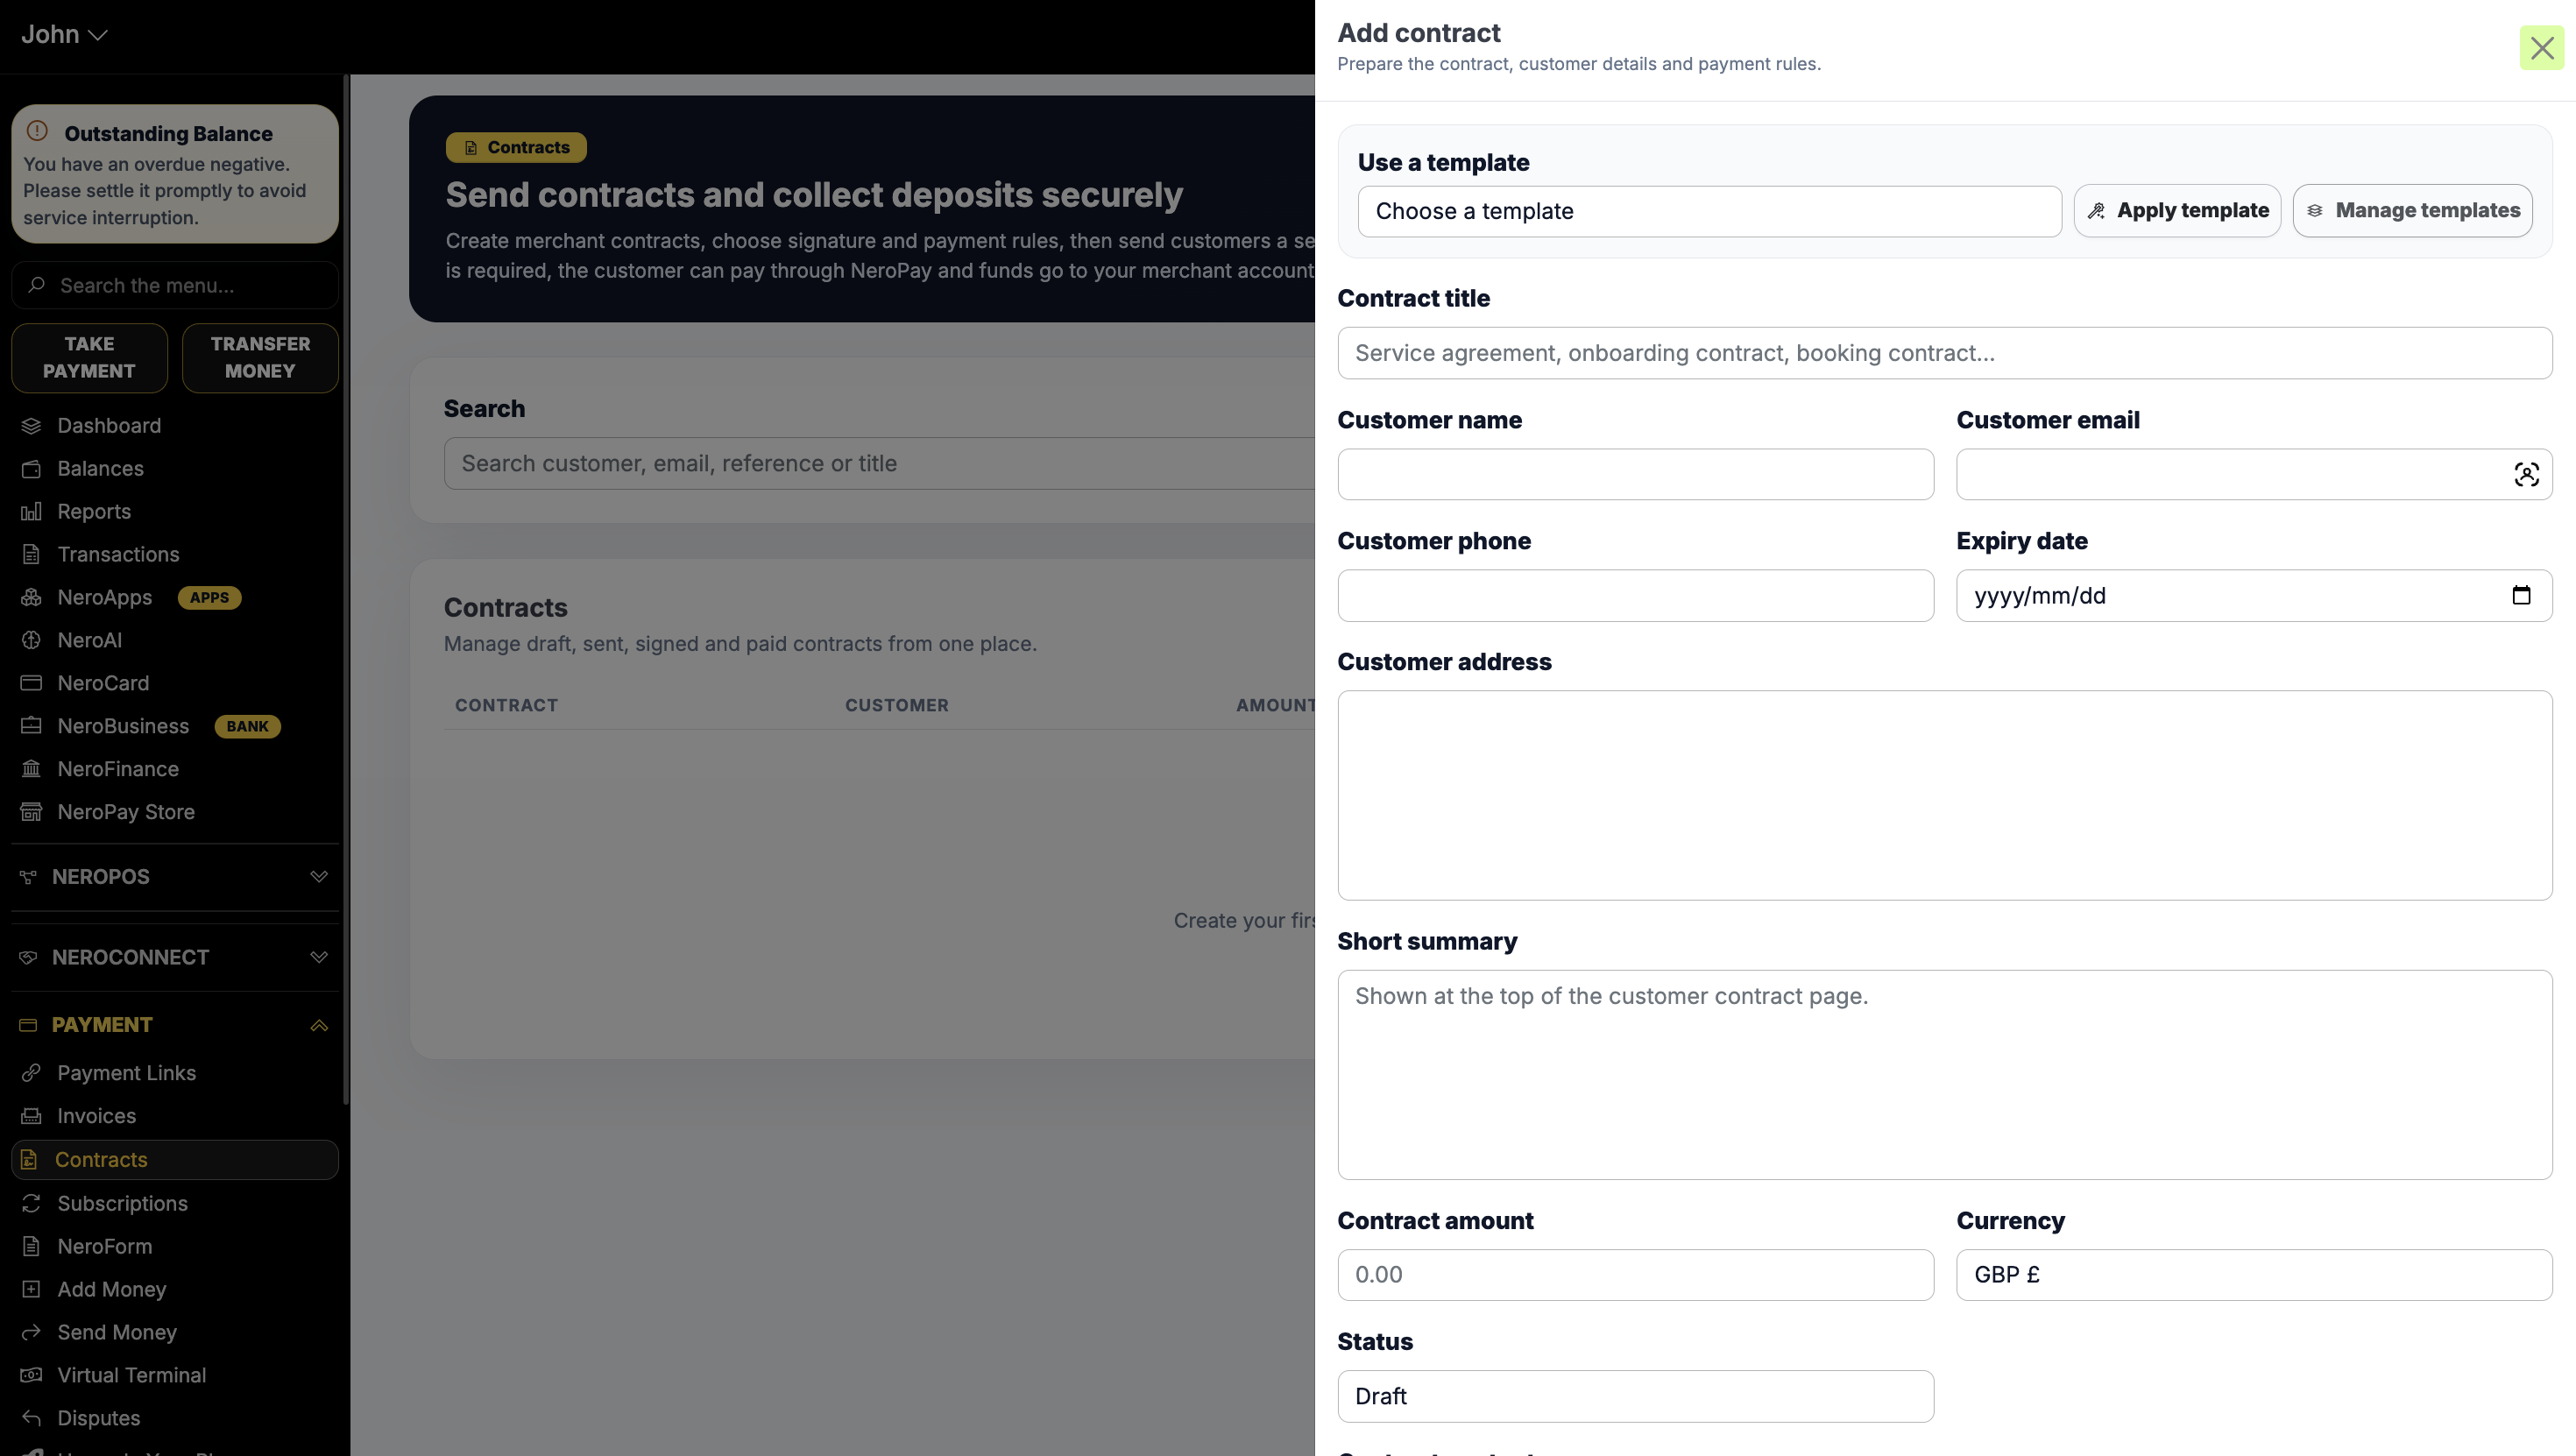
Fill in the following fields:
Template (optional)
Field
What to enter
Use a template
Select a saved template from the dropdown — click Apply template to populate the fields, or Manage templates to edit your existing templatesContract details
| Field | What to enter |
|---|---|
| Contract title | A clear title for the contract — e.g. Service Agreement, Booking Contract, Onboarding Contract |
| Short summary | A brief description shown at the top of the customer-facing contract page |
| Contract amount | The total value of the contract |
| Currency | The currency — GBP £ is selected by default |
| Status | The initial status of the contract — Draft by default |
| Expiry date | The date the contract link expires |
Customer details
| Field | What to enter |
|---|---|
| Customer name | The full name of the customer |
| Customer email | The customer's email address — used to send the secure review link |
| Customer phone | The customer's phone number |
| Customer address | The customer's full address |
Once all fields are complete, continue scrolling to set your signature and payment rules, then send the contract to your customer.
What the customer receives
Once sent, the customer receives a secure link to review the contract. From the customer-facing page they can:
- Read the contract summary and full terms
- Sign the contract electronically
- Pay the required amount through NeroPay if a deposit or payment is required
Funds from any payment collected through the contract go directly to your NeroPay merchant account.
Contract statuses
| Status | What it means |
|---|---|
| Draft | The contract has been created but not yet sent |
| Sent | The contract has been sent to the customer and is awaiting action |
| Signed | The customer has signed the contract |
| Paid | The customer has signed and completed payment |
Frequently asked questions
Q: Can I require payment as part of the contract?
A: Yes. When setting up the contract, you can include a payment requirement. The customer can pay through NeroPay directly from their secure contract link, and the funds are sent to your merchant account.
Q: Can I create reusable contract templates?
A: Yes. Click Contract templates from the Contracts page to create and manage templates. When adding a new contract, select a template and click Apply template to pre-fill the fields.
Q: What happens if the contract link expires before the customer signs?
A: The link becomes inactive on the expiry date. You can create a new contract or contact support if you need to extend a contract.
Q: Can I edit a contract after it has been sent?
A: Use the Action column in the contracts table to manage sent contracts. If you need to make significant changes, it is recommended to create a new contract and resend it.
Q: Where do the funds go when a customer pays through a contract?
A: Funds are processed through NeroPay and go directly to your merchant account, the same as any other NeroPay payment.
Still need help? Contact us at support@neropay.app or create a ticket from your dashboard.