What NeroBooking does for your business
- Reduces no-shows — customers receive confirmations and reminders automatically
- Improves scheduling — manage all reservations from a single calendar view
- Smoother front-of-house — your team always knows what's coming and when
- Builds customer trust — a professional booking experience keeps customers coming back
How to get there
From your dashboard, follow this path:
NeroPOS → Bookings
You will also see Bookings and Booking Settings — this is where you manage all your configuration.
📸

Merchant overview — what you'll see
Step 1 — Log in to your NeroPay account
Go to eu.neropay.app and log in. From the main dashboard, click NeroPOS to expand the menu, then select Bookings.
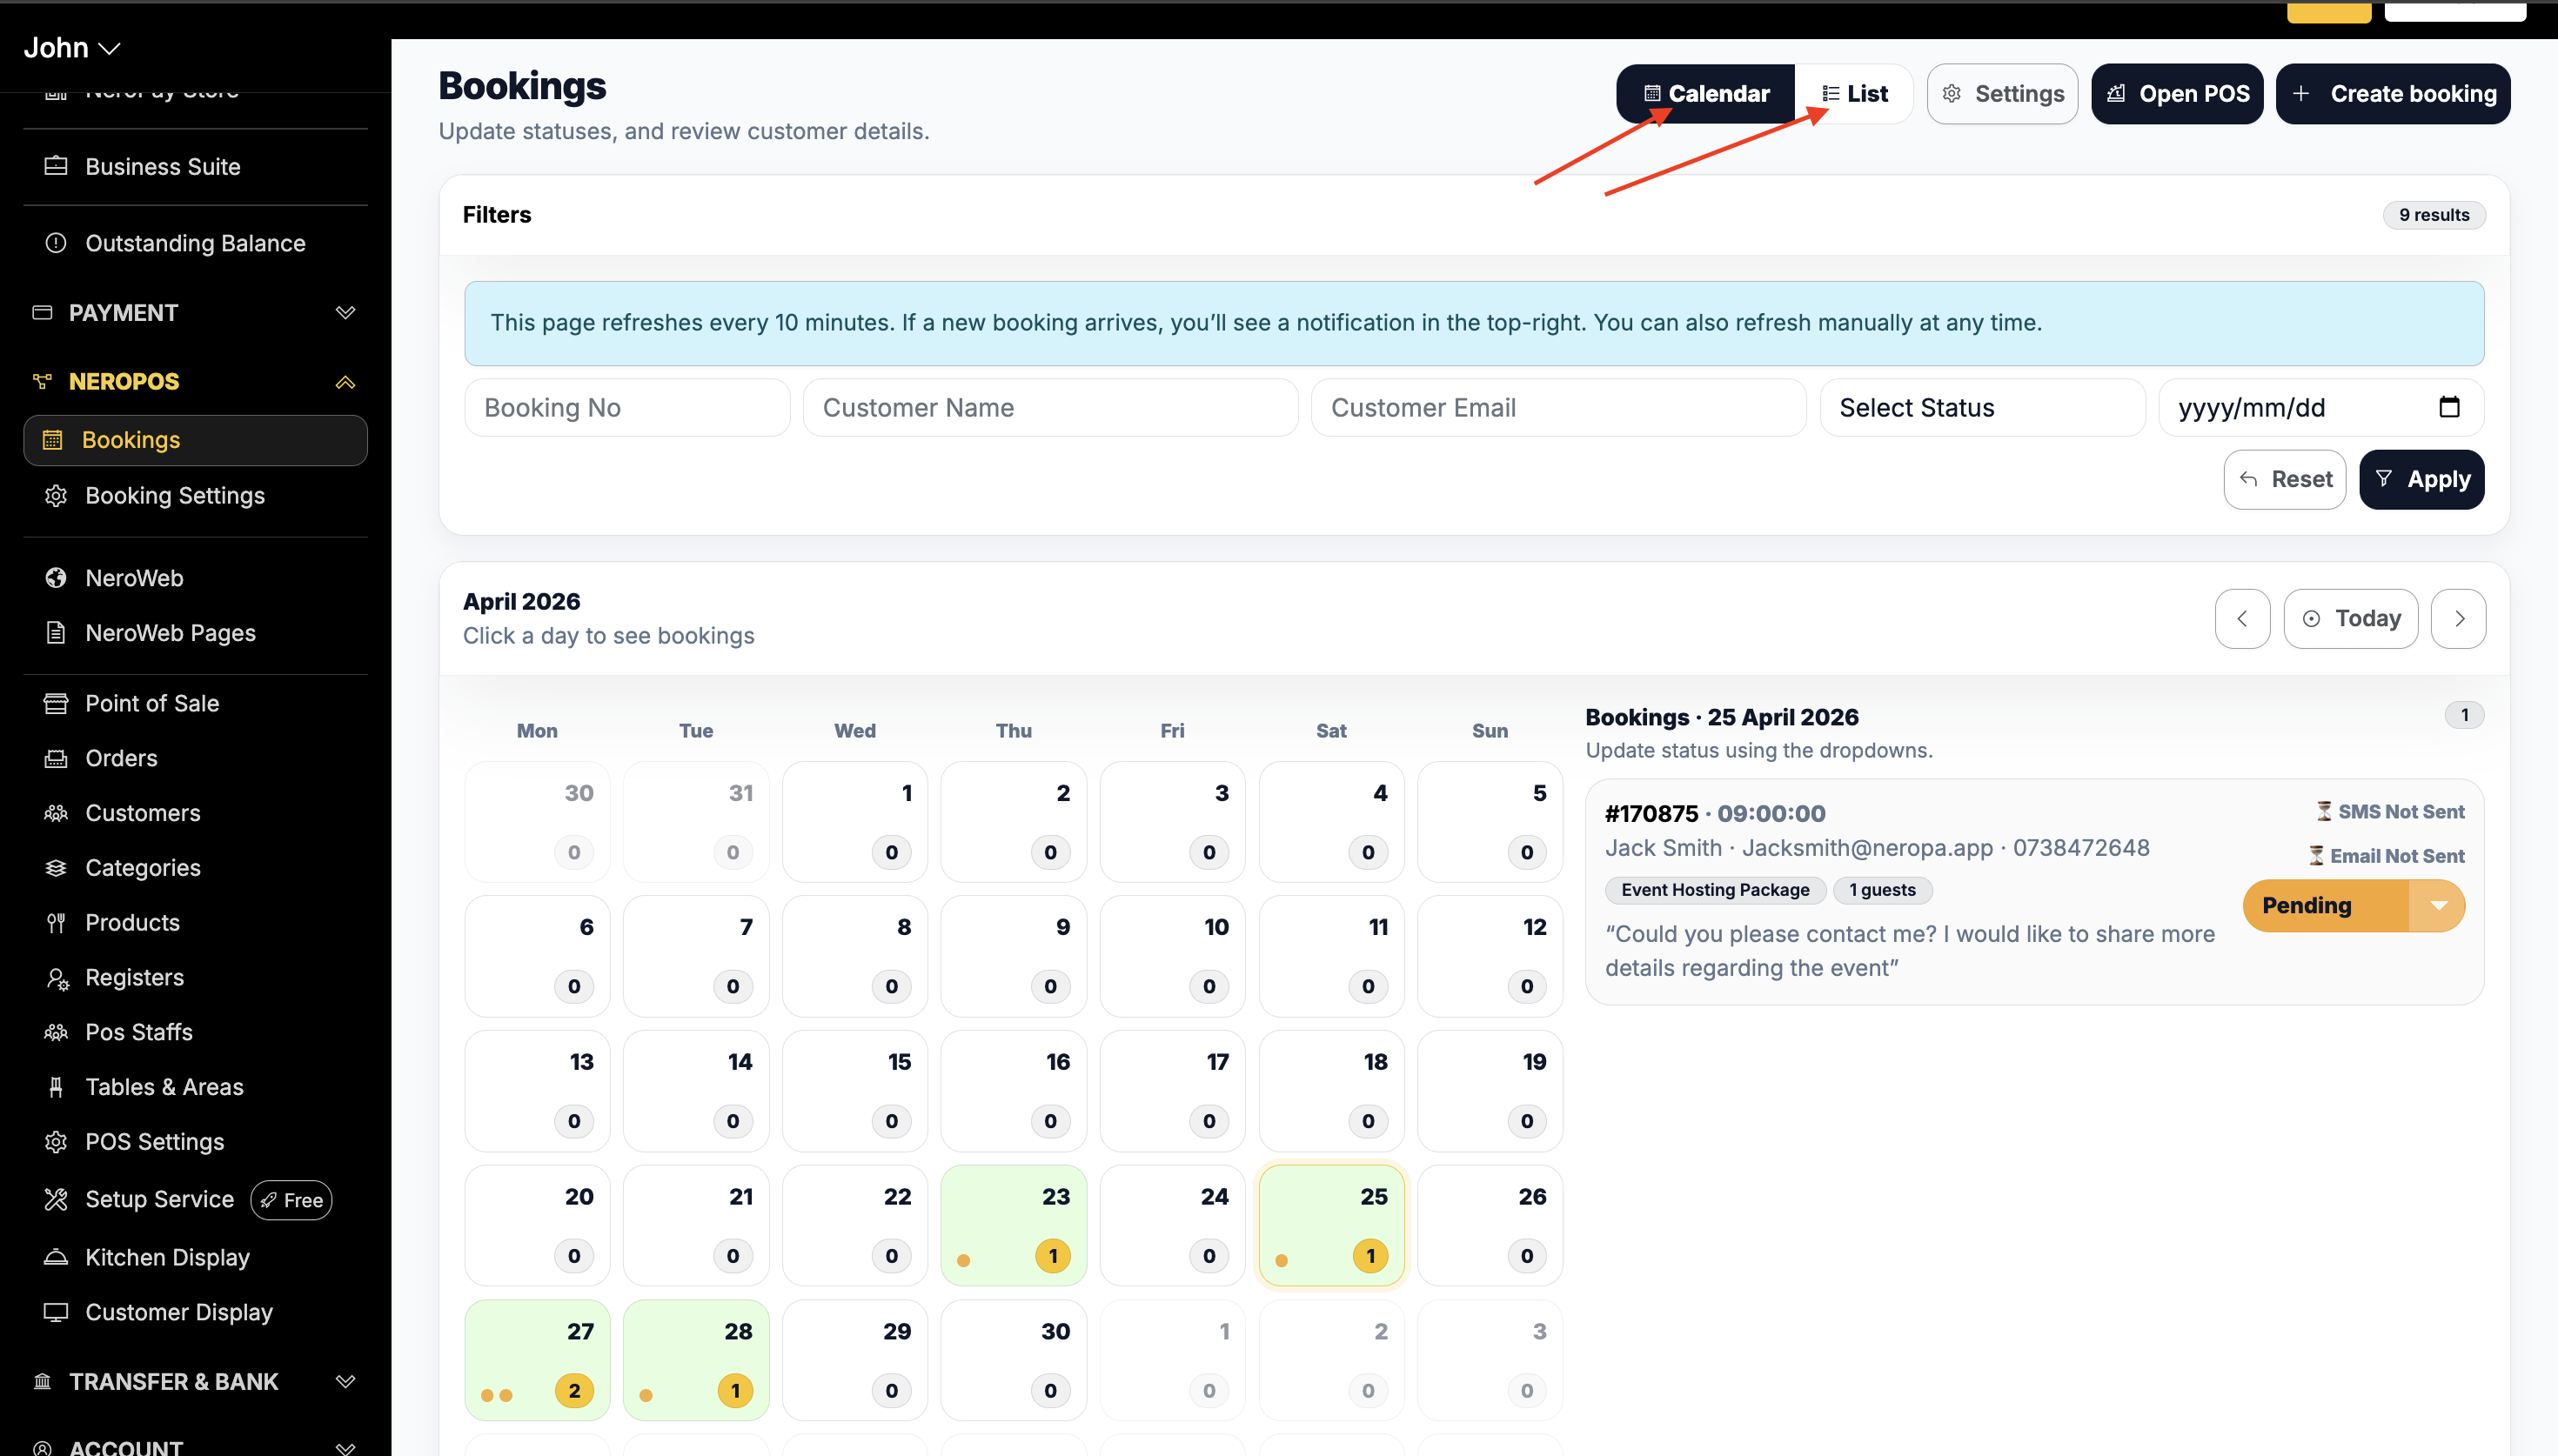
Step 2 — Your bookings view
You'll see two views to manage your reservations:
- Calendar view — a visual day-by-day overview of all upcoming bookings
- List view — a chronological list of all reservations, easier to scan at a glance
📸
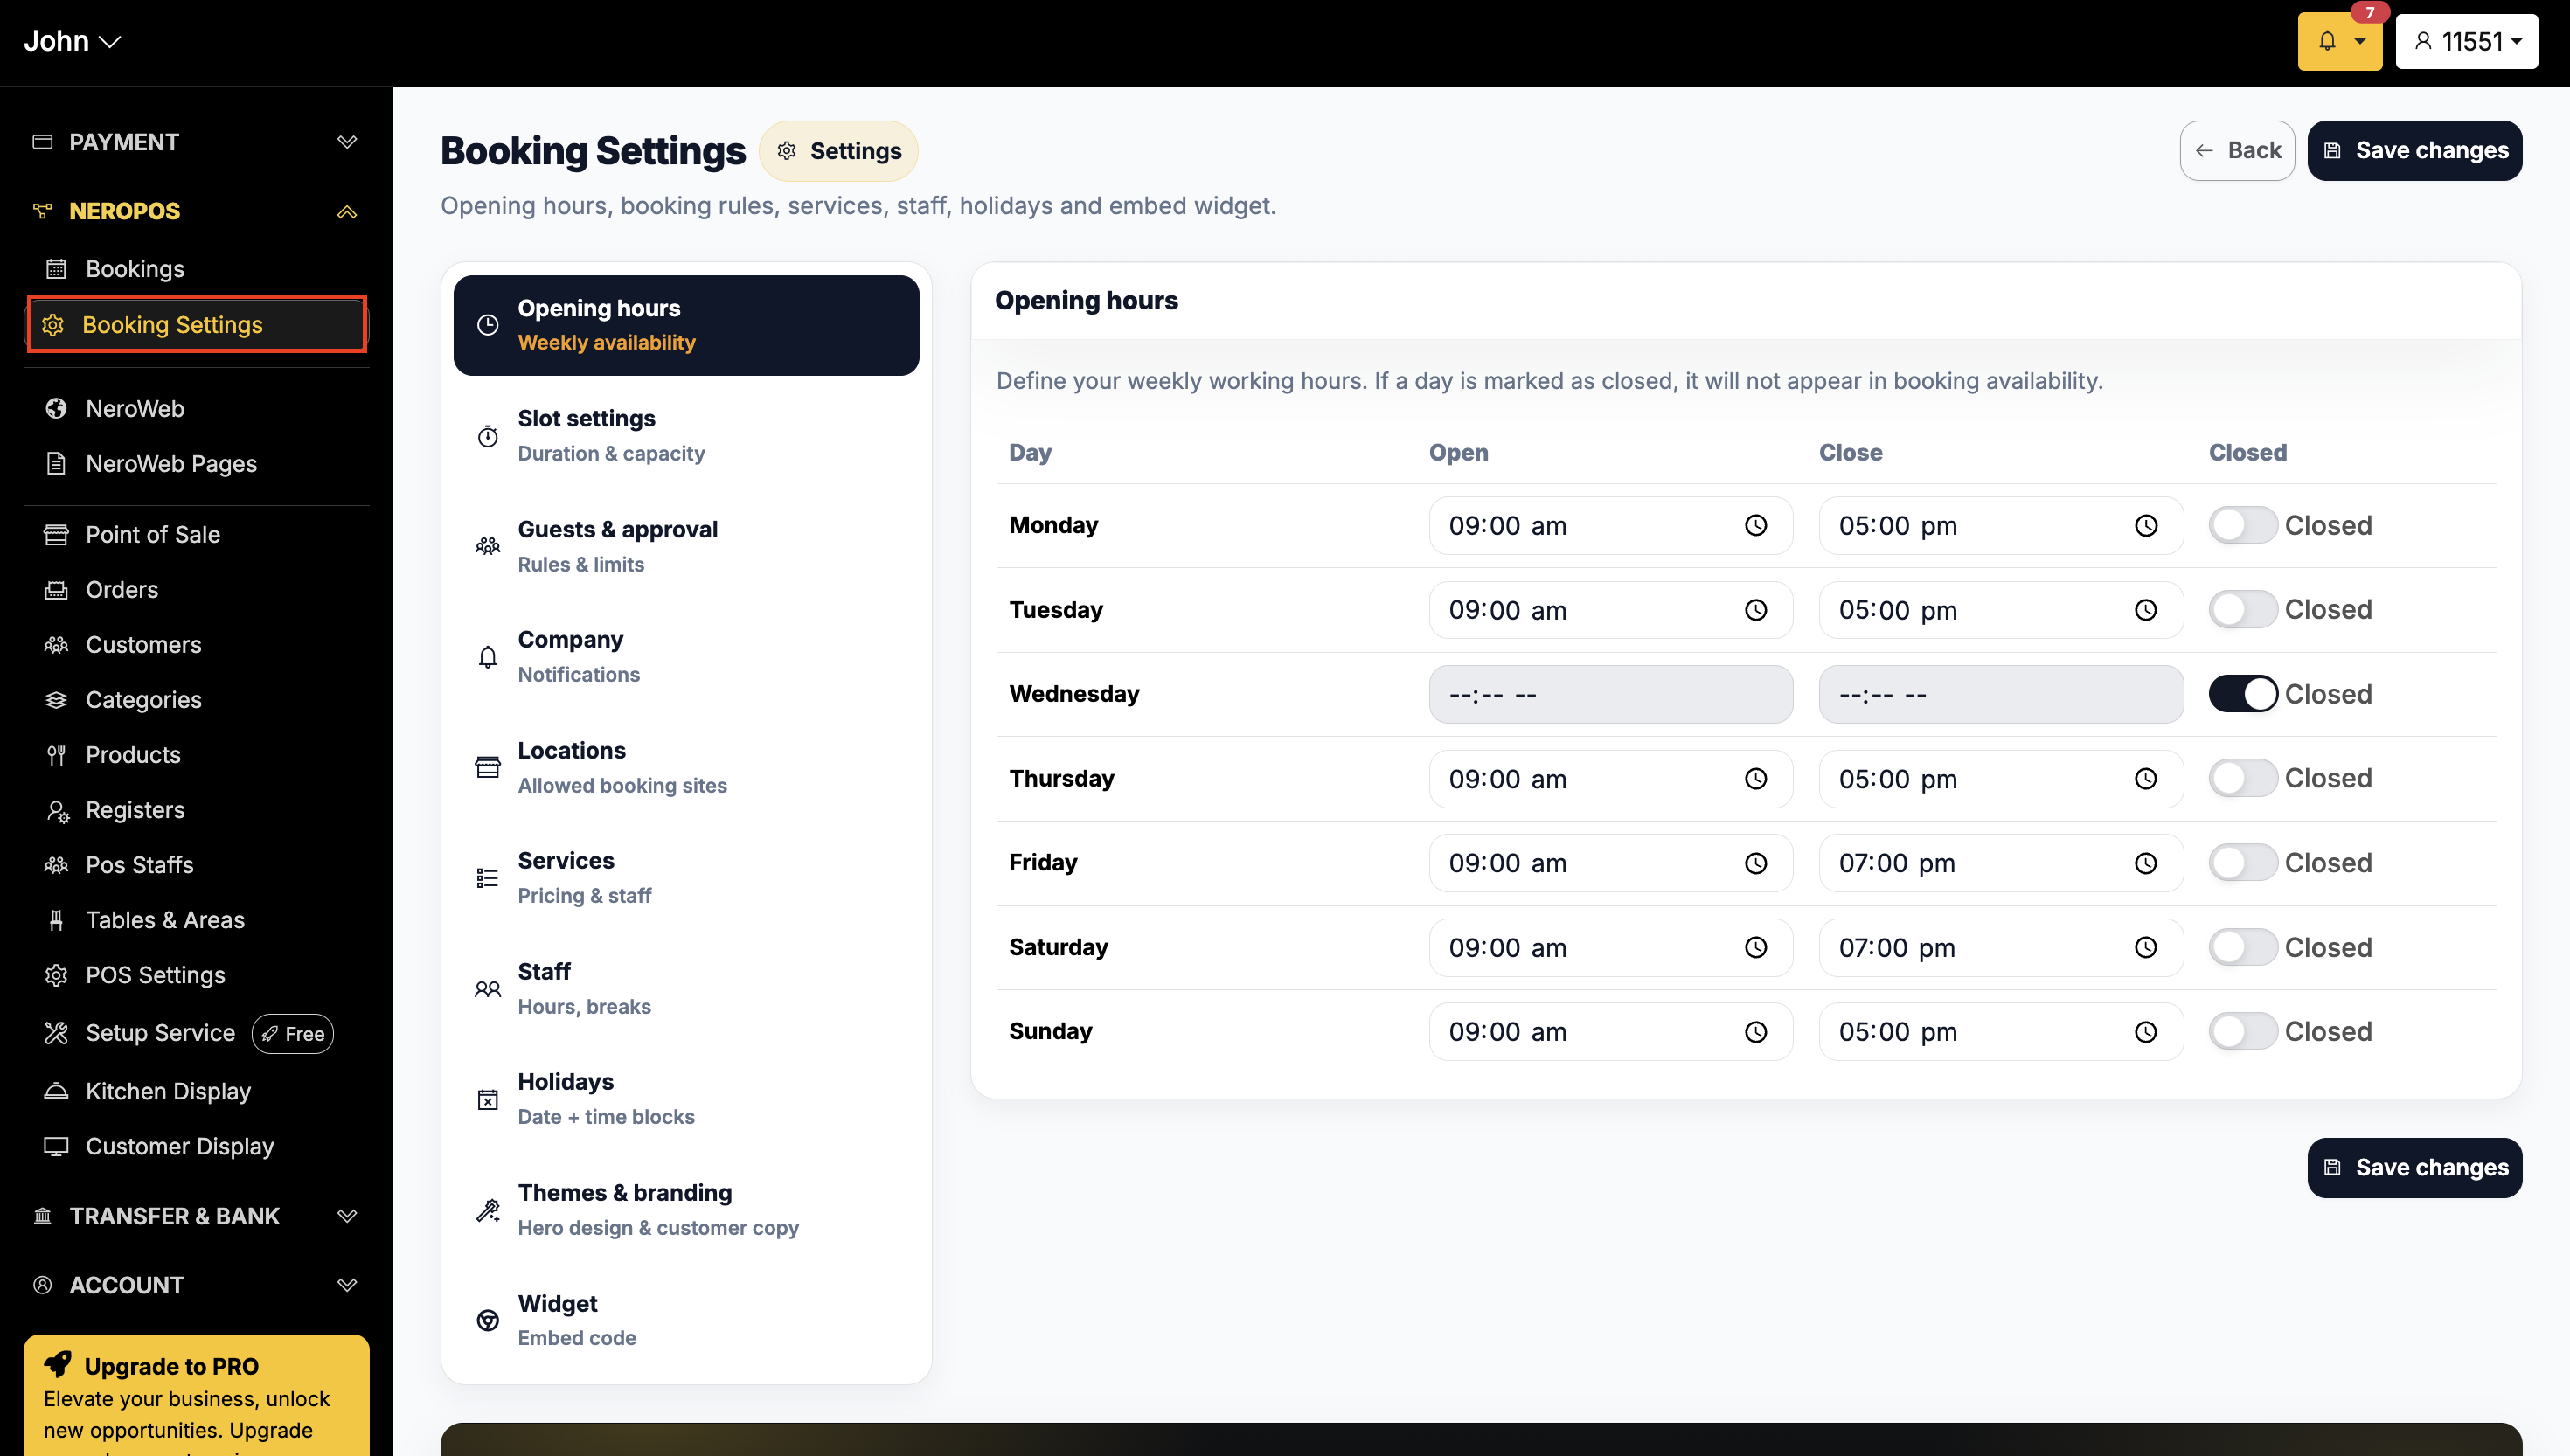
Step 3 — Booking Settings
From Booking Settings, you can manage everything about how your booking system works, including:
- Opening hours
- Slot Settings
- Guests & approval
- Company
- Locations
- Services
- Staff
- Holiday
- Theme & branding
- Widget
📸
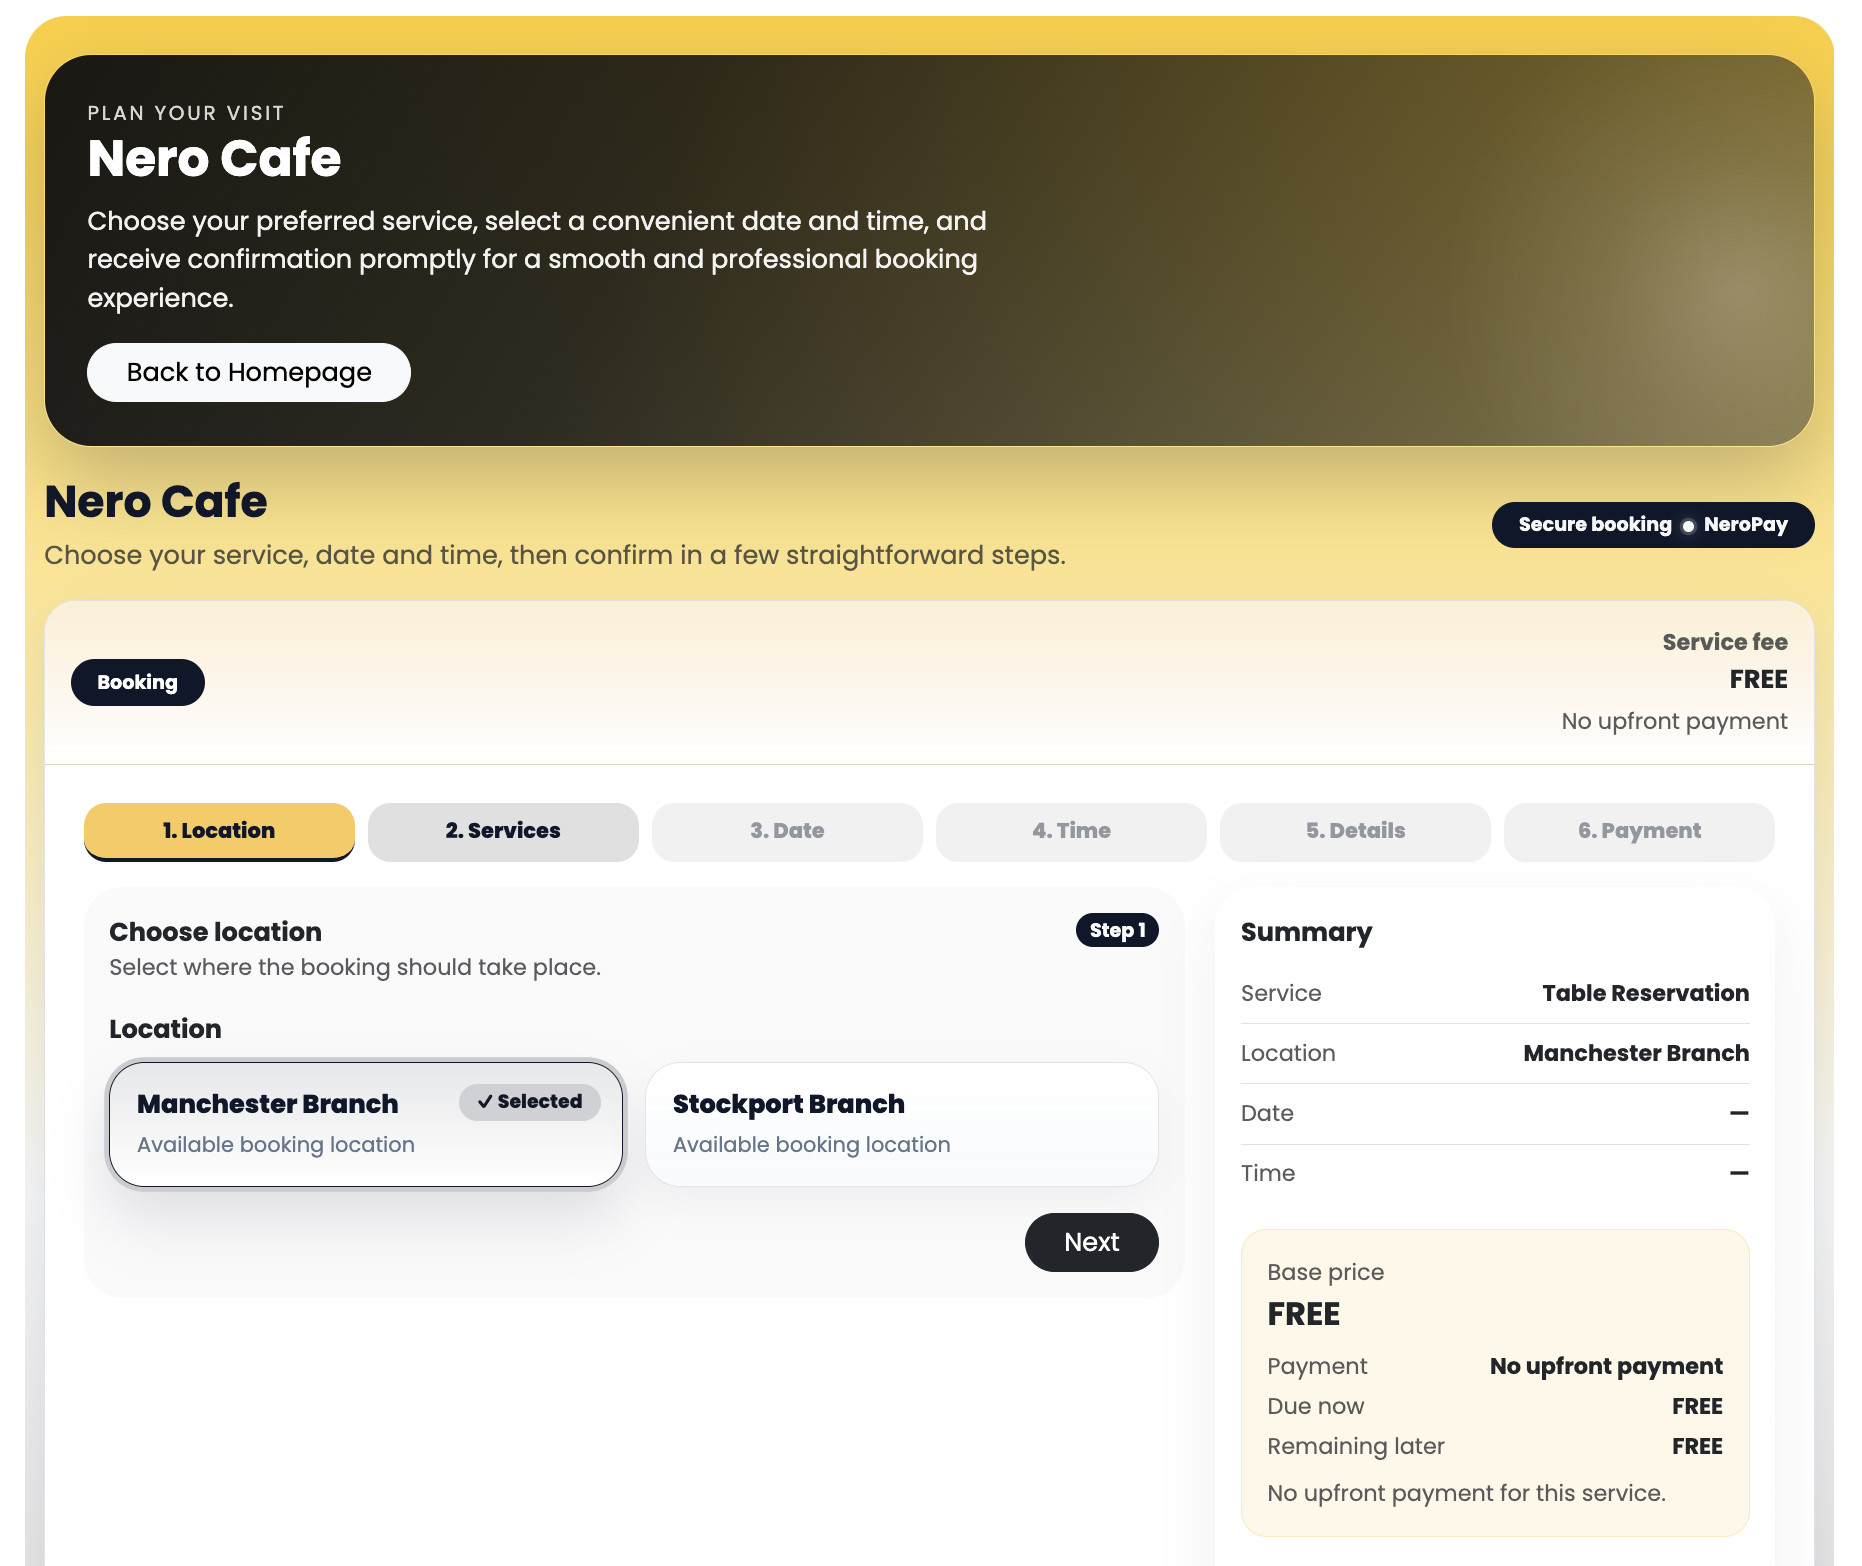
Customer journey — what your customers see
When a customer visits your booking page — either through your website or a direct link — they will go through the following steps:
Location → Service → Date → Time → Details → Payment (If deposit applied)
📸
💡 Note: We'll show you how to add your booking page to your website in [Getting started with NeroWeb].
Key concepts
| Term | What it means |
|---|---|
| Booking | A confirmed reservation made by a customer for a specific service, date, and time |
| Service | The specific offering a customer is booking — e.g. a table for two, a haircut, an event slot |
| Deposit | A partial upfront payment taken at the time of booking to secure the reservation |
| Full payment | The total amount collected at the time of booking |
| Booking status | The current state of a reservation — e.g. Confirmed, Pending, Cancelled |
Before you go live — checklist
Make sure the following are set up before accepting live bookings:
- ✅ Services are created with correct names, durations, and prices
- ✅ Opening hours are set correctly
- ✅ Deposit or payment settings are configured
- ✅ Customer notifications are turned on
- ✅ You have completed a test booking end to end
⚠️ Important: We strongly recommend completing a test booking before sharing your booking link with customers, to make sure everything works as expected.
Frequently asked questions
Q: Which types of businesses can use NeroBooking? A: NeroBooking is suitable for any business that takes appointments or reservations — restaurants, salons, event venues, and more.
Q: Do customers need to create an account to make a booking? A: No. Customers can complete a booking by entering their details directly on the booking page without creating an account.
Q: Can I take a deposit at the time of booking? A: Yes. You can configure deposit and payment settings in Booking Settings. See [Booking settings] for full details.
Q: Can I manage bookings from my phone? A: Yes. Your NeroPay dashboard is accessible on mobile, so you can view and manage reservations from anywhere.
Still need help? Contact us at support@neropay.app or create a ticket