How to get there
From your dashboard, follow this path:
NeroPOS → Booking Settings
1. Opening hours
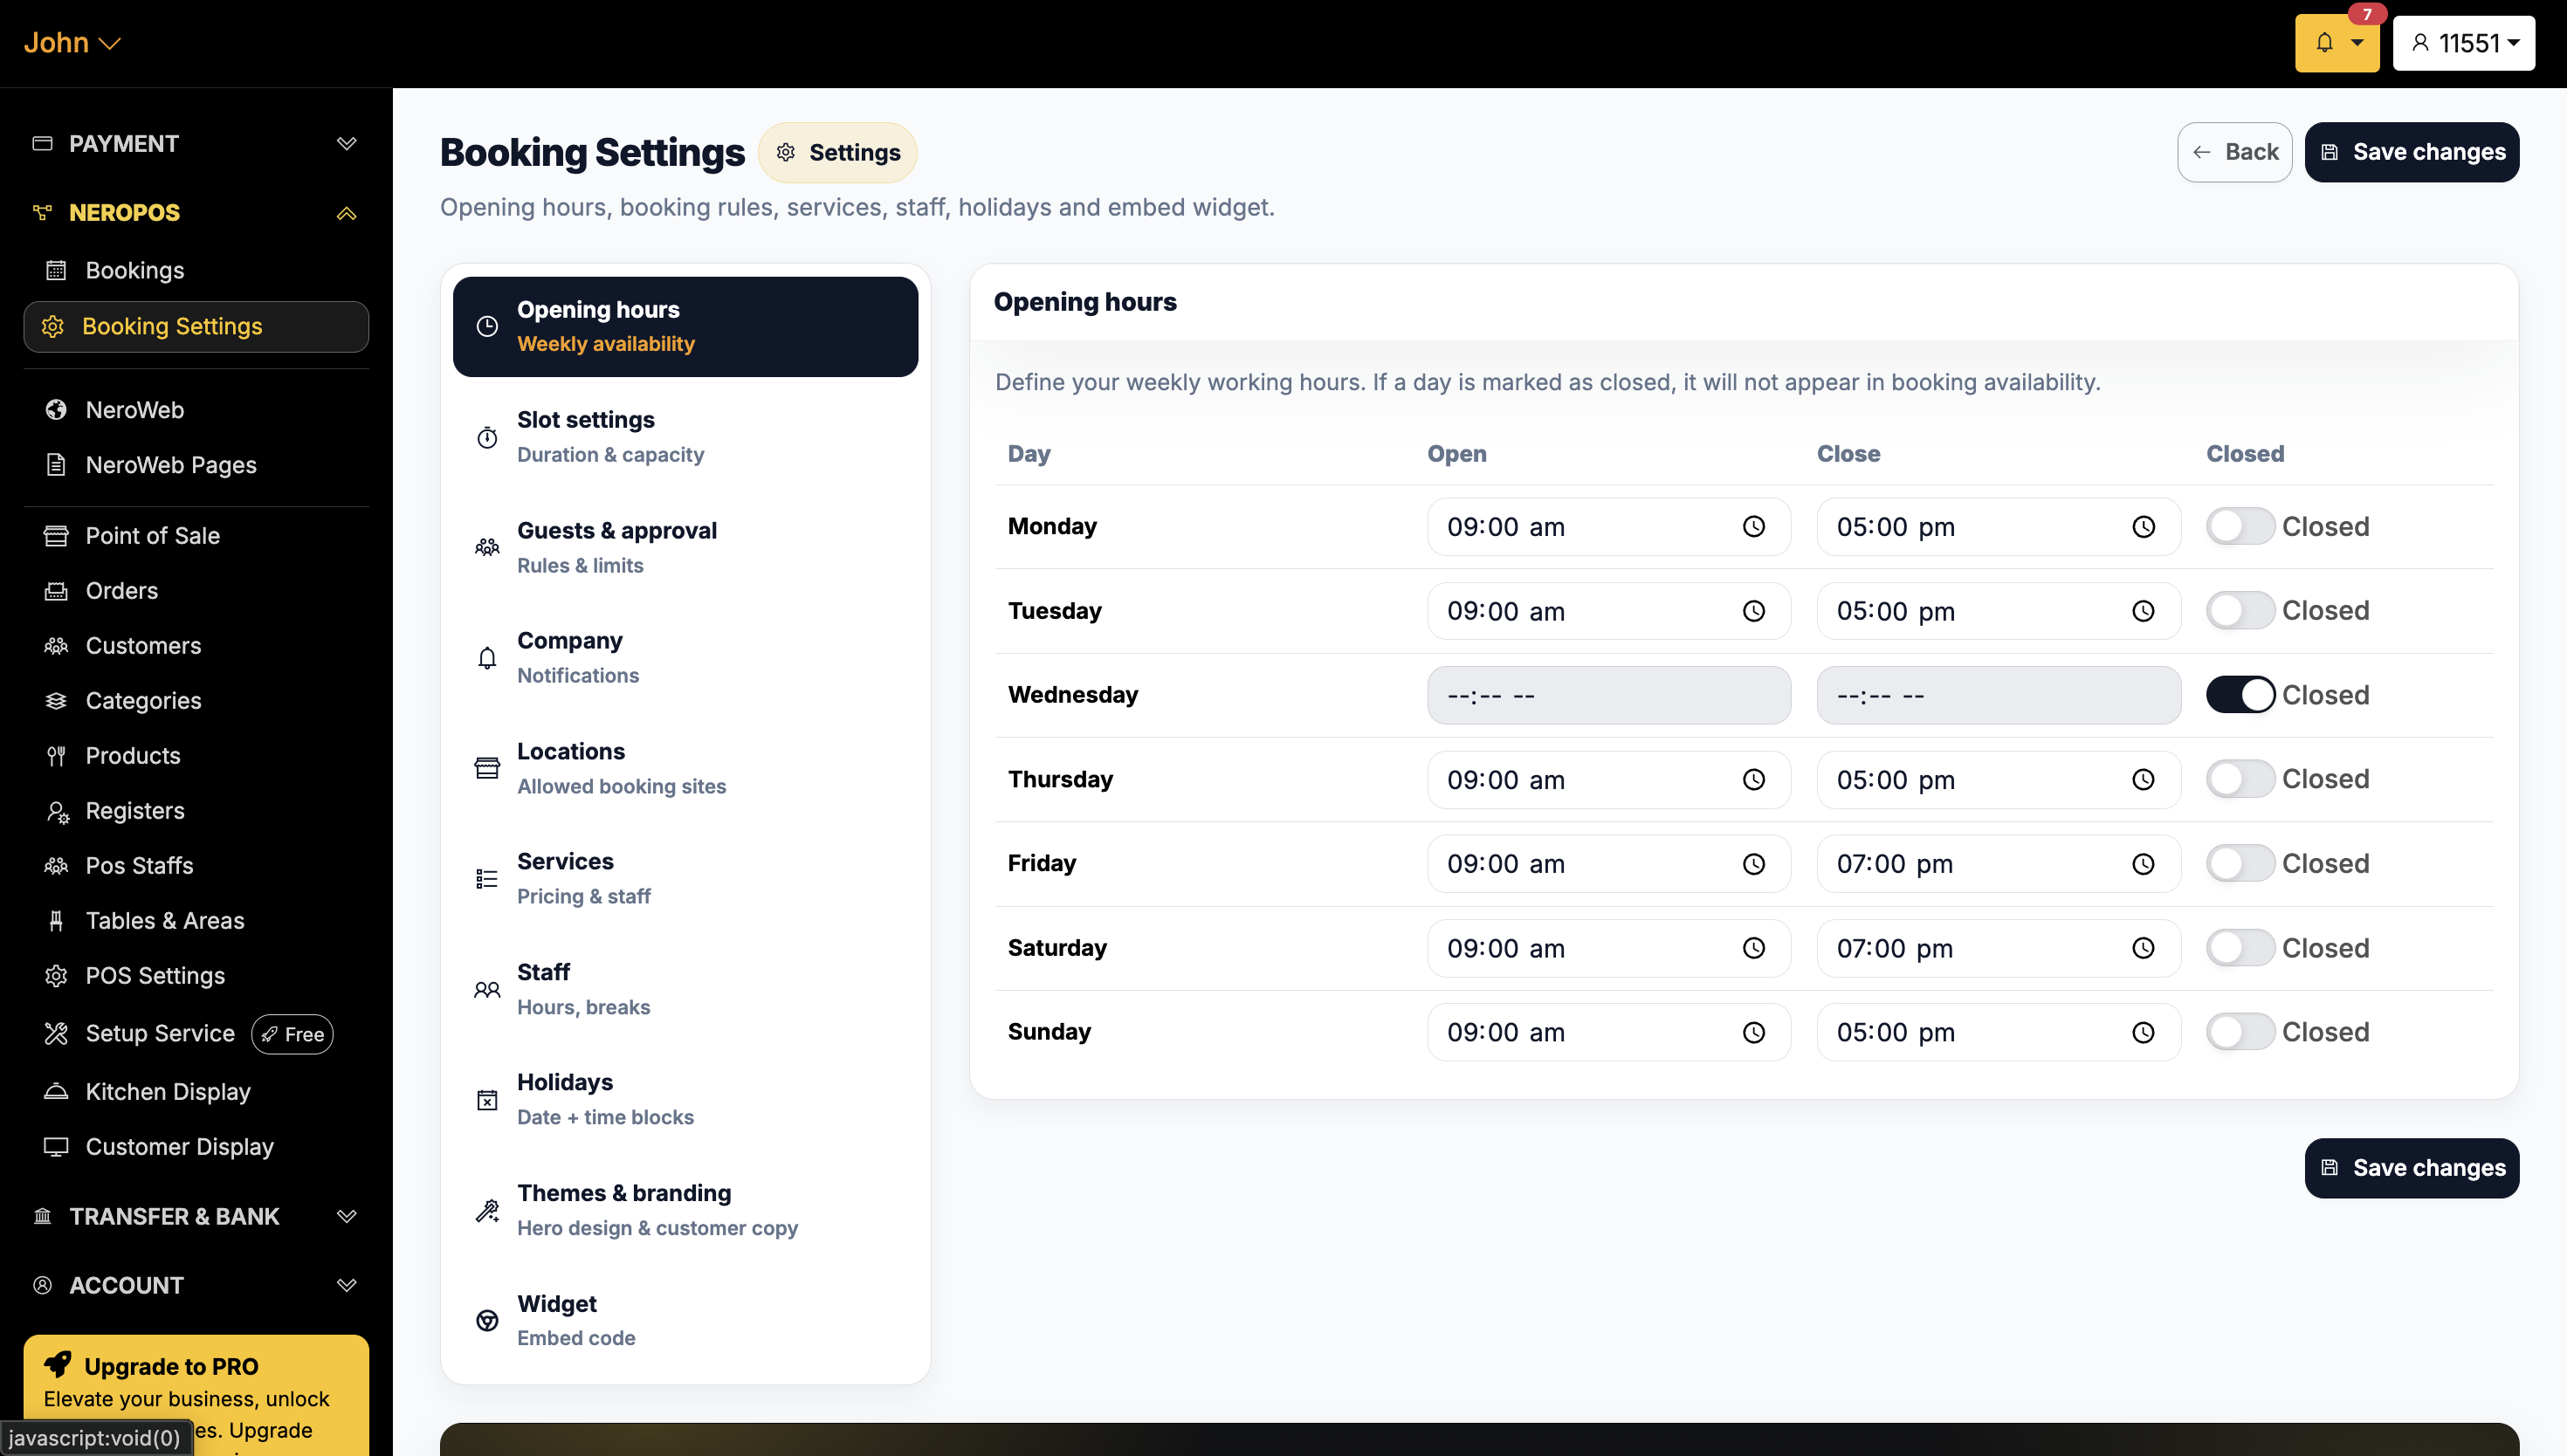
Start here — customers can only make bookings during the hours you set, so this needs to be configured before you go live.
Enter your opening and closing times for each day of the week. If you're closed on a particular day, use the toggle to turn that day off.
📸
📸
2. Slot settings
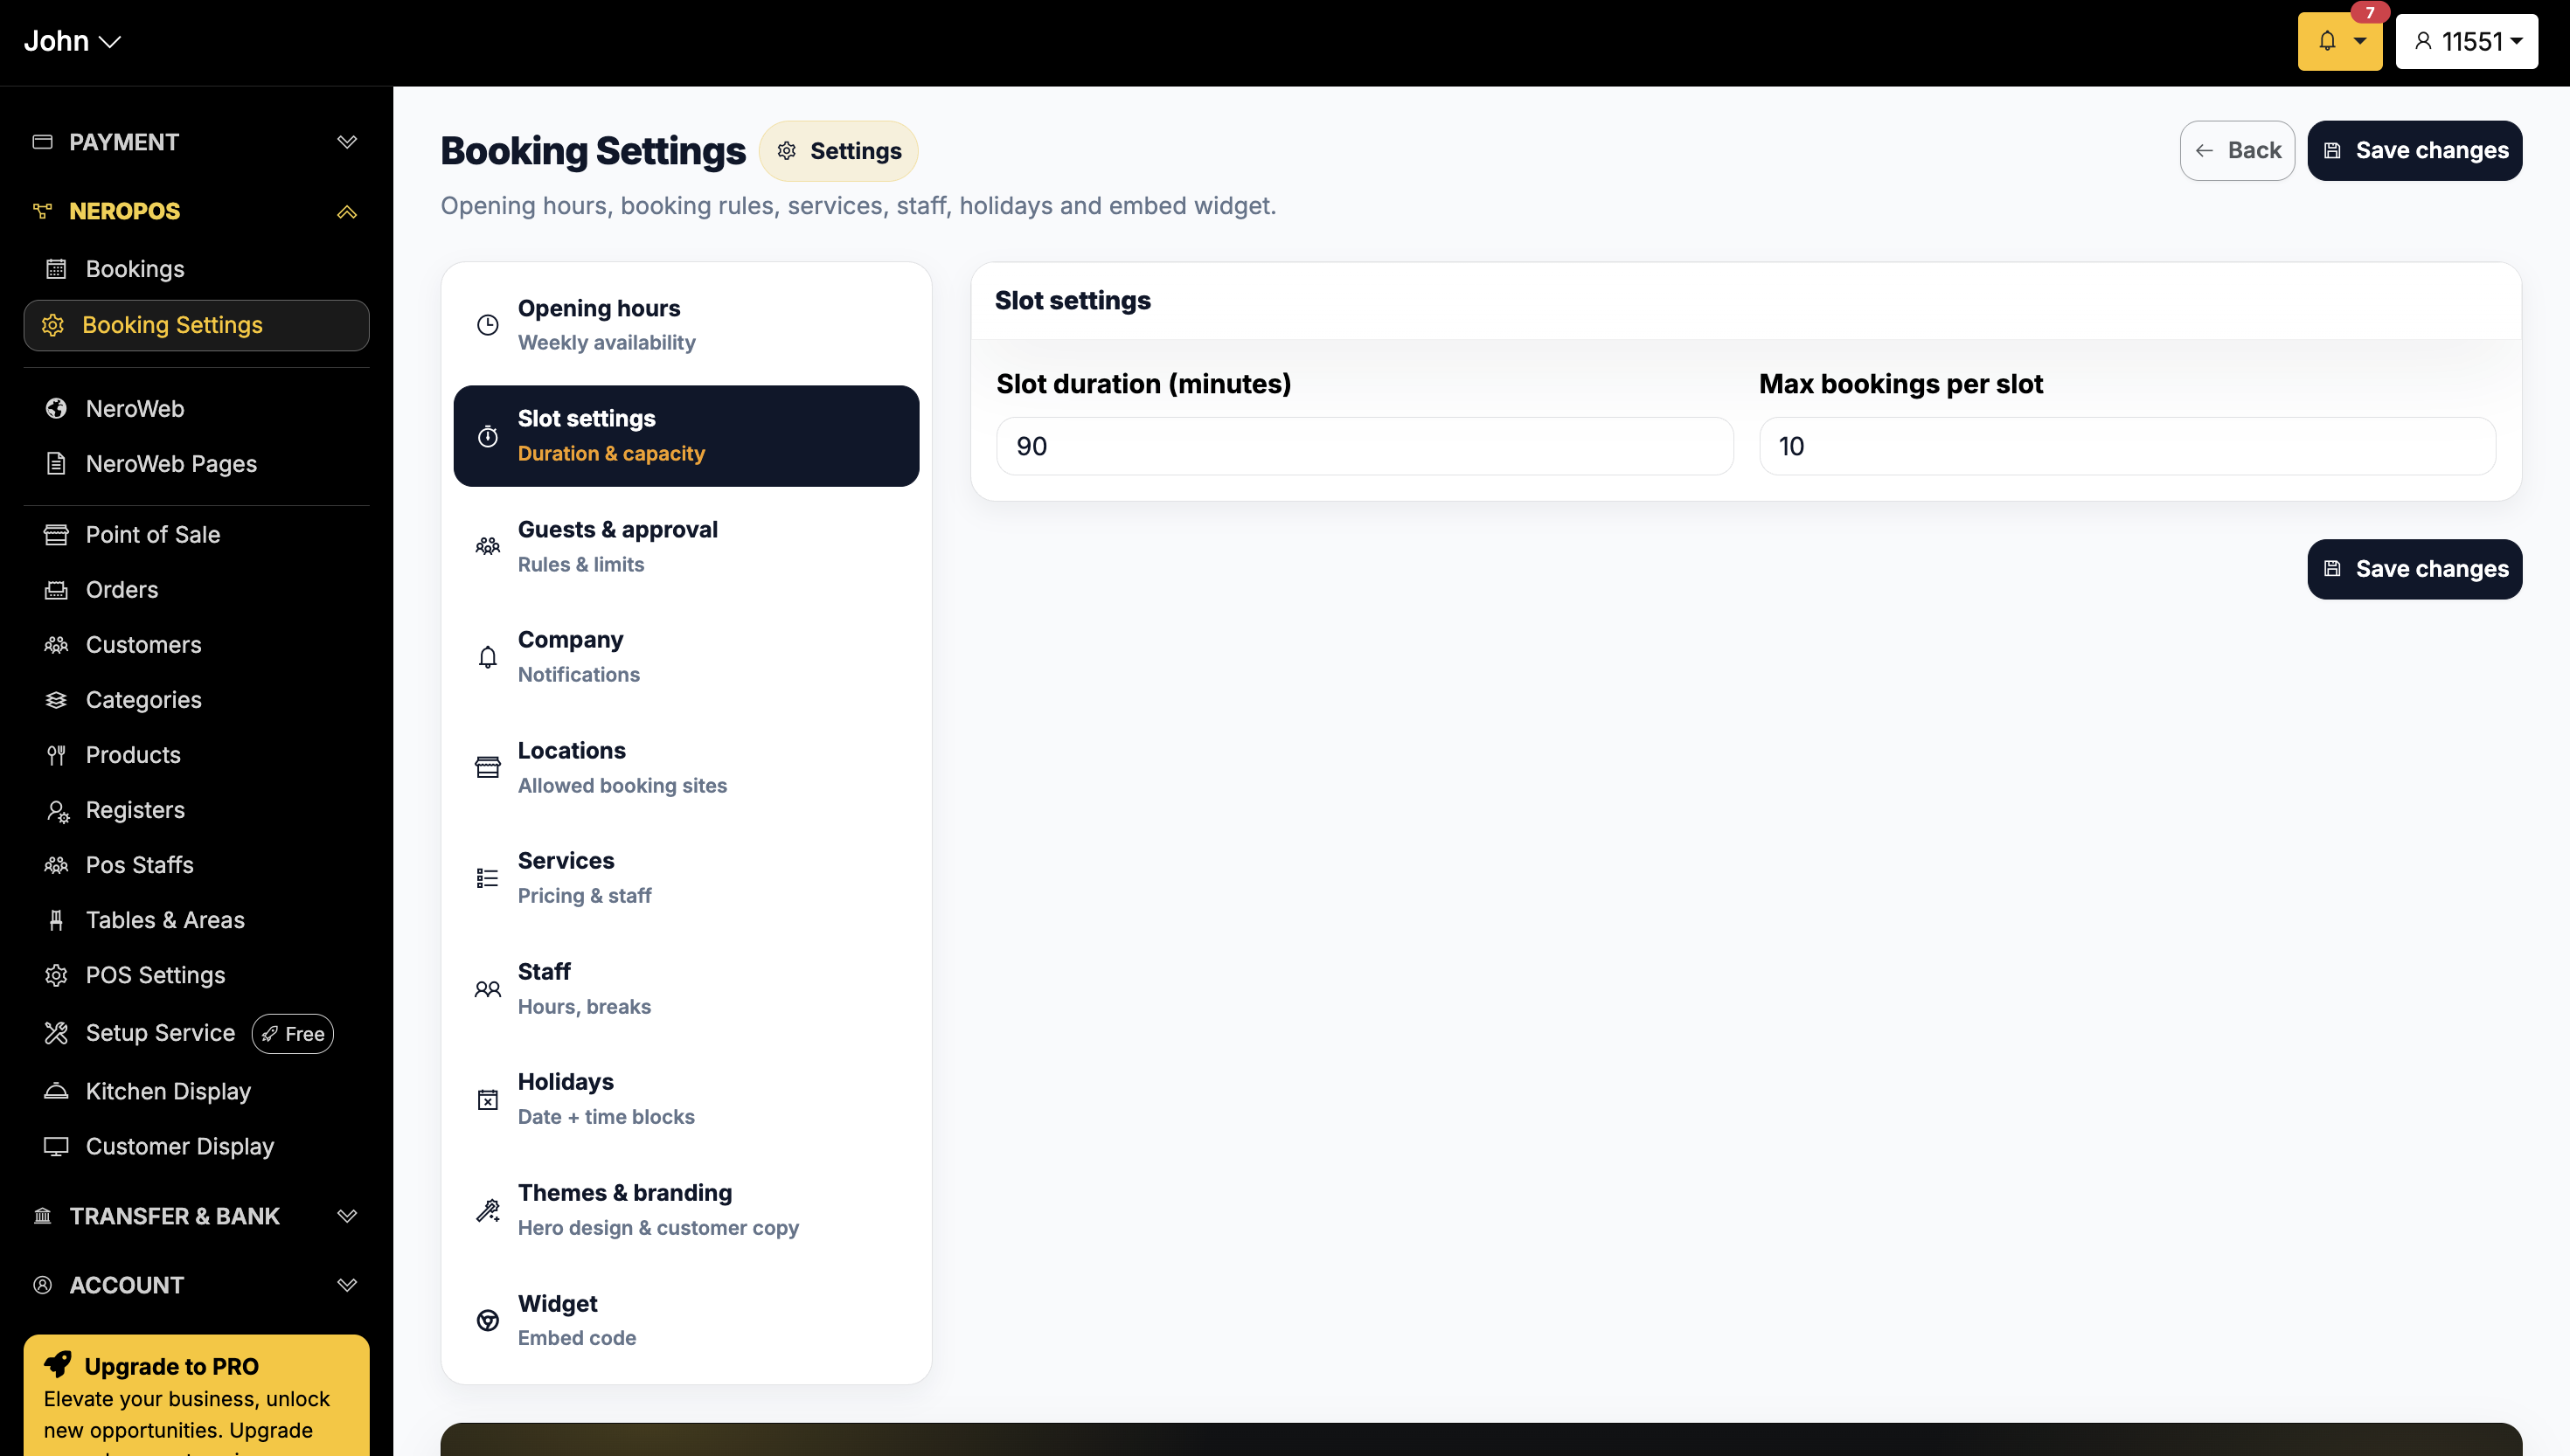
Set the duration of each booking slot. For example, if you set 90 minutes, customers will see available times every 1.5 hours.
You can also set a maximum number of groups you're willing to serve within the same time period — useful for managing capacity during busy periods.
📸
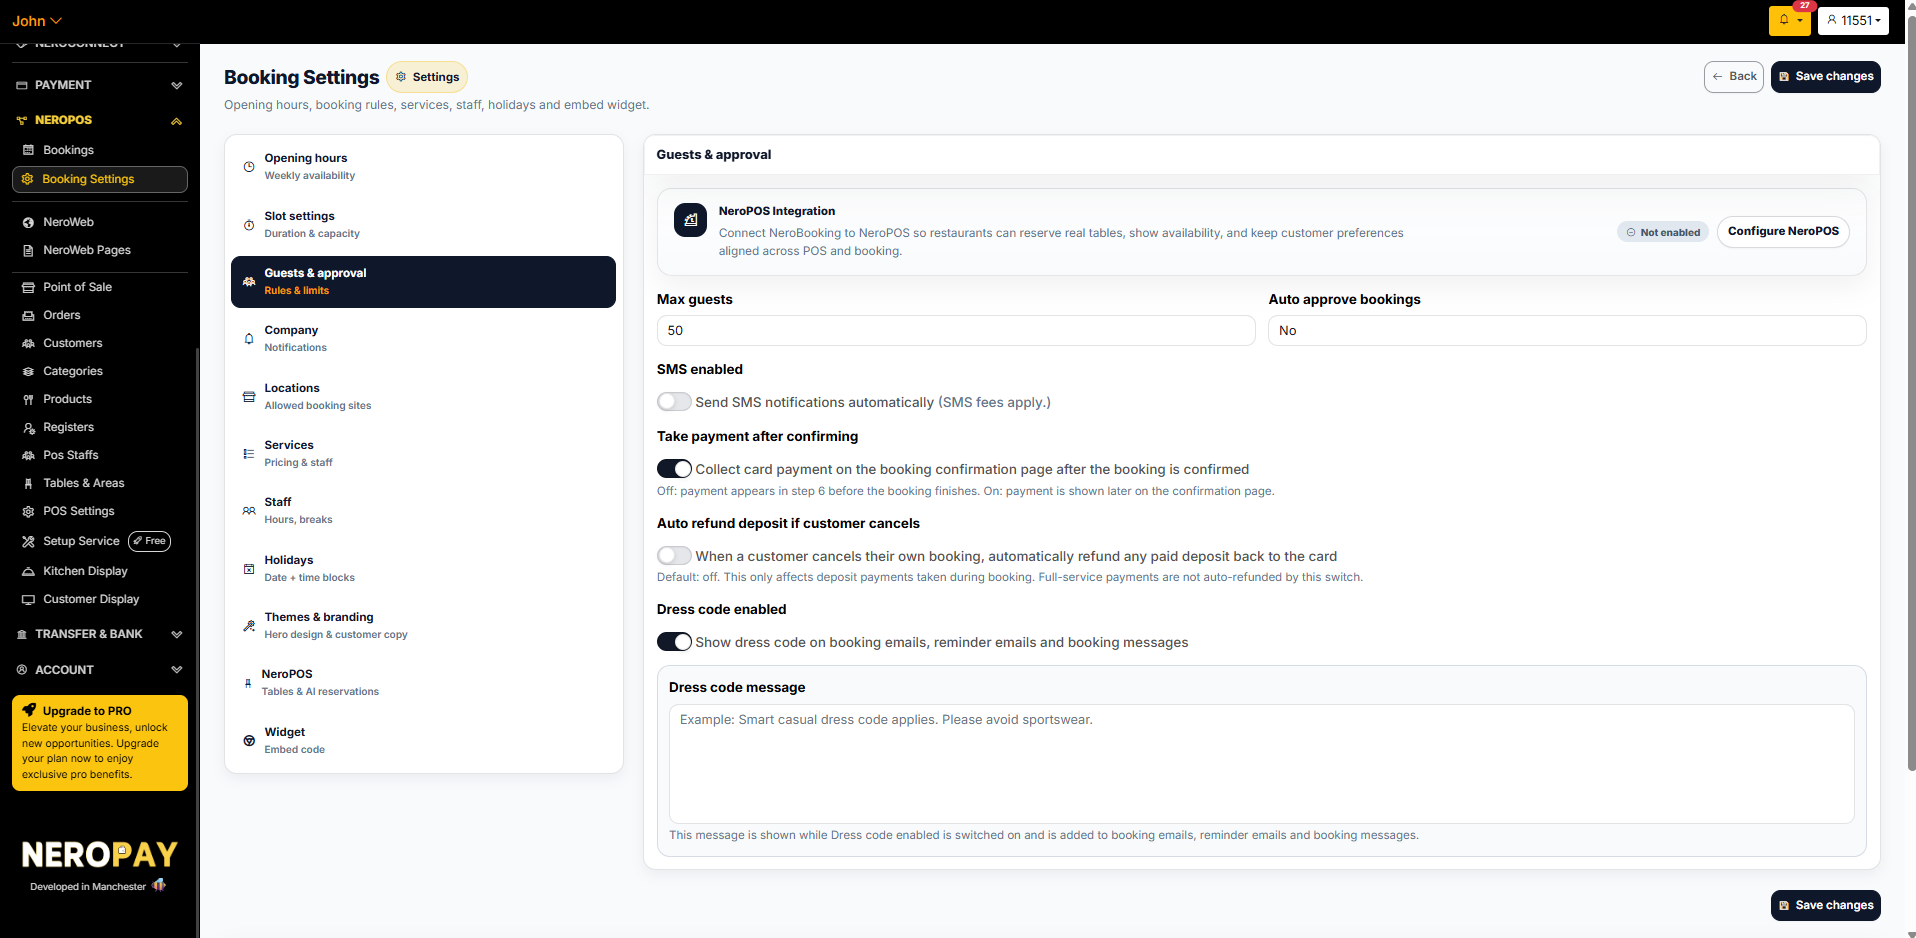
3. Guest & Approval
This section controls booking rules, guest limits, payment collection, and any dress code requirements shown to customers.
NeroPOS integration
Connect NeroBooking to NeroPOS so restaurants can reserve real tables, show live availability, and keep customer preferences aligned across your POS and booking system. Click Configure NeroPOS to set this up.
| Setting | What it does |
|---|---|
| Max guests | The maximum number of guests allowed per booking |
| Auto approve bookings | Set to Yes to confirm bookings automatically, or No to review and approve each one manually |
| Send SMS notifications | Automatically sends SMS confirmations and reminders to customers. SMS fees apply |
| Take payment after confirming | When on — payment is collected on the confirmation page after you approve the booking. When off — payment appears at step 6 before the booking is completed |
| Auto refund deposit if customer cancels | When on — any deposit paid during booking is automatically refunded to the customer's card if they cancel. Off by default. This only affects deposit payments — full-service payments are not auto-refunded |
| Dress code enabled | When on — your dress code message is shown in booking emails, reminder emails, and booking messages |
| Dress code message | Write your dress code requirements here — for example, Smart casual dress code applies. Please avoid sportswear |
📸
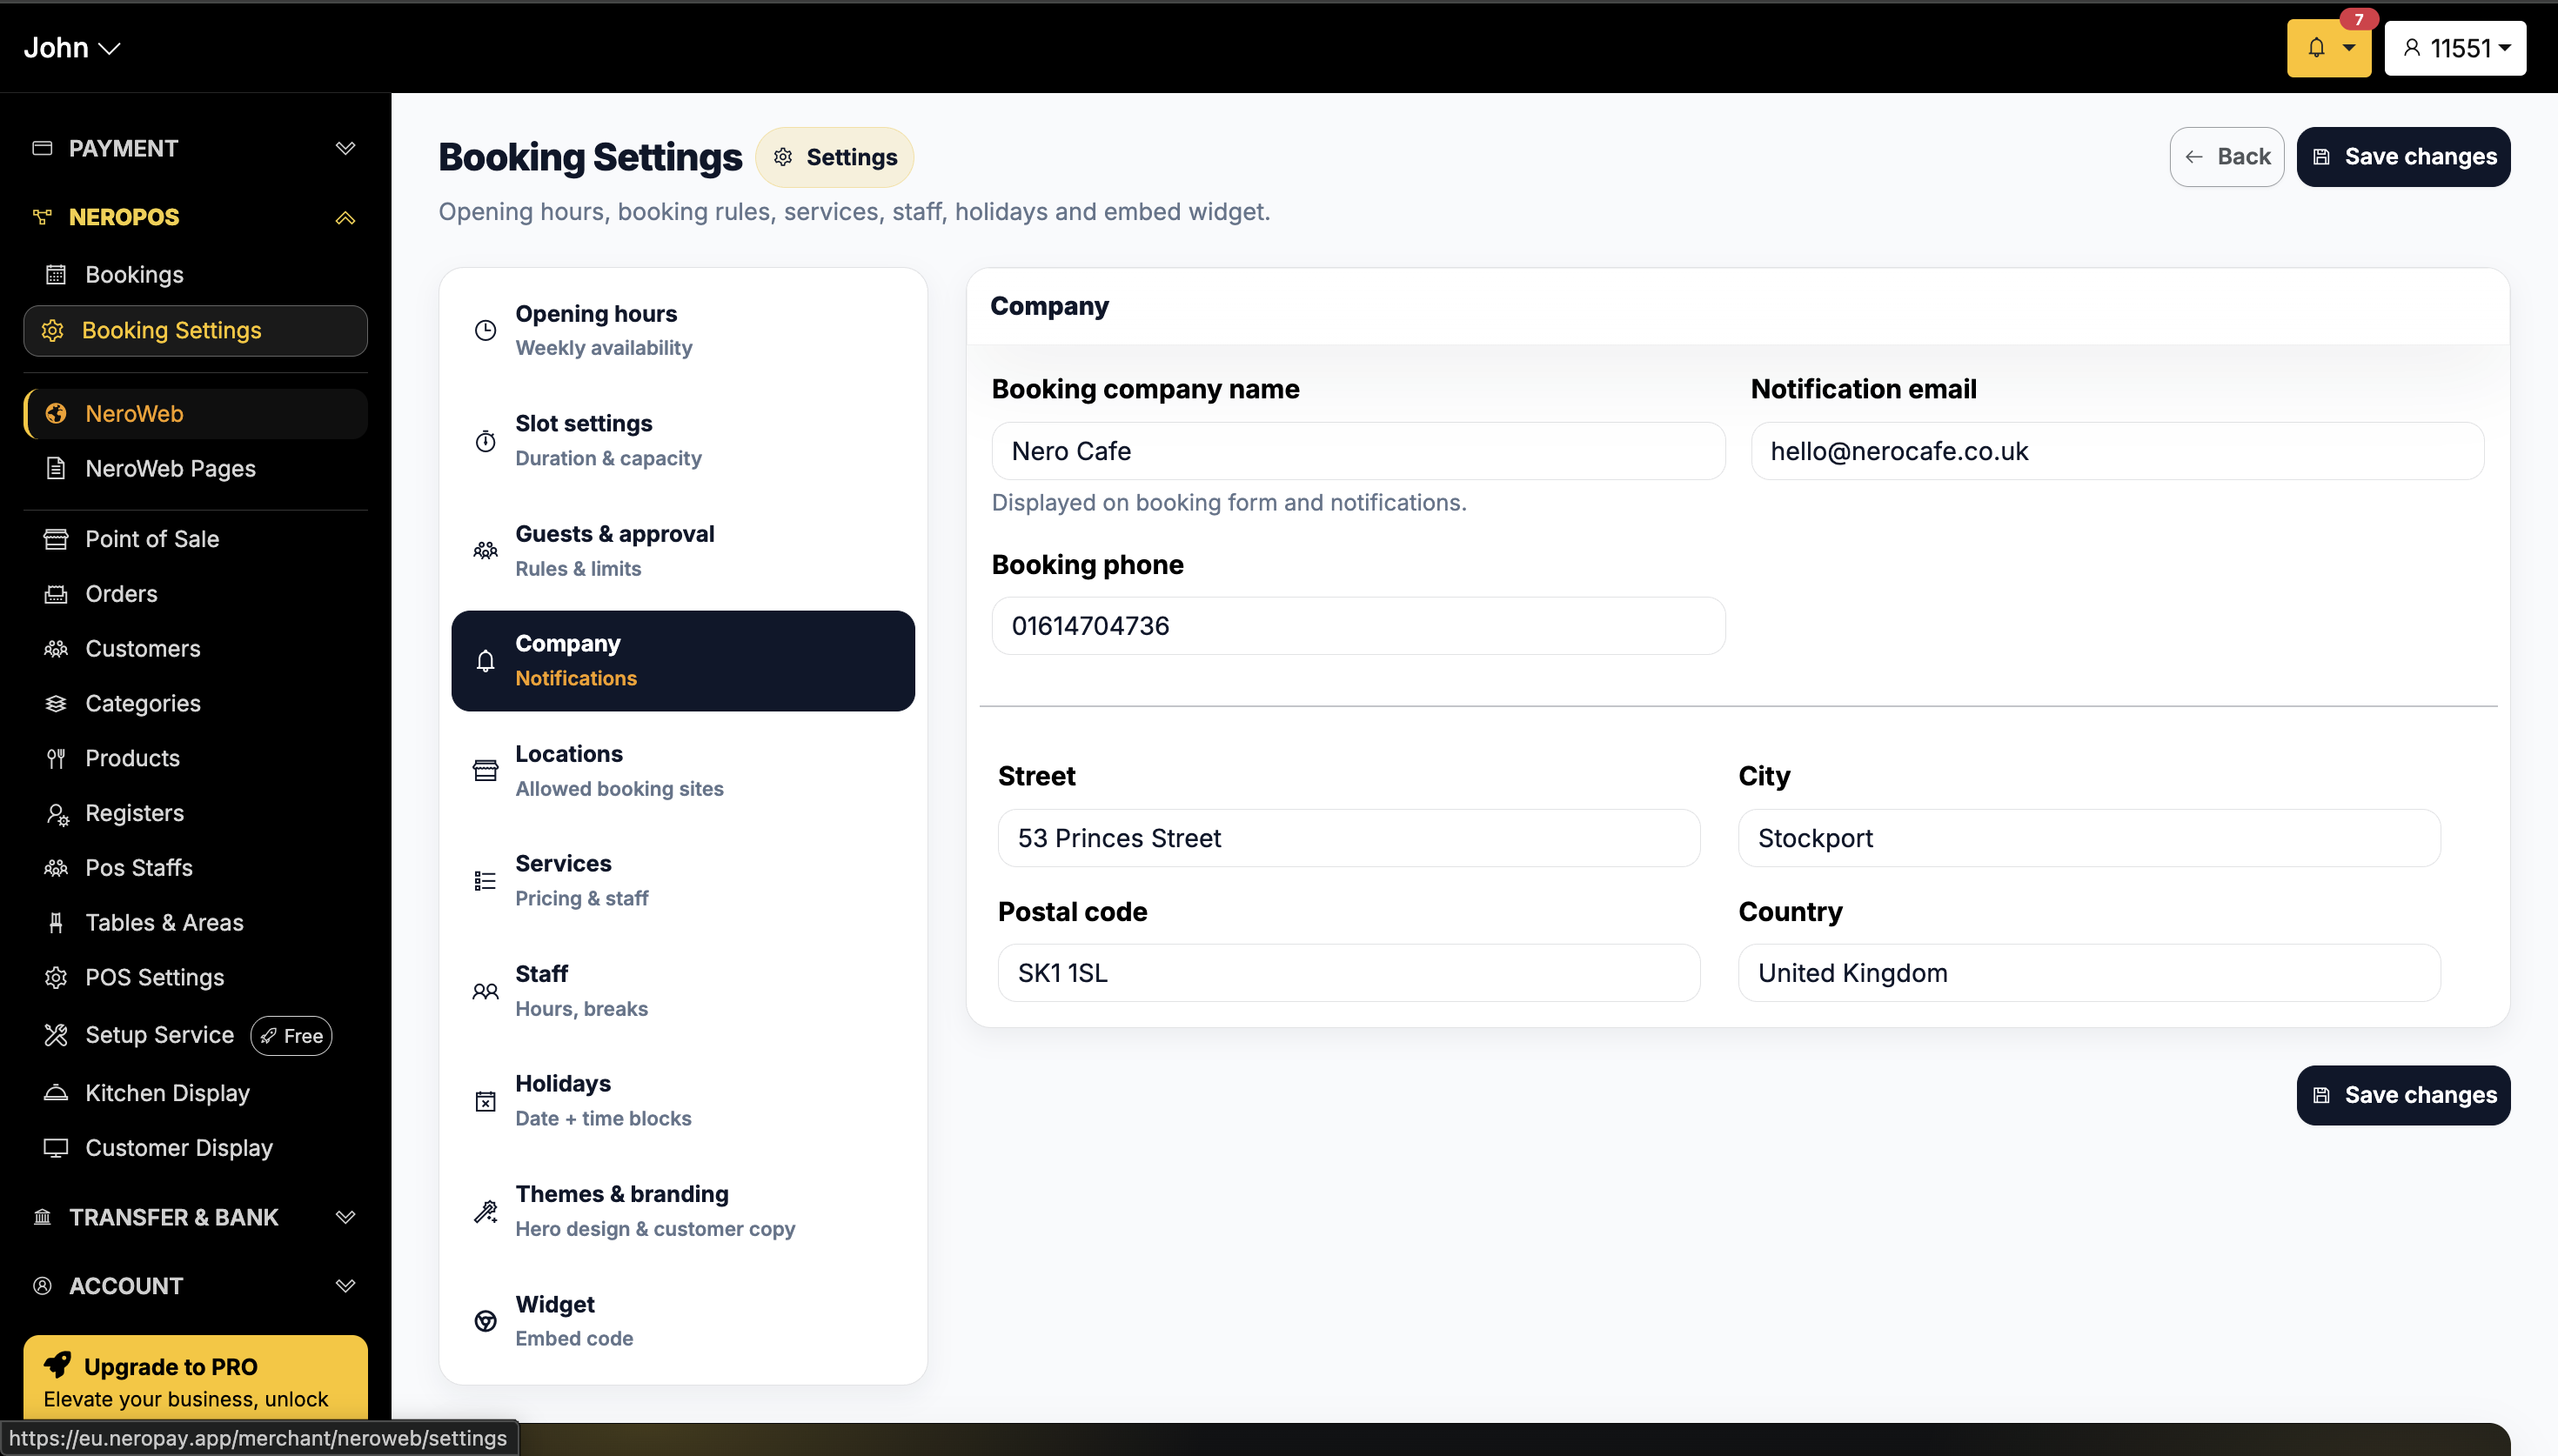
4. Company page
Fill in your trading information here — this is displayed to customers when they make a booking, so make sure everything reflects your business accurately.
This includes your business name, contact details, and any other information you want customers to see.
📸
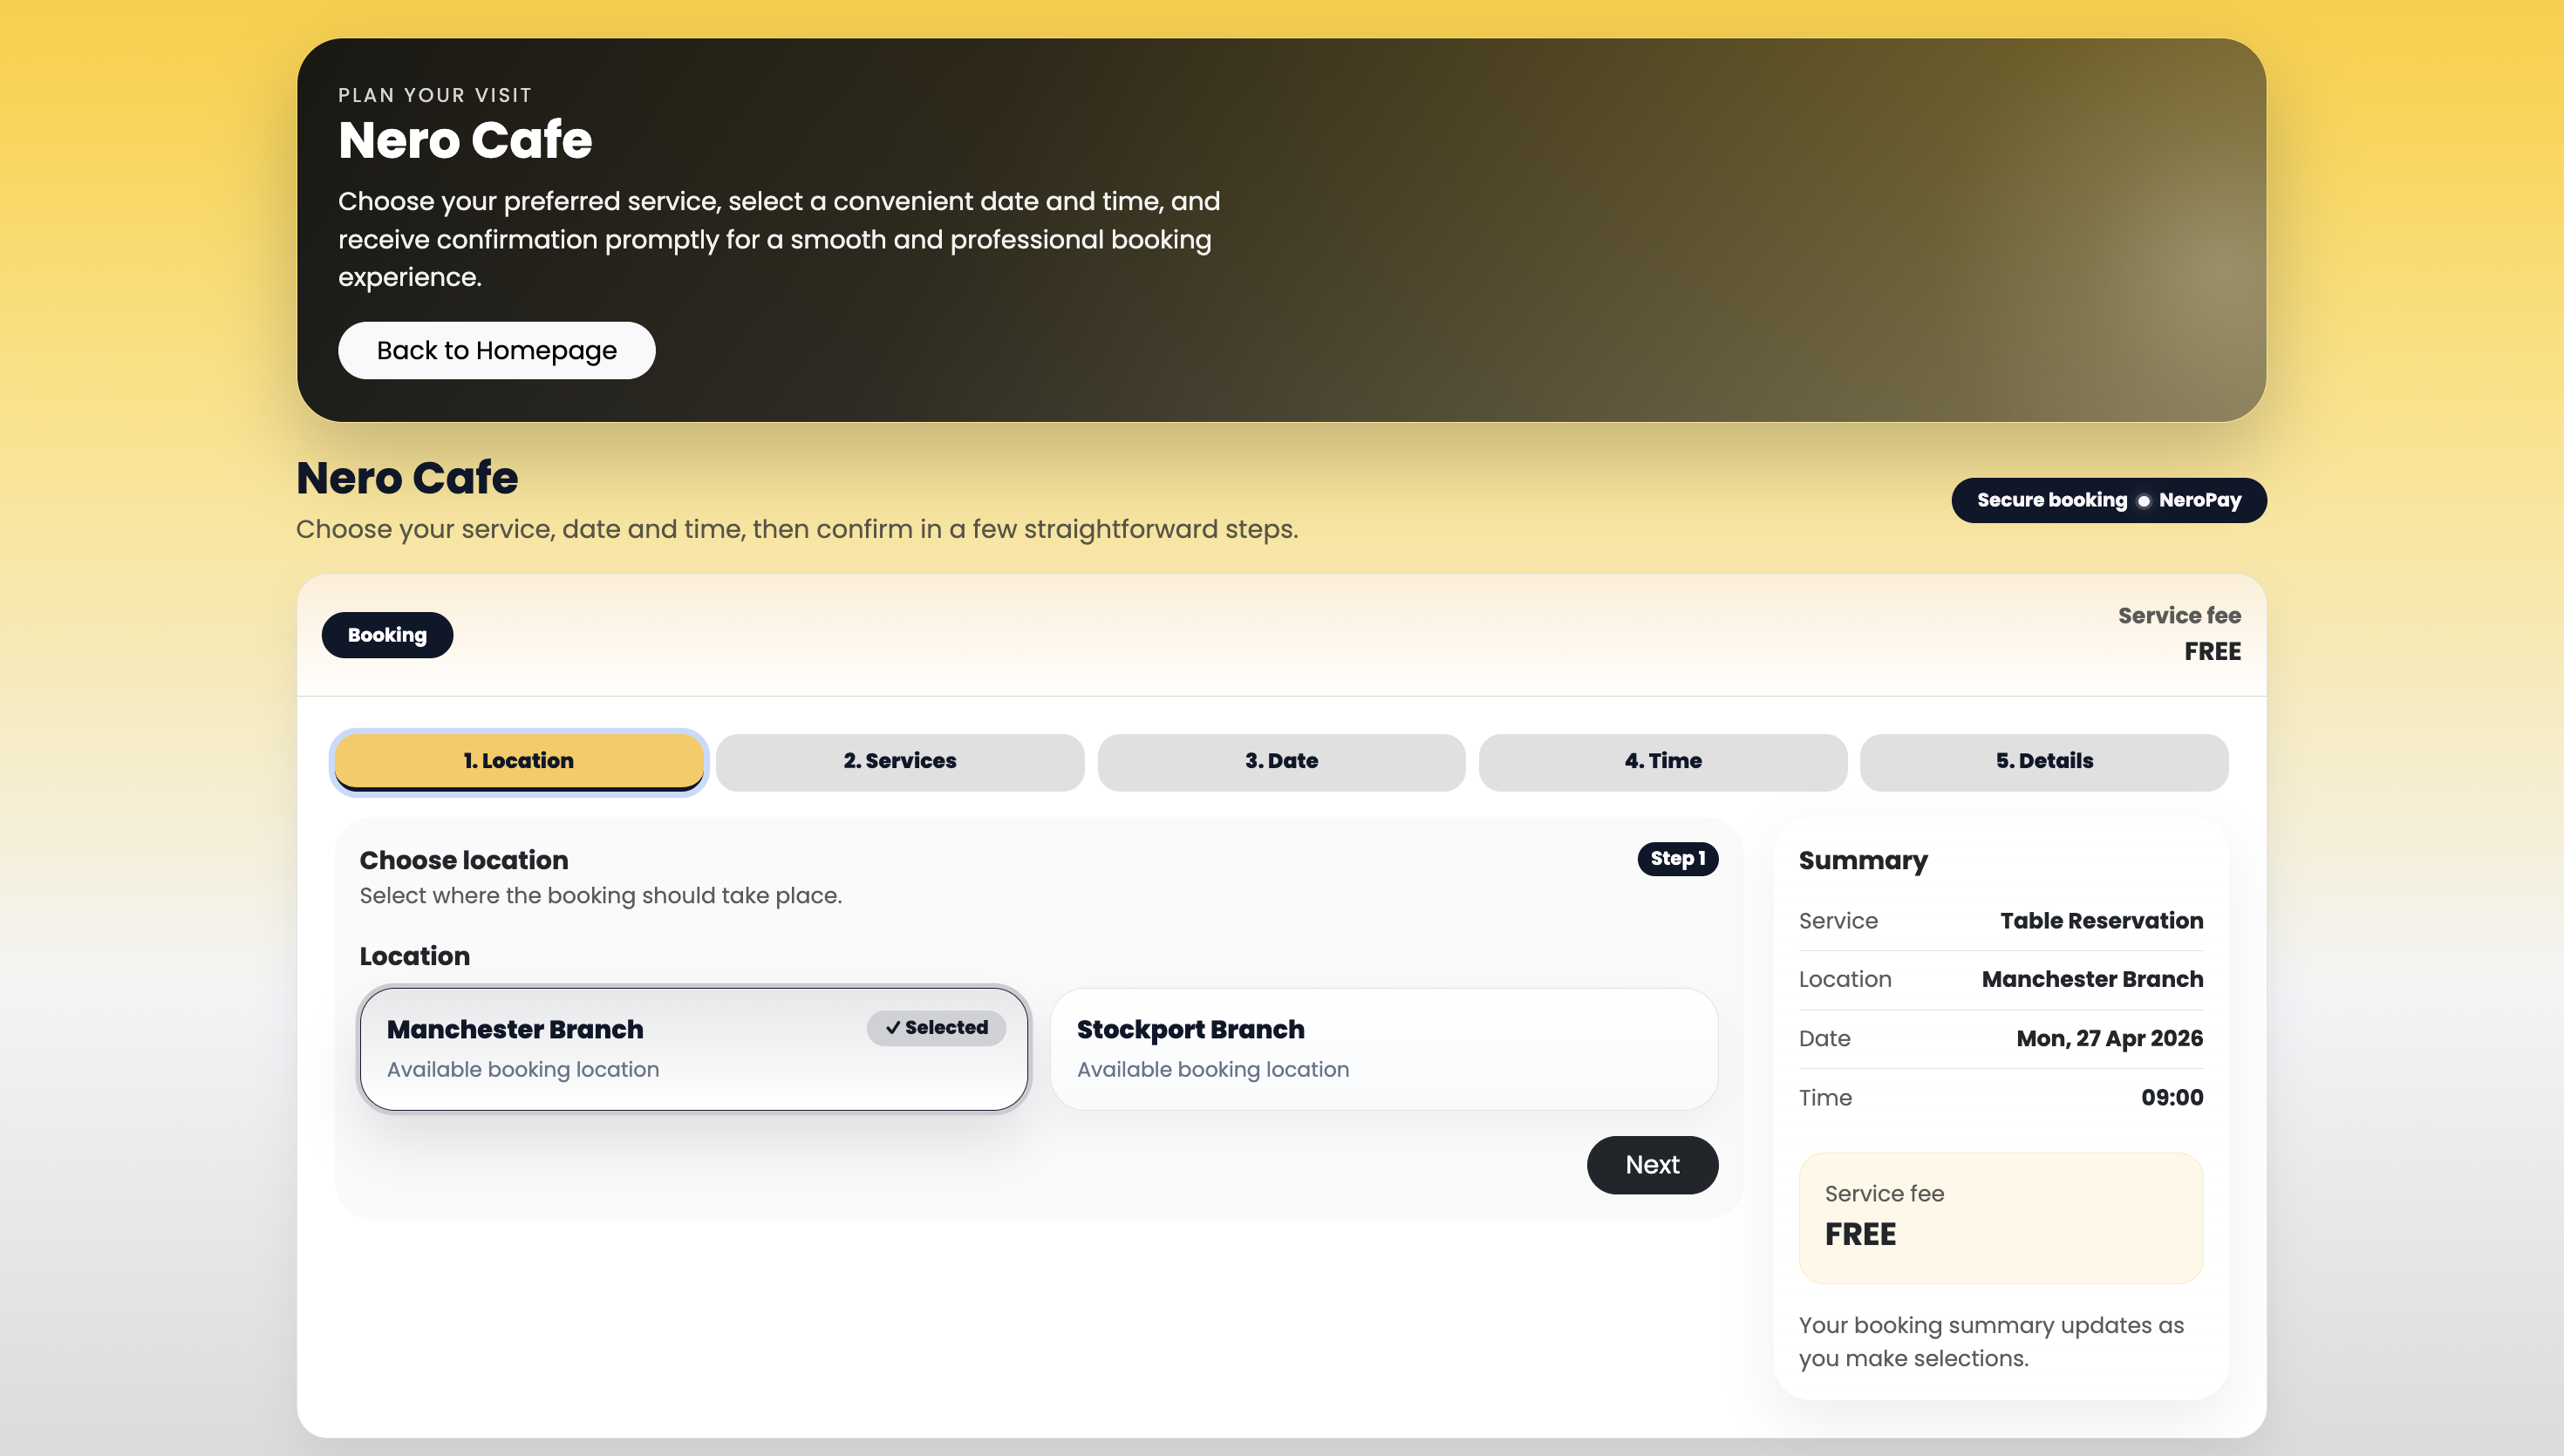
5. Locations
If you have only one location, you can skip this step.
If you have more than one branch, you can manage them all from here:
- Click Add location and create each of your shop locations
- Switch on Enable location selection so customers can choose their preferred branch
- Tick the branches you want to display on the booking page
📸
📸

6. Services and staff
Setting up your services and staff is covered in a separate guide — see [Managing your services and staff →]
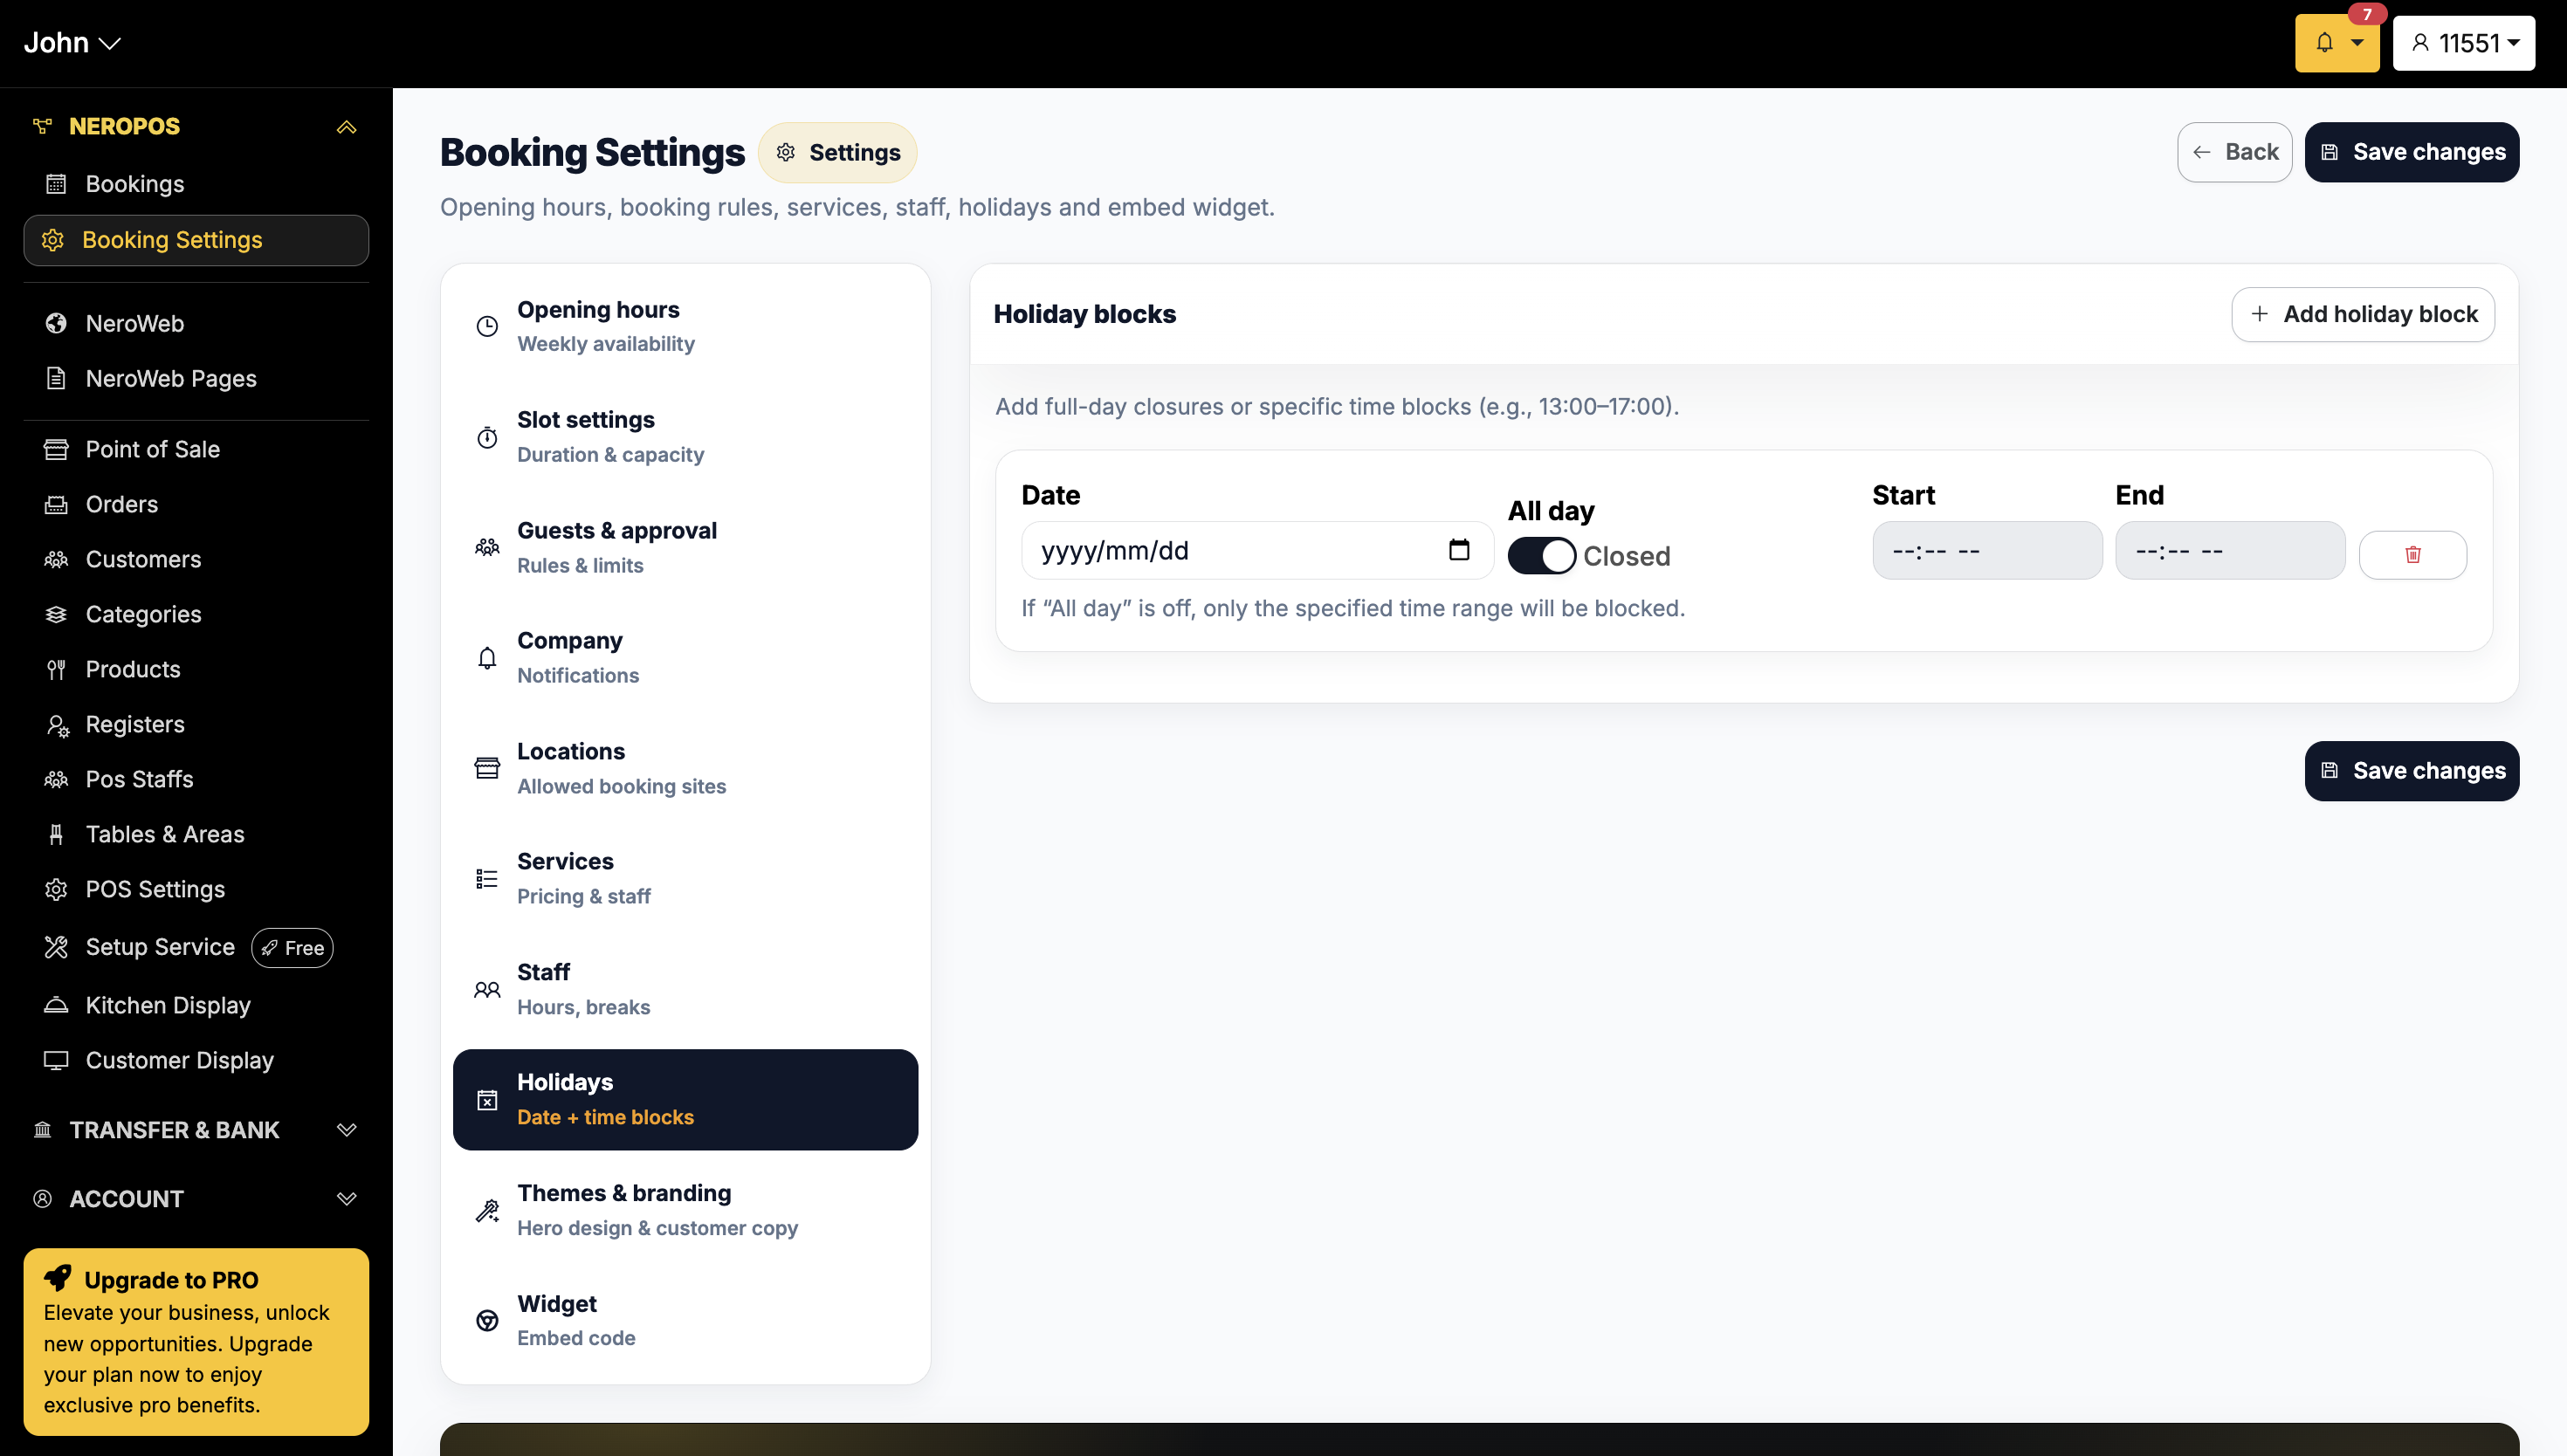
7. Holiday
If your business will be closed for a holiday or a scheduled break, add it here. This blocks out the relevant dates so customers cannot make bookings while you're away.
📸
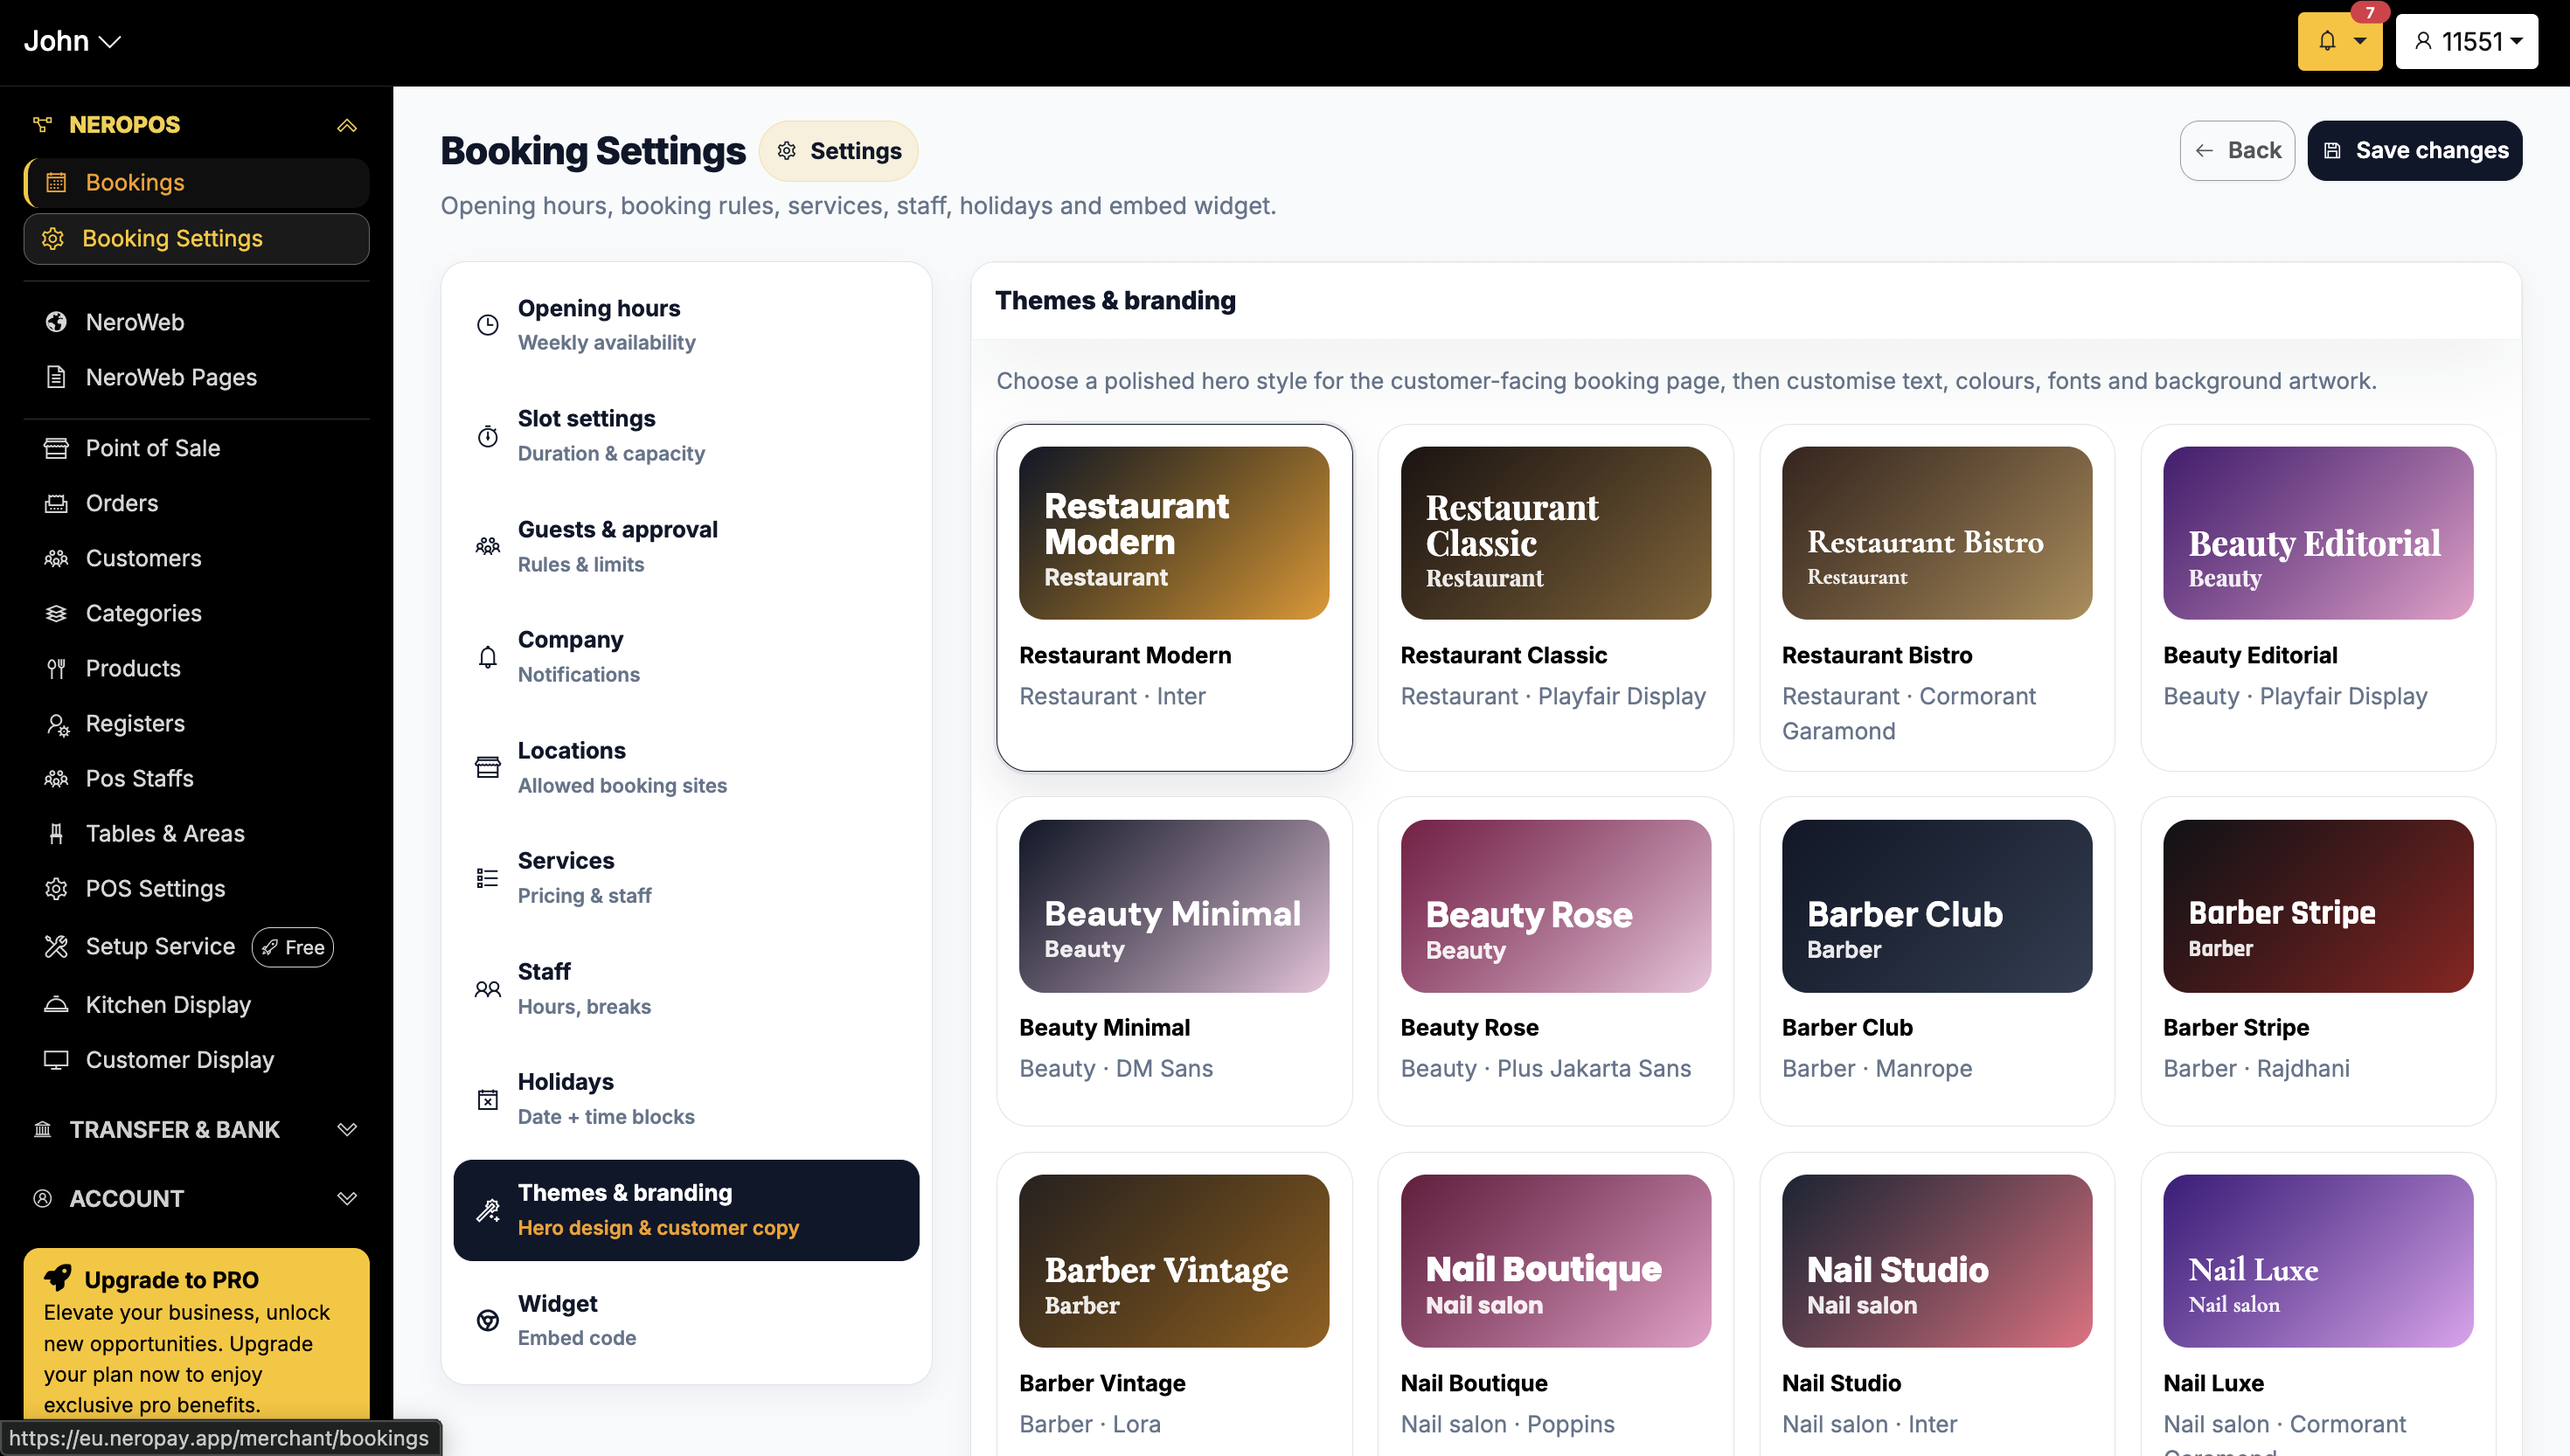
8. Themes and branding
Choose a customer-facing interface that suits your business style. Scroll down within this section to find additional customised design settings.
📸
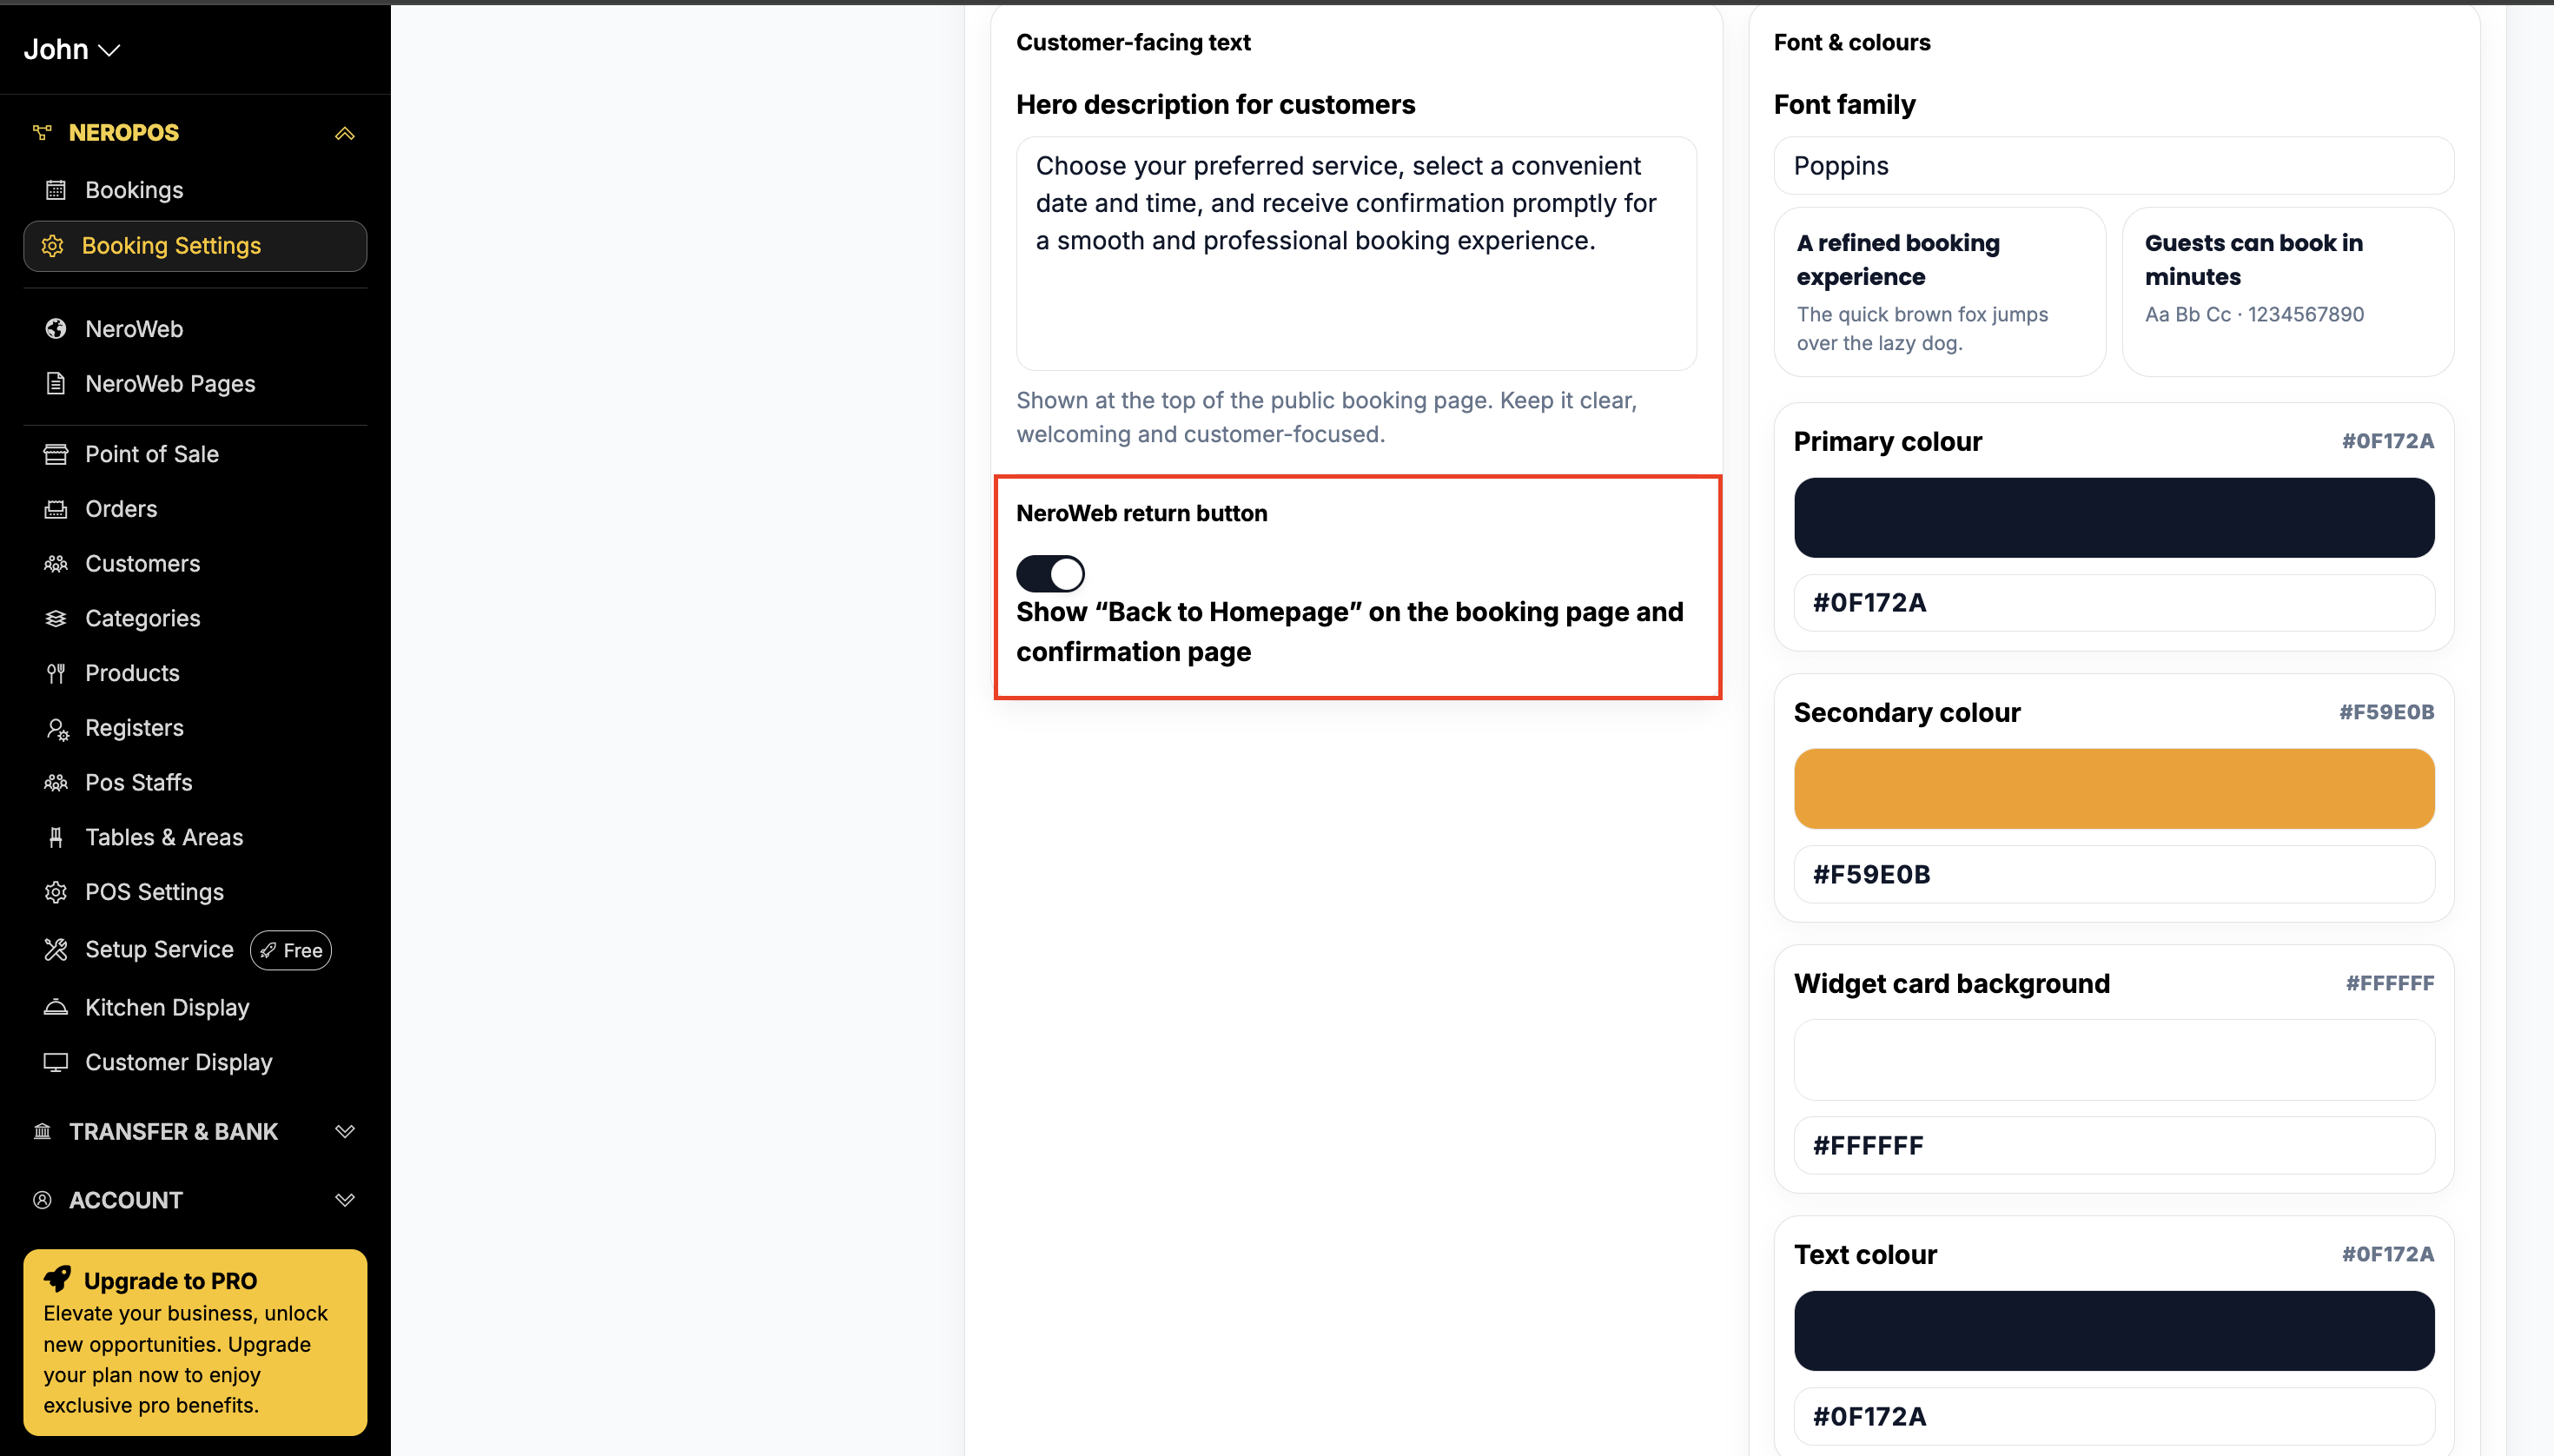
You'll also find a section called Customer-facing settings. Here you can toggle the NeroWeb return button, which controls whether customers see a return button to your main website after booking.
📸
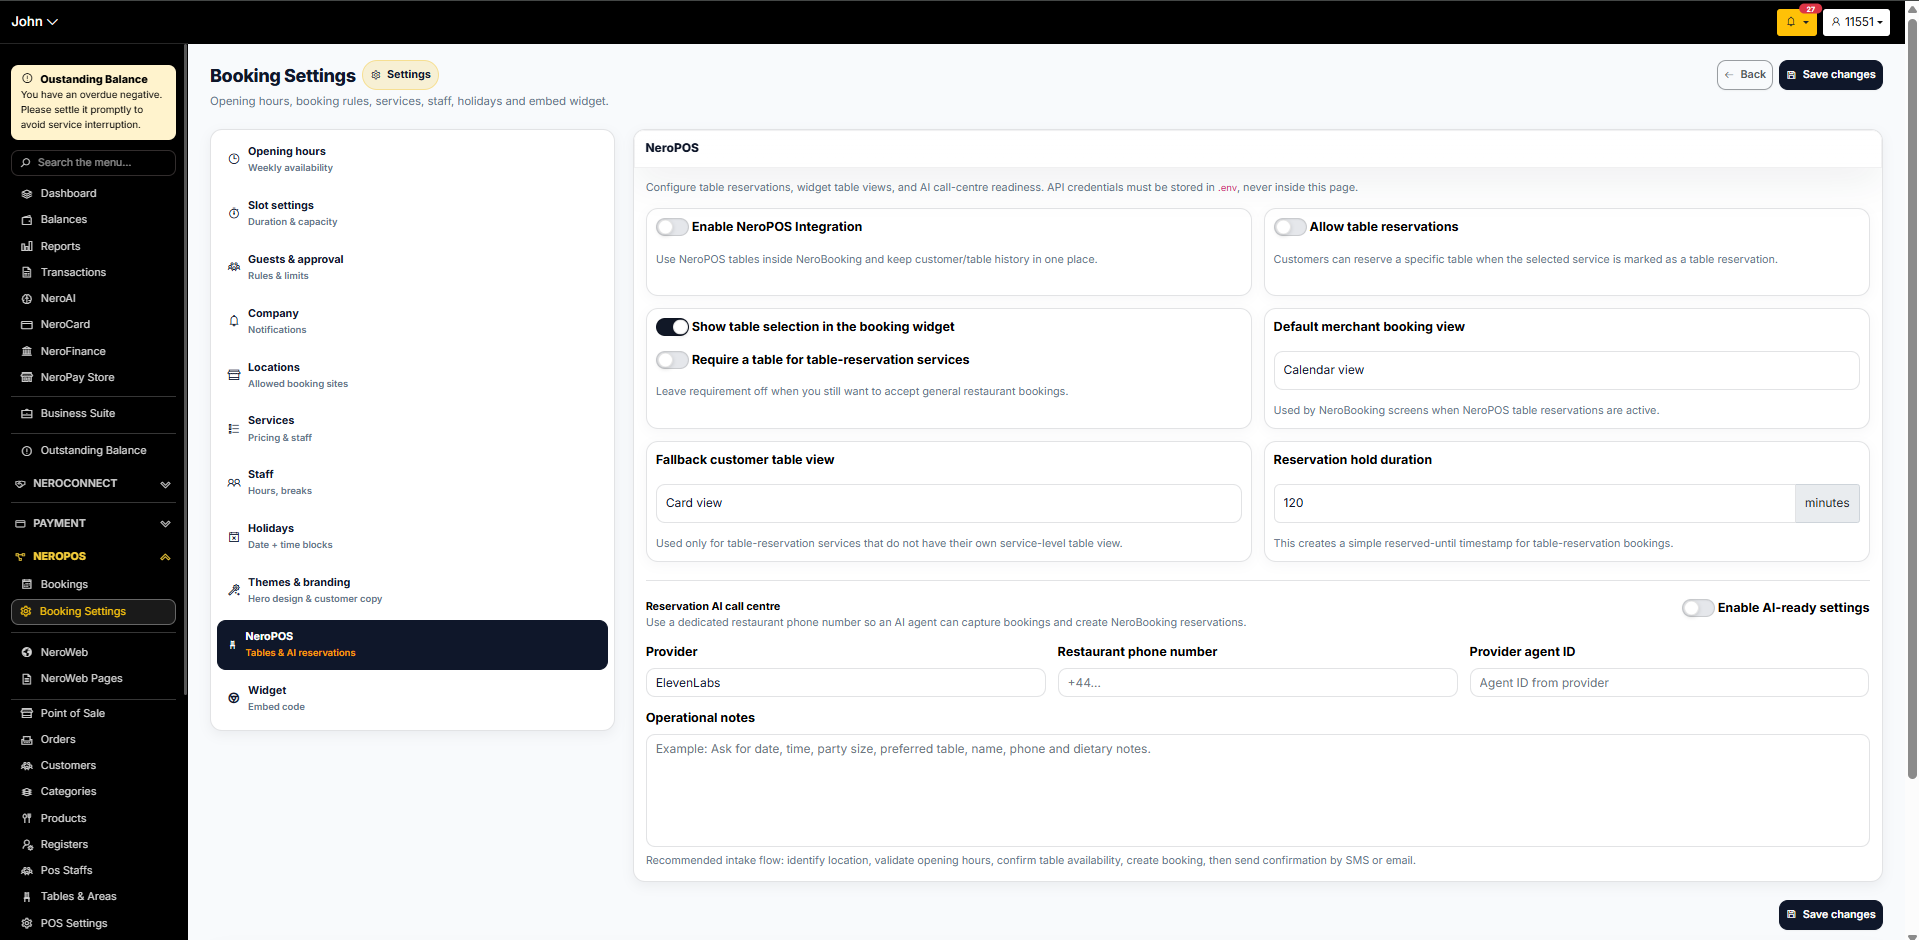
9. NeroPOS
This section connects NeroBooking with your NeroPOS table layout, so bookings and walk-ins are managed in one place.
| Setting | What it does |
|---|---|
| Enable NeroPOS integration | Use NeroPOS tables inside NeroBooking and keep customer and table history in one place |
| Allow table reservations | Customers can reserve a specific table when the selected service is marked as a table reservation |
| Show table selection in the booking widget | Displays the table selection step in the customer-facing booking flow |
| Require a table for table-reservation services | Makes table selection mandatory. Turn this off if you still want to accept general restaurant bookings without a specific table assigned |
| Default merchant booking view | The view used in NeroBooking screens when NeroPOS table reservations are active — for example, Calendar view |
| Fallback customer table view | Used only for table-reservation services that do not have their own service-level table view — defaults to Card view |
| Reservation hold duration | How long a table is held for a booking — default is 120 minutes |
Reservation AI call centre
Enable AI-ready settings to use a dedicated restaurant phone number so an AI agent can capture bookings and create NeroBooking reservations automatically.
| Field | What to enter |
|---|---|
| Provider | Your AI provider — for example, ElevenLabs |
| Restaurant phone number | The dedicated phone number the AI agent will use |
| Provider agent ID | The agent ID from your AI provider |
| Operational notes | Instructions for the AI agent — for example, Ask for date, time, party size, preferred table, name, phone, and dietary notes |
⚠️ Note: API credentials must be stored in
.envand never entered directly on this page.
📸
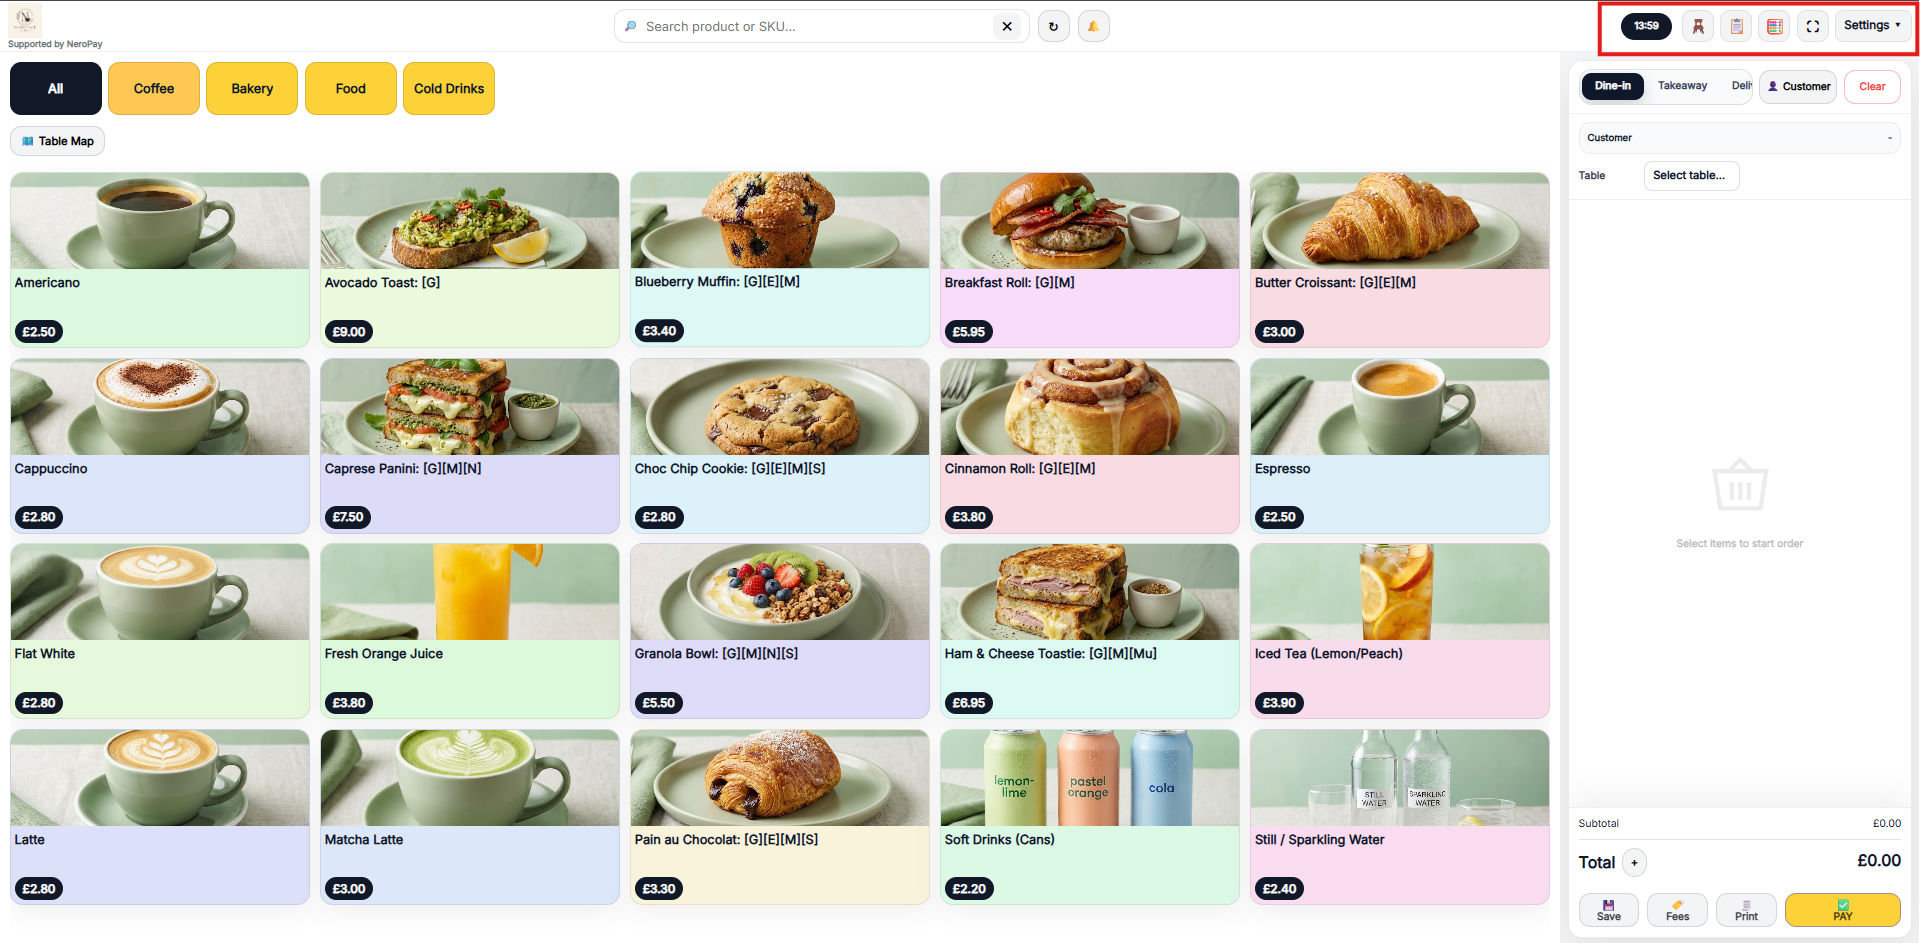
And you could see a different view from the EPOS, access from the top-right corver icons
📸
10. Widget — sharing your booking link
For security reasons, NeroPay does not provide an embeddable widget snippet such as an iframe or embed code. Instead, use your secure booking link:
Your secure booking link:
https://eu.neropay.app/nerobooking/widget/yourspecialcode
How to use it on your website
Add the link to a button on your website — for example, labelled Book now or Schedule a call.
If you'd like a branded link, you can set up domain forwarding so that a URL like book.yourdomain.com redirects to your secure booking link. We recommend forwarding via a 301 redirect rather than embedding.
💡 Need help setting up domain forwarding? Let us know your domain provider — such as Cloudflare, GoDaddy, or Namecheap — and we can point you to the exact steps.
Frequently asked questions
Q: Can I set different opening hours for different days? A: Yes. You can set individual opening and closing times for each day of the week, and turn off any days your business is closed.
Q: What happens if a customer tries to book on a holiday I've blocked? A: Those dates will not appear as available on your booking page, so customers will not be able to select them.
Q: Can I have different services at different locations? A: Yes. Once your locations are set up, you can configure services and staff per location. See [Managing your services and staff →] for details.
Q: Why can't I embed the booking widget directly on my website? A: For security reasons, NeroPay uses a secure booking link instead of an embeddable iframe. You can link to it from any button on your website, or set up domain forwarding for a branded experience.
Still need help? Contact us at support@neropay.app or create a ticket