Connected Accounts is where you create a merchant and manage it afterwards. The register lists every account on your platform with its onboarding, KYC and activity state, the New connected merchant wizard creates a new one in five validated steps, and the account panel holds the balances, login access, pricing, limits and verification tools for a single merchant. This article walks through all three.
The register
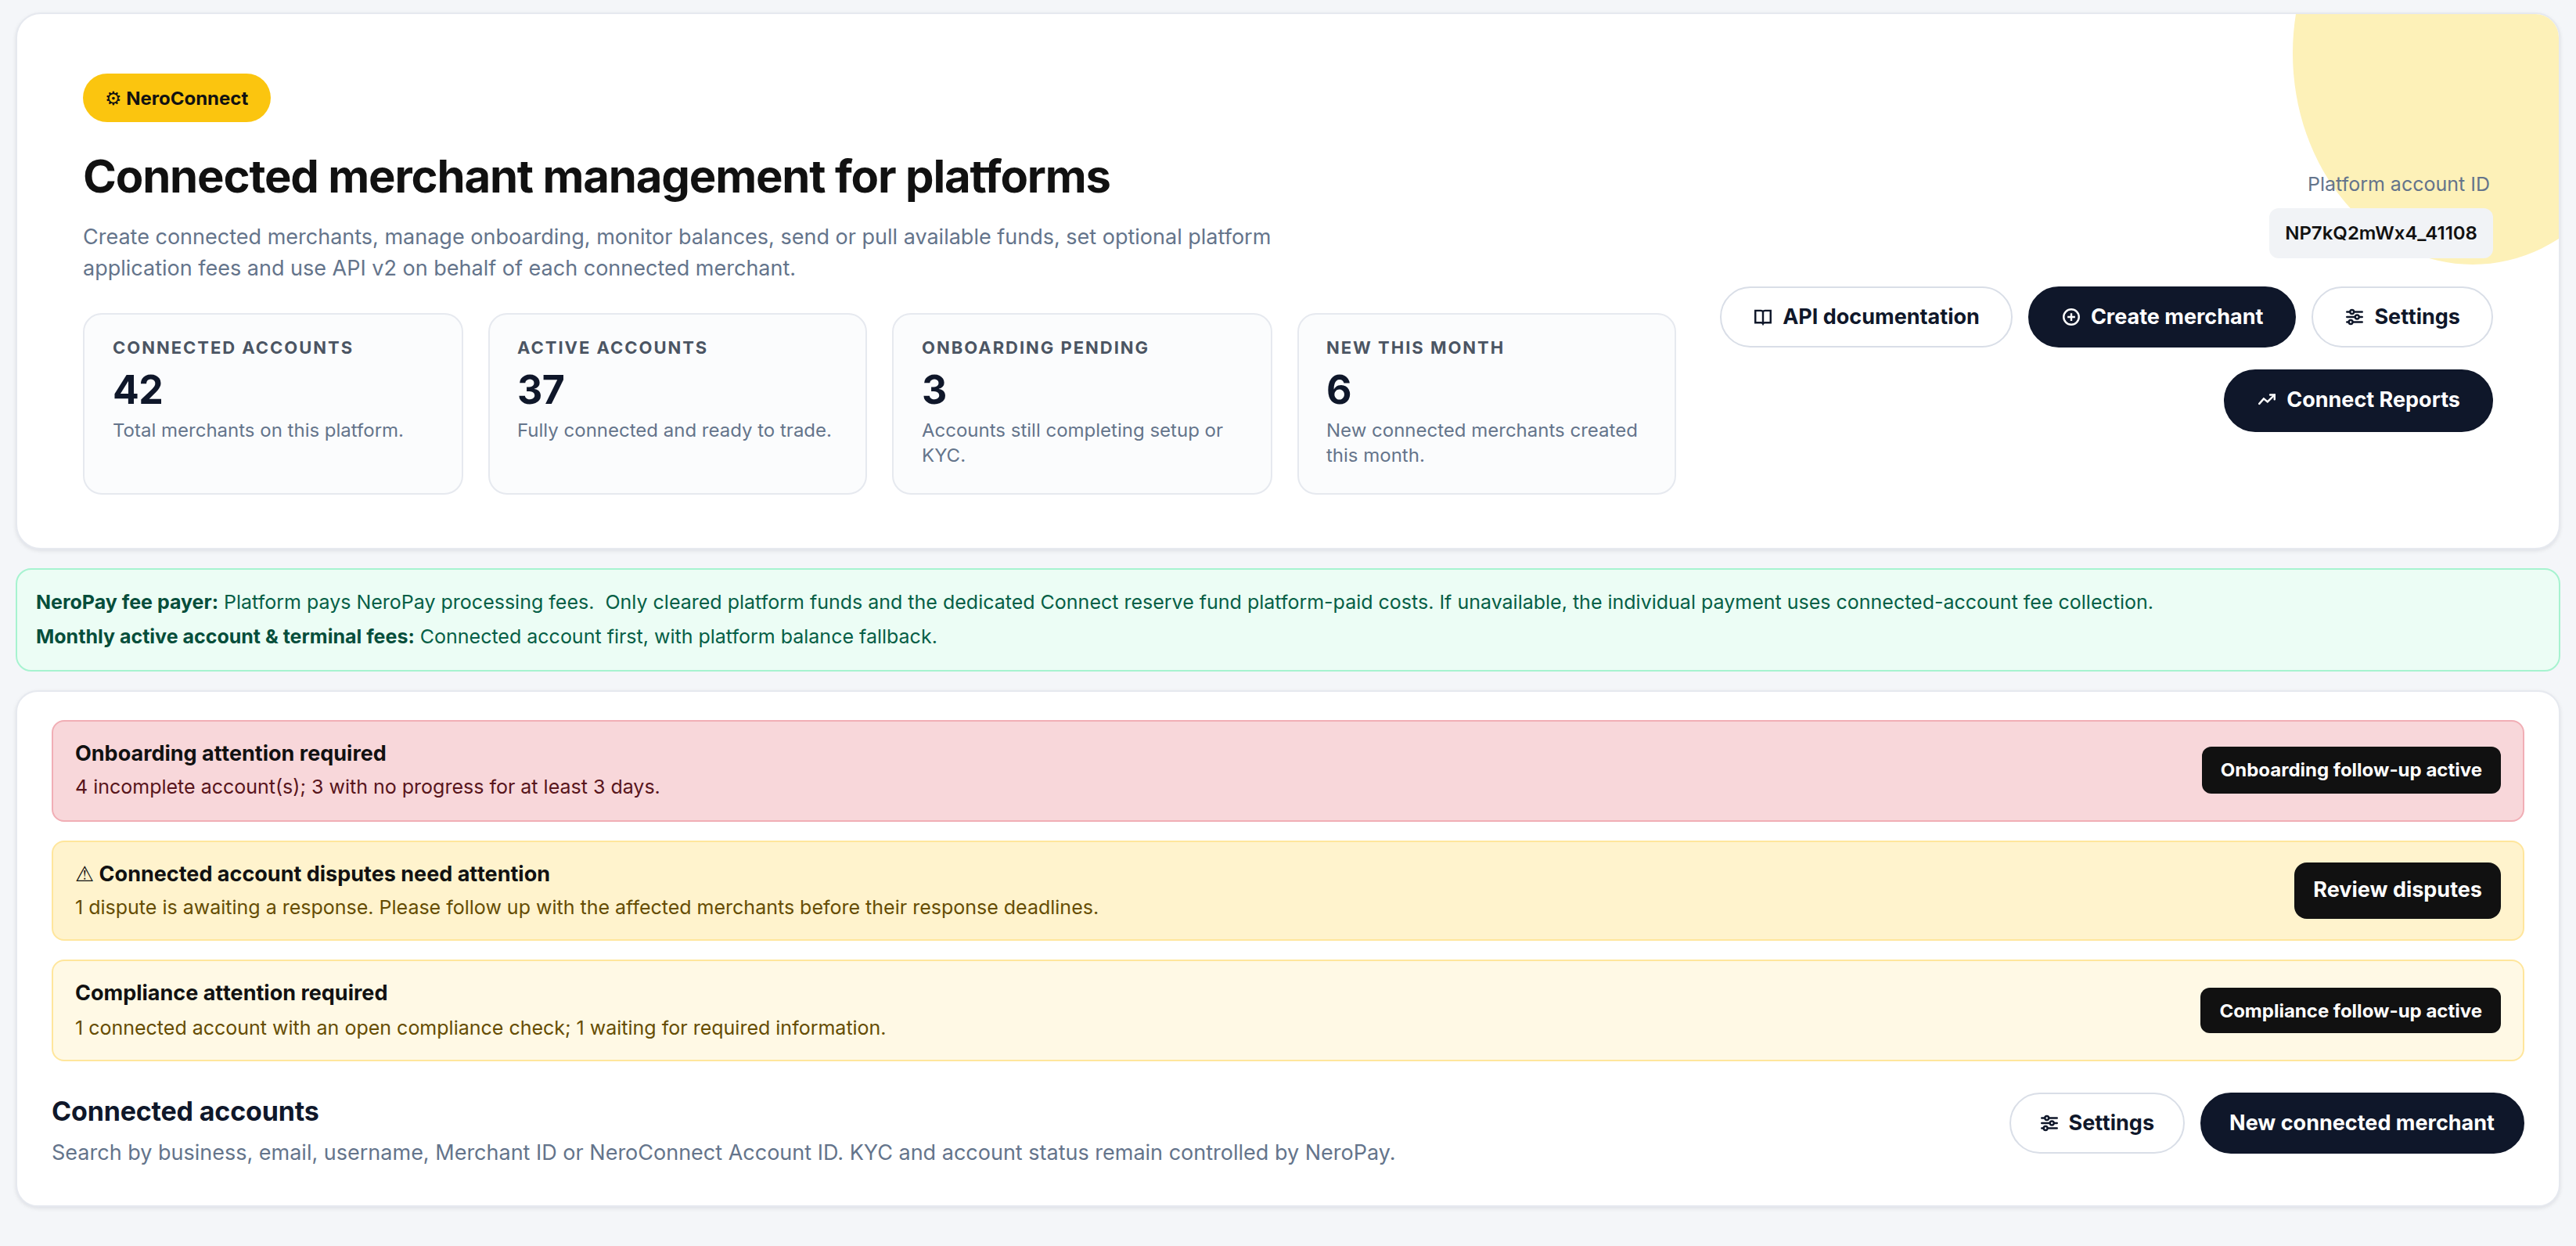
Go to NeroConnect → Connected Accounts. The page header repeats the estate counts from the dashboard and shows your platform account ID, which identifies your platform when it acts on behalf of a merchant through the API. Beneath it, a banner states your current fee arrangement in plain language, and up to three attention banners appear when something needs a response — those are covered in Accounts needing attention.
📸 The Connected Accounts header, with the estate counts, the platform account ID, the fee-arrangement banner and the three attention banners above the register.
Filters
| Filter | What it narrows by |
|---|---|
| Search | Business name, email, username, Merchant ID or NeroConnect Account ID |
| Country | All countries, or one supported EU or UK market |
| Onboarding | All · Connected · Pending · Not started |
| Connection | All · Connected · Not connected |
Columns
| Column | What it shows |
|---|---|
| Account ID | Country flag and the NeroConnect account ID |
| Business | Trading name, username and last login — a dash if the merchant has never signed in |
| The merchant's contact address | |
| Created / Creator | Creation timestamp, then the platform entity and role that created the account |
| Account mode | Full active, or Deactivated where the platform has switched the account off |
| Channel | E-commerce, Terminal or No activity — the channel the merchant has actually transacted on, not the one it was set up for |
| Attention | No action, or the stalled onboarding step with its age and a Send reminder control |
| Onboarding | Connected · Pending · Not started |
| KYC | Verified or Unverified — set by NeroPay, never by the platform |
| Actions | View opens the account panel |
📸 The register with its four filters and the columns described above.
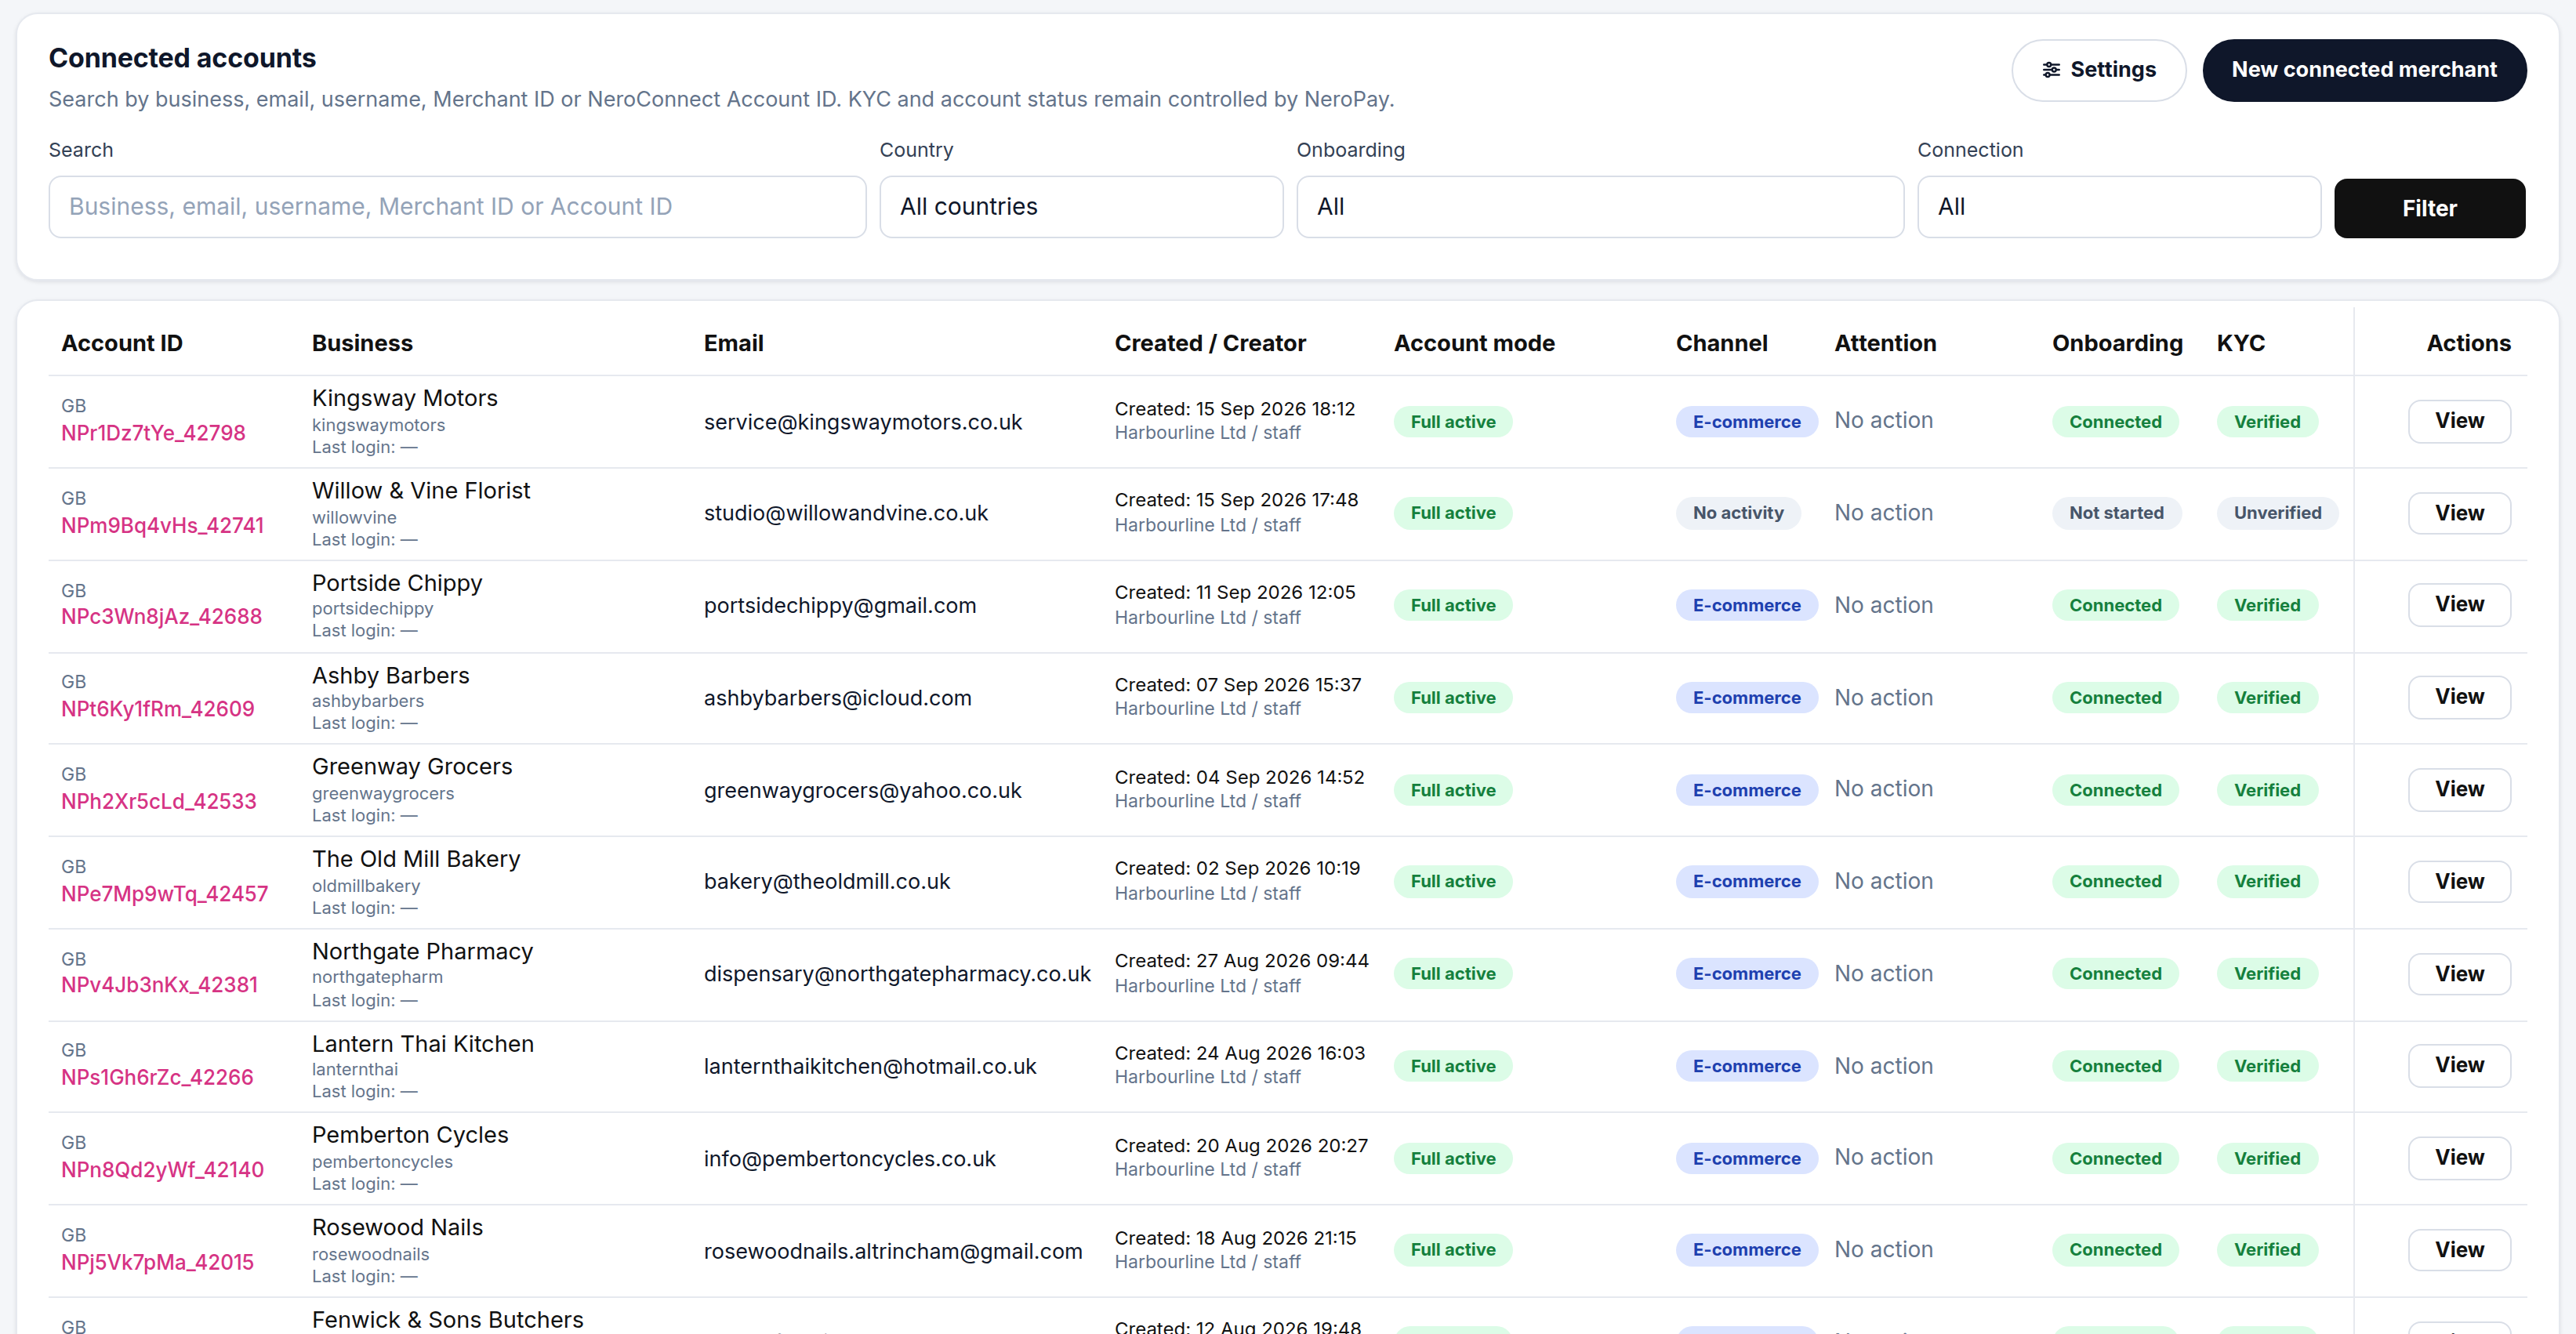
💡 Note: Onboarding and KYC answer different questions. Onboarding is whether the merchant has finished the set-up steps; KYC is whether NeroPay has verified the business. An account can be Connected and still Unverified while NeroPay's check completes.
Creating a merchant
Press New connected merchant to open the five-step wizard. Each step validates before the next unlocks, so the steps cannot be skipped or completed out of order.
| Step | What you enter |
|---|---|
| 1 · Authorised person | First and last name, nationality, date of birth, account country, email and mobile. Minimum age 13 |
| 2 · Business | Trading and legal identity |
| 3 · Addresses | Registered and trading addresses |
| 4 · Terms | Agreement acceptance |
| 5 · Review | Confirm the details and create the account |
The two country fields in step 1 are deliberately separate. Account country must be a NeroPay-supported country; it drives the dial code and the account's home market. Nationality is the authorised person's citizenship, chosen from the full country list, and does not change the account's country.
💡 Note: NeroFree is applied to the new account automatically. KYC still runs through NeroPay after creation, which is why a freshly created account shows Unverified until that check completes.
The account panel
Press View on any row and a full-height panel slides in. The header shows the business name and account ID, plus View dashboard as connected account, which opens the merchant's own dashboard as they see it — useful when supporting them. Directly below is the balance strip.
| Balance | Means |
|---|---|
| Normal balance | The merchant's payment wallet |
| NeroBusiness balance | Snapshot of the linked financial account, where one exists |
| Reserve balance | Funds held back on this merchant |
| Debt balance | Amount due. A negative figure means the merchant owes NeroPay — usually an unfunded fee |
Merchant login access
| Control | What it does |
|---|---|
| Send login invitation | Emails the merchant a set-up link |
| Set password once | Sets a password directly. Usable a single time; after that the merchant uses the normal reset flow |
A Login setup available badge shows while neither control has been used.
Add / pull funds
Two mirrored forms: Send funds to connected account and Pull funds to platform. Each takes an amount, a currency with the available balance shown inline, and an optional transfer group or note. This is how you settle a shortfall on a merchant or recover an overpayment.
Merchant pricing
This account's own rates by channel and additional service, overriding your platform default. The fields, the protected base and the precedence rules are explained in How pricing works — who sets what.
Connected-account payout limits
Eight limit fields, each showing the effective value beside NeroPay's value. A blank field inherits, and a platform value can only make a limit stricter. See Payout limits and hard caps.
Rates & limits
A read-only companion showing what is actually in force once your choices and NeroPay's caps are applied: the display card rate, authorisation and fixed fee, any stored bespoke rate, the full pricing table including monthly account and terminal fees and the weekly minimum, and the eight effective transfer limits. Check here when a merchant asks what they are being charged.
Funding access
| Option | Effect on the NeroFinance menu |
|---|---|
| Inherit platform default | Follows your platform-wide setting |
| Show | Menu visible to this merchant |
| Hide | Menu hidden from this merchant |
⚠️ Funding access controls menu visibility only. It does not change whether the merchant is eligible for, or approved for, finance.
Identity verify
Generates and stores an identity verification link for the merchant: Create new link and Open latest link. A KYC verified badge shows the current state. Links expire quickly, so generate one immediately before you send it rather than in advance.
The panel footer
Every tab ends with the same footer. It shows the account reference your platform uses when acting on behalf of this merchant through the API — those calls appear in Connect API Logs — and a Connected account access block.
Deactivation is a platform-side action. It is recorded as such and can be reversed, and it sits alongside, not above, anything NeroPay has done: a platform deactivation does not override a separate NeroPay compliance action, and reactivating from your side does not lift one. With that understood, press Deactivate Connected Account to switch the merchant off. Its Account mode in the register changes to Deactivated.
Frequently asked questions
Why can I not move to step 2 of the wizard?
Each step validates before the next unlocks. Check every field on the current step — including that the authorised person is at least 13 and that the account country is one NeroPay supports — and the next step opens.
I set the nationality to a country outside the UK and EU. Has that changed the account's country?
No. Nationality records the authorised person's citizenship and can be any country. The account's home market and dial code come from Account country, which must be a supported market.
The merchant says the verification link has expired. What now?
Open the Identity verify tab and press Create new link, then send it straight away. Links are short-lived by design.
I used Set password once. Can I use it again?
No. It works a single time. After that the merchant resets their password through the normal reset flow, or you can send a login invitation.
I deactivated an account but NeroPay had already suspended it. Which applies?
Both are recorded separately. Reversing your deactivation restores the platform side only; the NeroPay compliance action stays in place until NeroPay lifts it.
Still need help? Contact us at support@neropay.app or create a ticket.