Part 1 — Registers
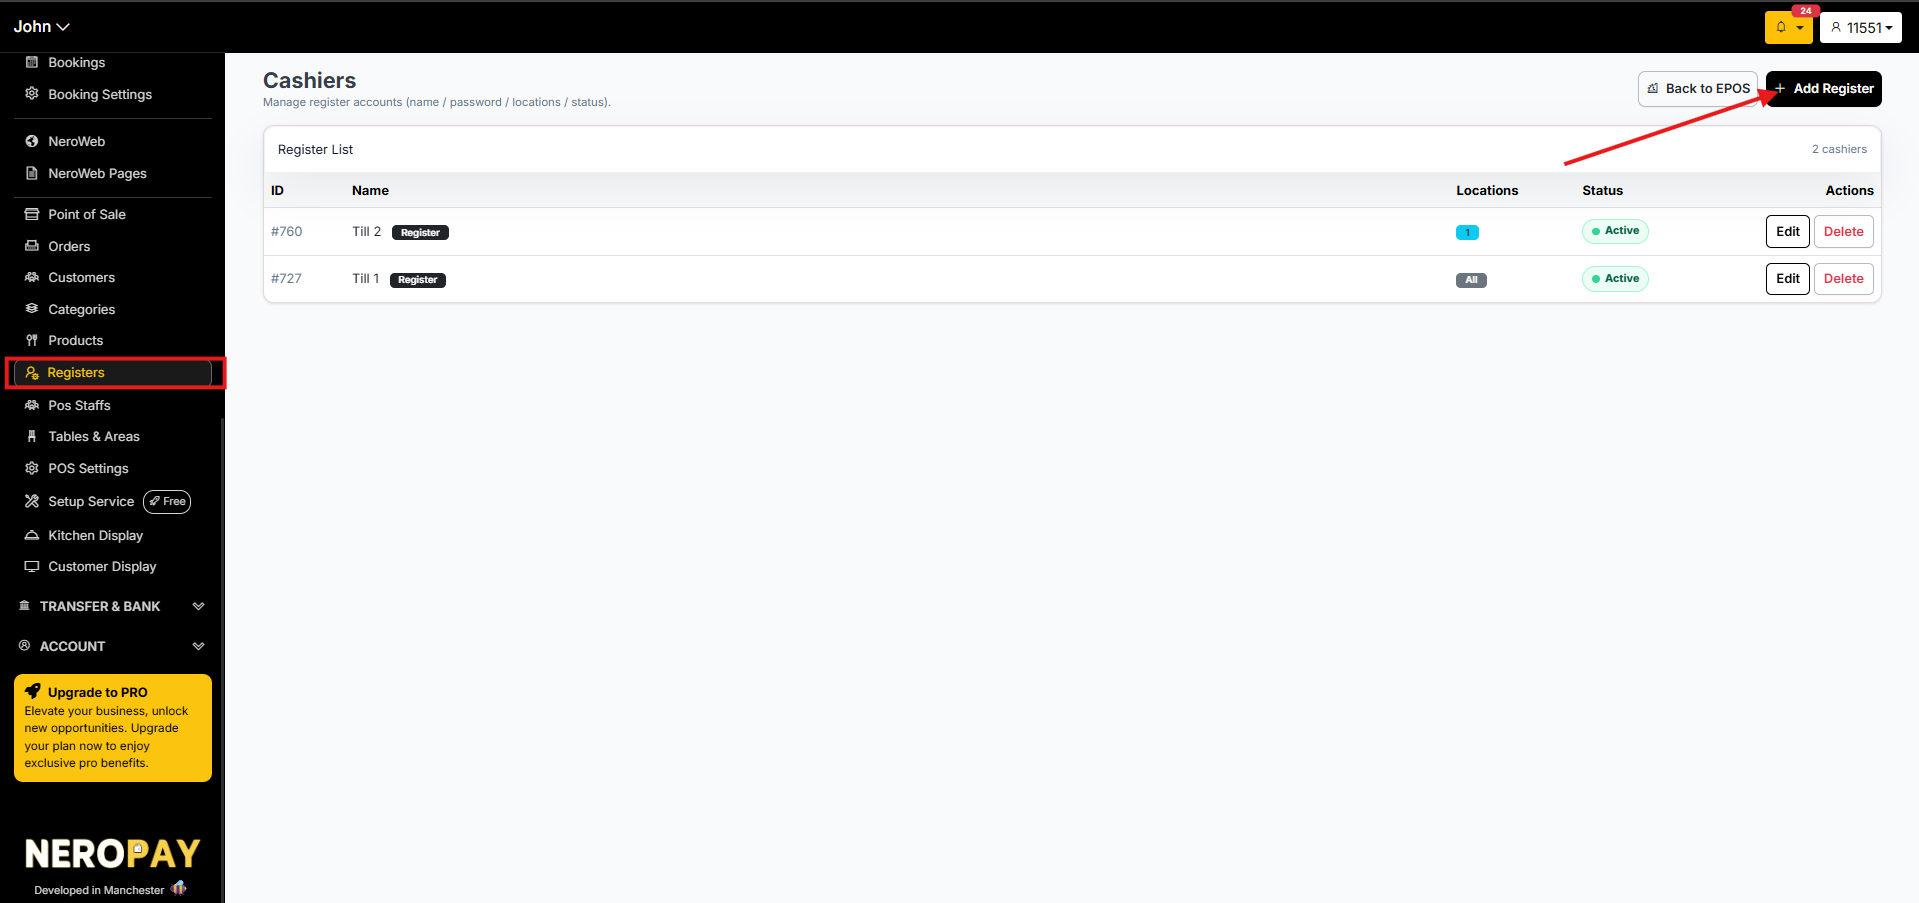
Registers are the named tills or cashier accounts on your POS. Each register can be assigned to a specific location and role, giving you full control over access across your team.
How to get there
From your dashboard, follow this path:
NeroPOS → Registers
📸
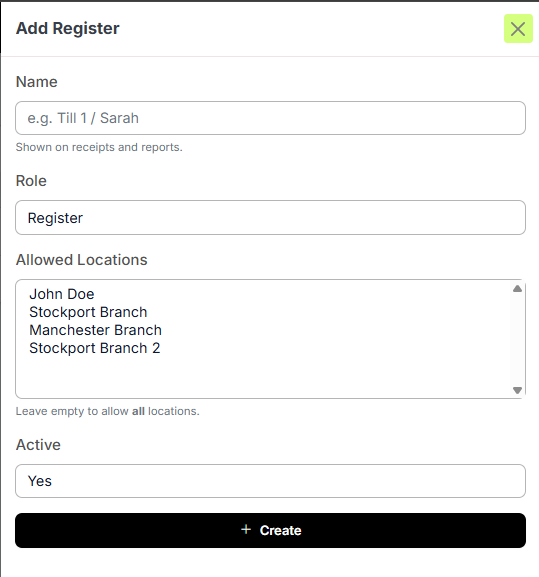
How to add a register
- Click + Add Register
- Fill in the following fields:
| Field | What to enter |
|---|---|
| Name | The name of the till or cashier — for example, Till 1 or Sarah. Shown on receipts and reports |
| Role | The access level for this register — for example, Register |
| Allowed locations | Select which locations this register can be used at. Leave empty to allow all locations |
| Active | Set to Yes to activate the register |
- Click + Create
📸
💡 Tip: Keep register names consistent across your venue — for example, Front, Bar, Terrace. This makes it easier to identify which till processed an order in your reports.
Part 2 — Creating staff logins
Once registers are set up, create individual login credentials for each team member. Always create separate logins per staff member rather than sharing one — this lets you track who processed which order and manage any discrepancies effectively.
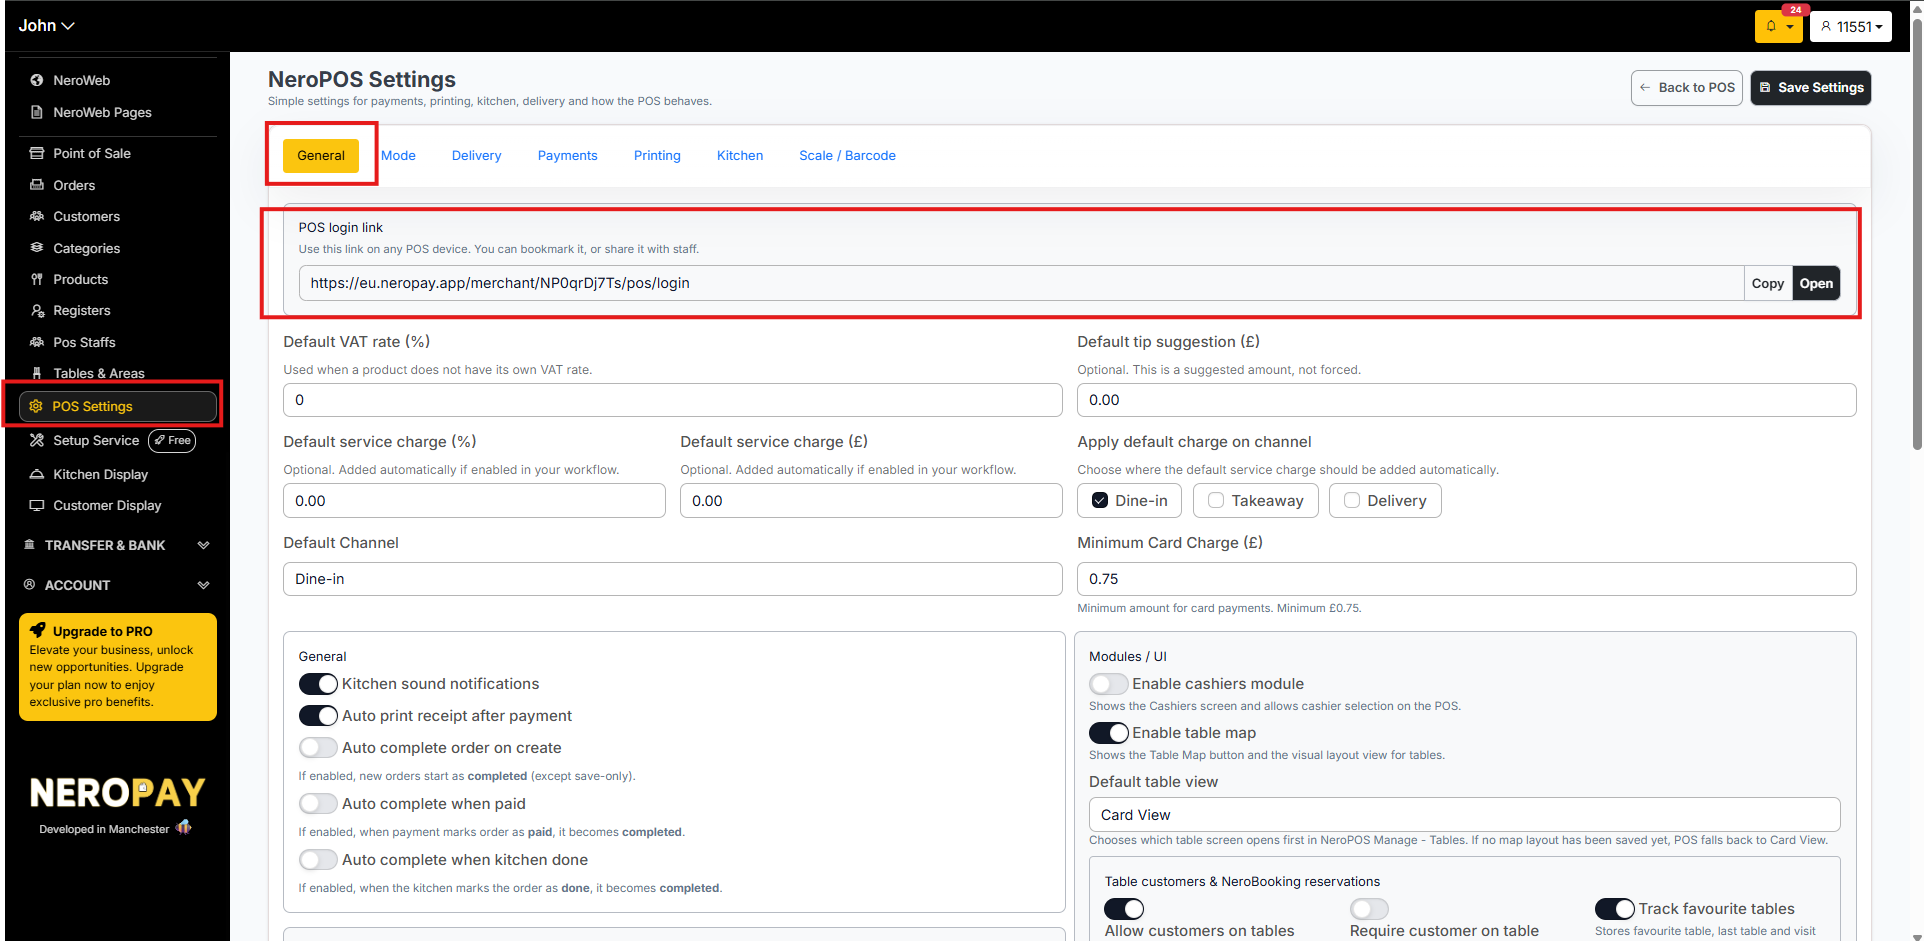
Step 1 — Find your POS login link
Before staff can log in, you need to share the dedicated POS login link with them:
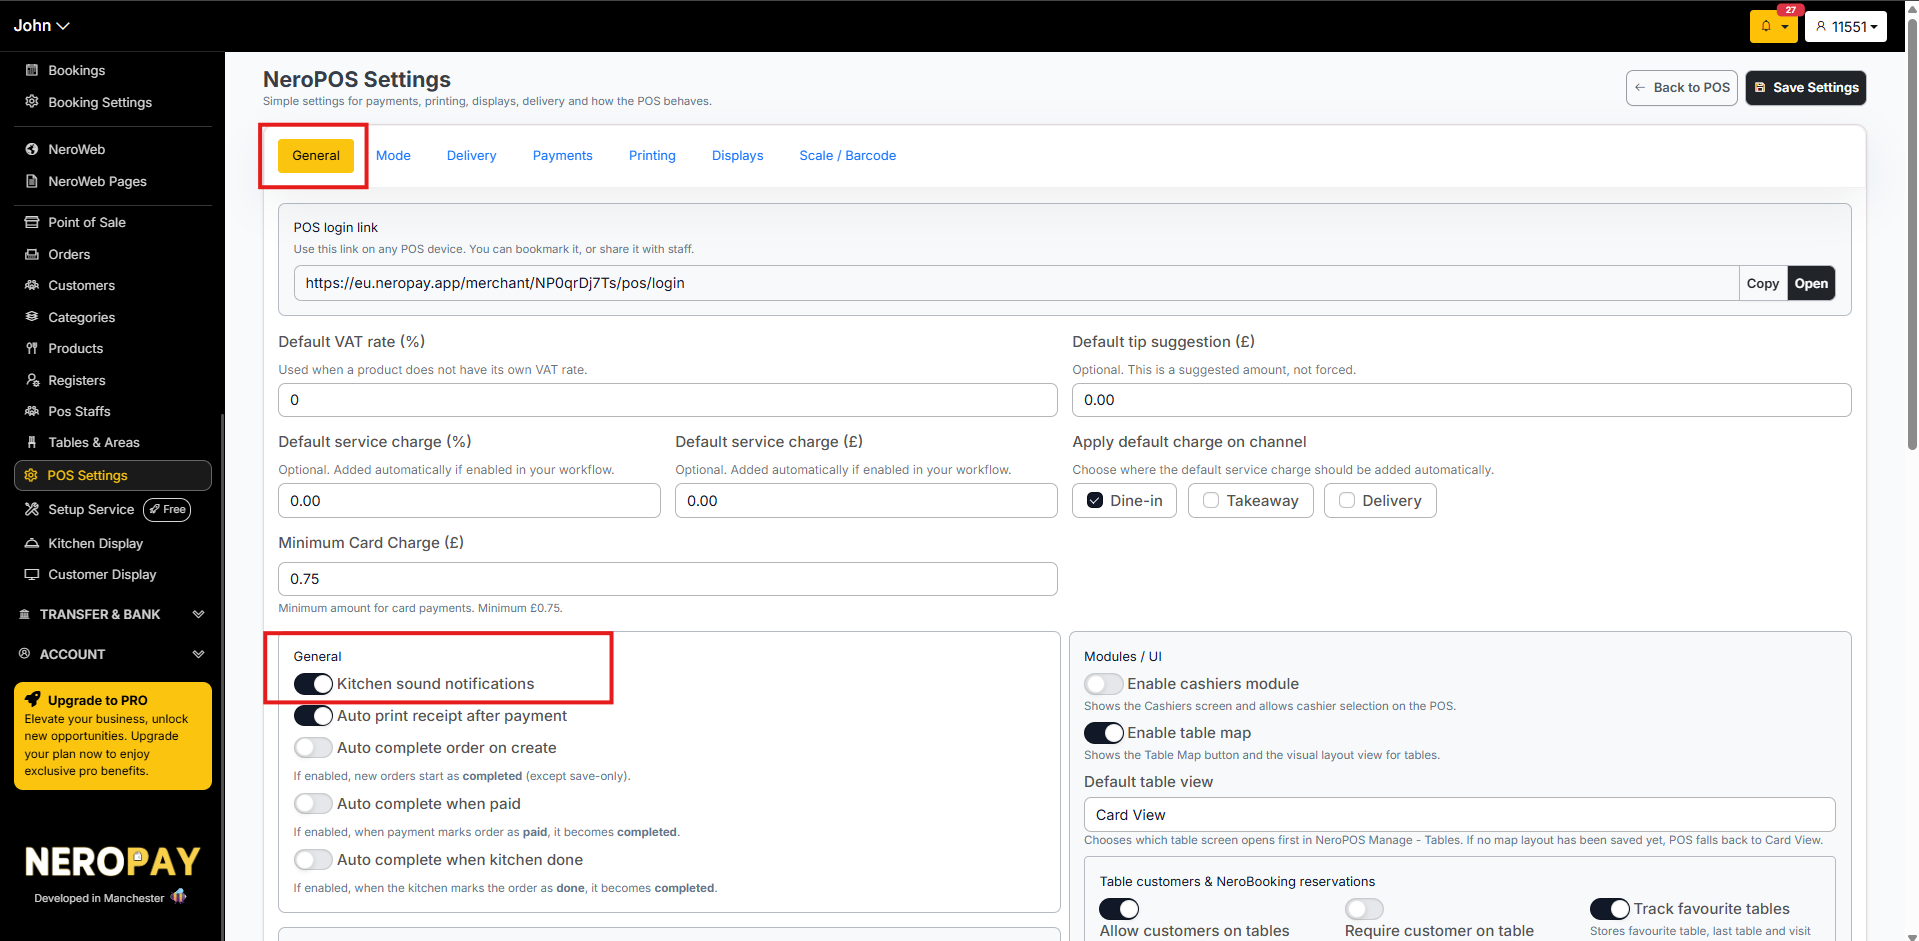
- Go to NeroPOS → POS Settings → General
- At the top of the page, find the field labelled POS Login Link
- Click Copy and share the link with your staff, or bookmark it on your store's tablets and tills
📸
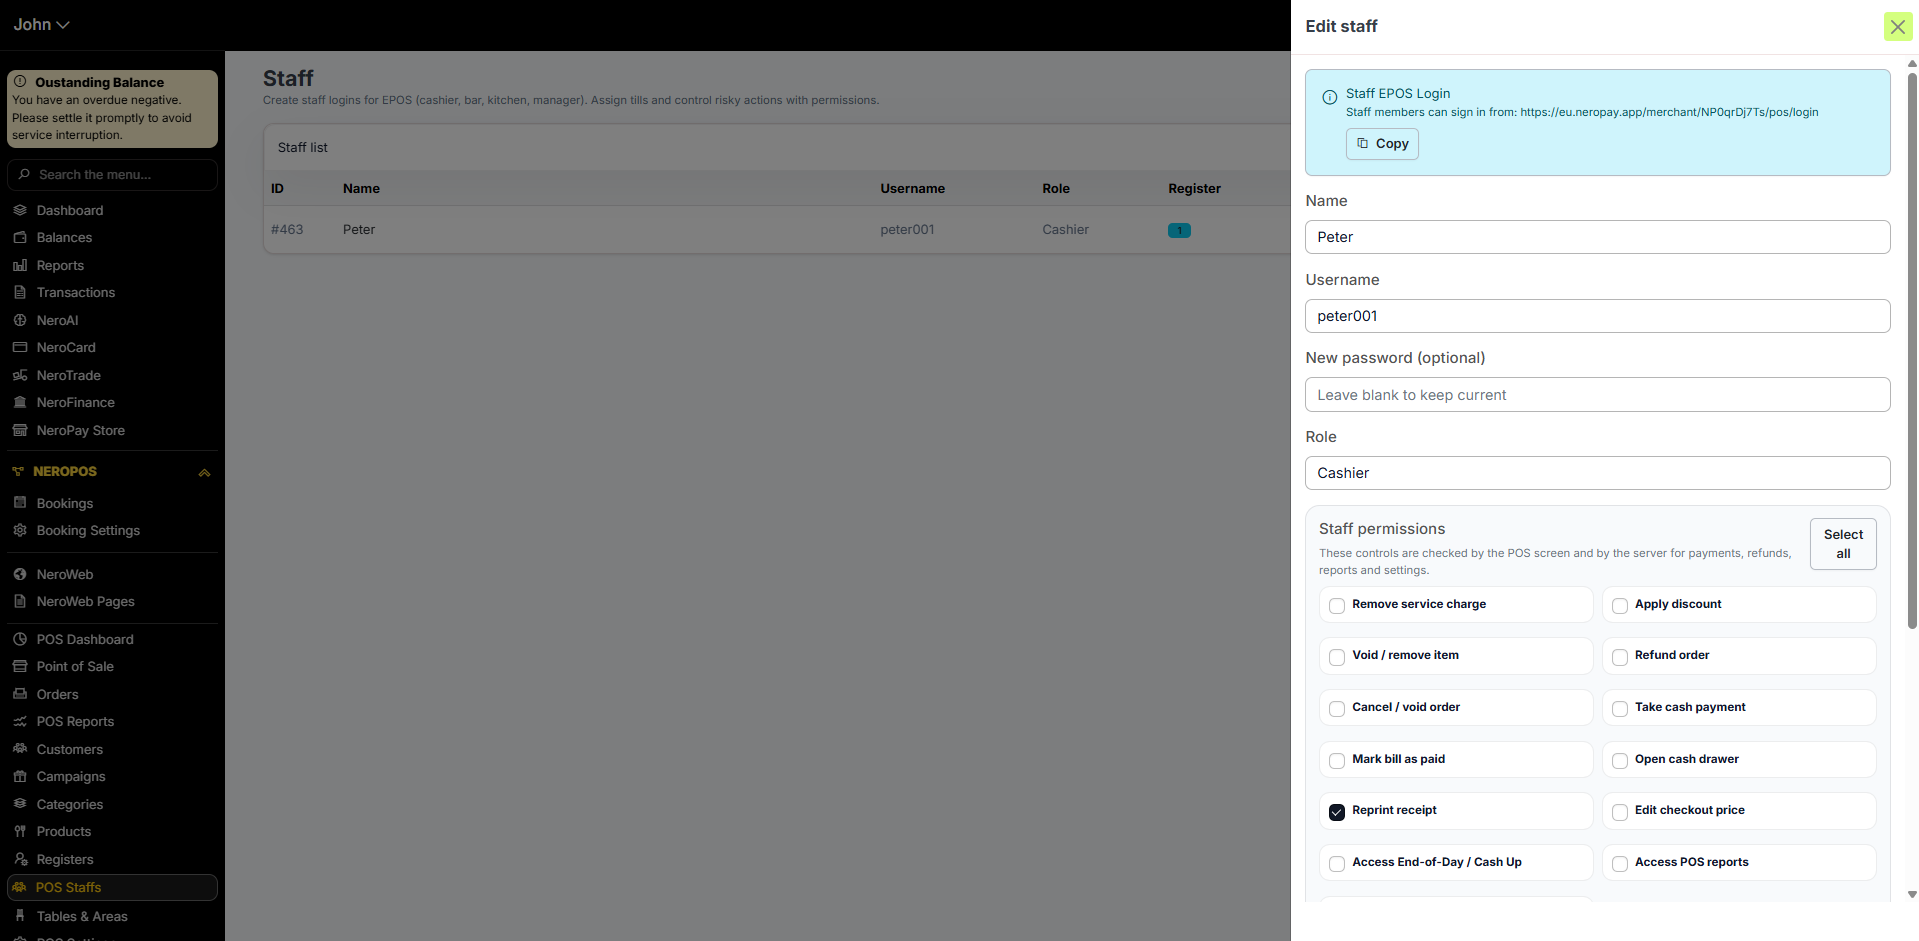
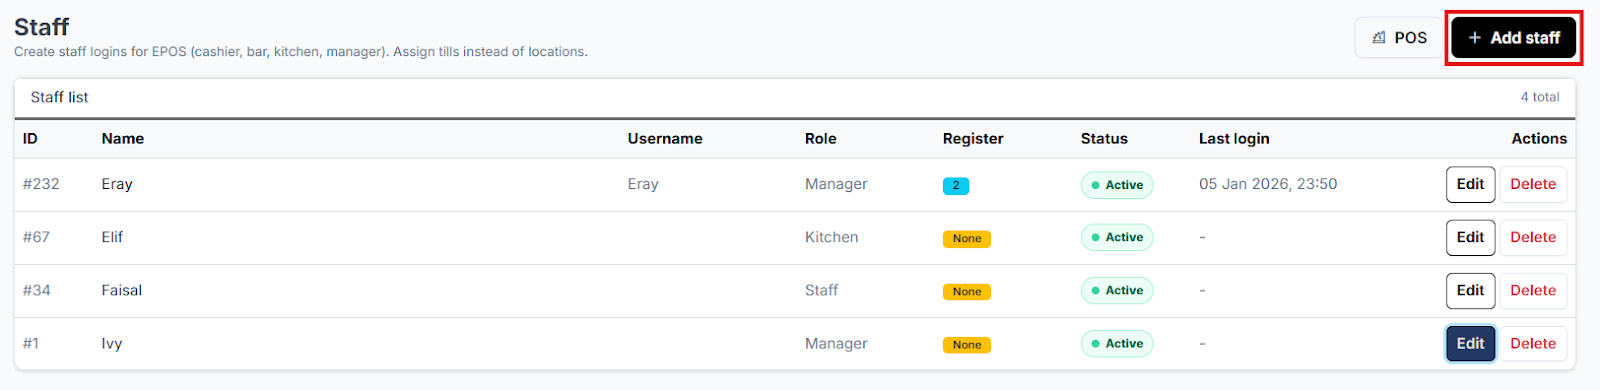
Step 2 — Create a staff member
- Go to NeroPOS → POS Staffs
- Click Add Staff in the top right corner
- Fill in the following details:
- Name — the staff member's full name
- Username and password — unique credentials they will use to log in
- Role — select a role from the dropdown, for example Cashier. This defines their permission level within the POS
- Till — select the specific till this staff member is authorised to use
- Click Create Staff to save the profile
📸
You can manage the aceess directly from edit to give different accesses for each staff. The login link could be found here as well

Step 3 — Staff log in to the POS
When staff open the POS login link, they will:
- Enter their username and password
- Select their location
- Select their register
- Click Continue to EPOS
⚠️ Note: These settings are locked for the session once selected. To change location or register, staff must sign out first.
📸

Step 4 — Save your settings
After creating staff profiles and till assignments, click Save Settings on the relevant pages to make sure all permissions are synced to your live system.
Part 3 — POS Staffs
How to get there
From your dashboard, follow this path:
NeroPOS → POS Staffs
POS Staffs is where you manage all individual staff members who can log in to the POS. Each staff member is linked to a register and location so you can control exactly who has access to what. You can edit, deactivate, or remove staff profiles from here at any time.
📸
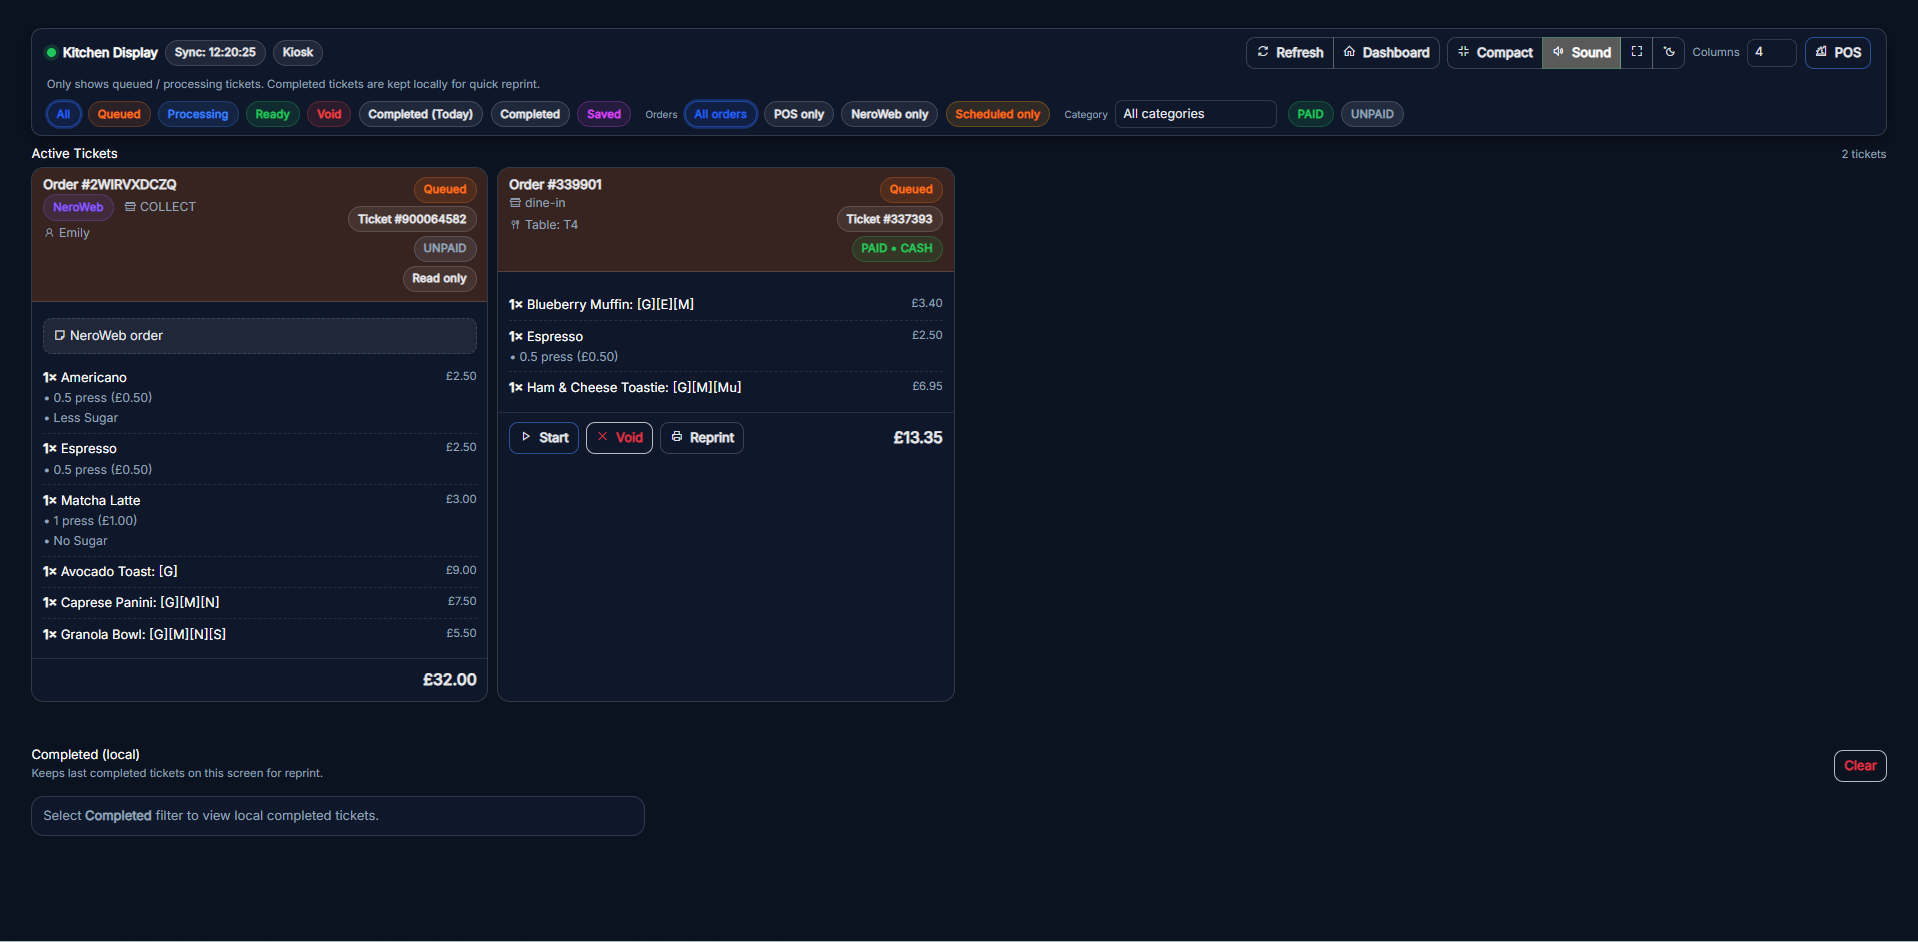
Part 4 — Kitchen Display
How to get there
From your dashboard, follow this path:
NeroPOS → Kitchen Display
The Kitchen Display is a dedicated screen for your kitchen team. It syncs automatically with your EPOS and displays incoming orders in real time — so chefs always know what to prepare without needing printed tickets. You are able to check the orders from EPOS or website respectively with the filter.
Key features:
- Synced live with your EPOS and NeroWeb orders
- Chefs can mark orders as done directly from the screen
- Works alongside the Auto complete when the kitchen is done setting: see NeroPOS settings -> General
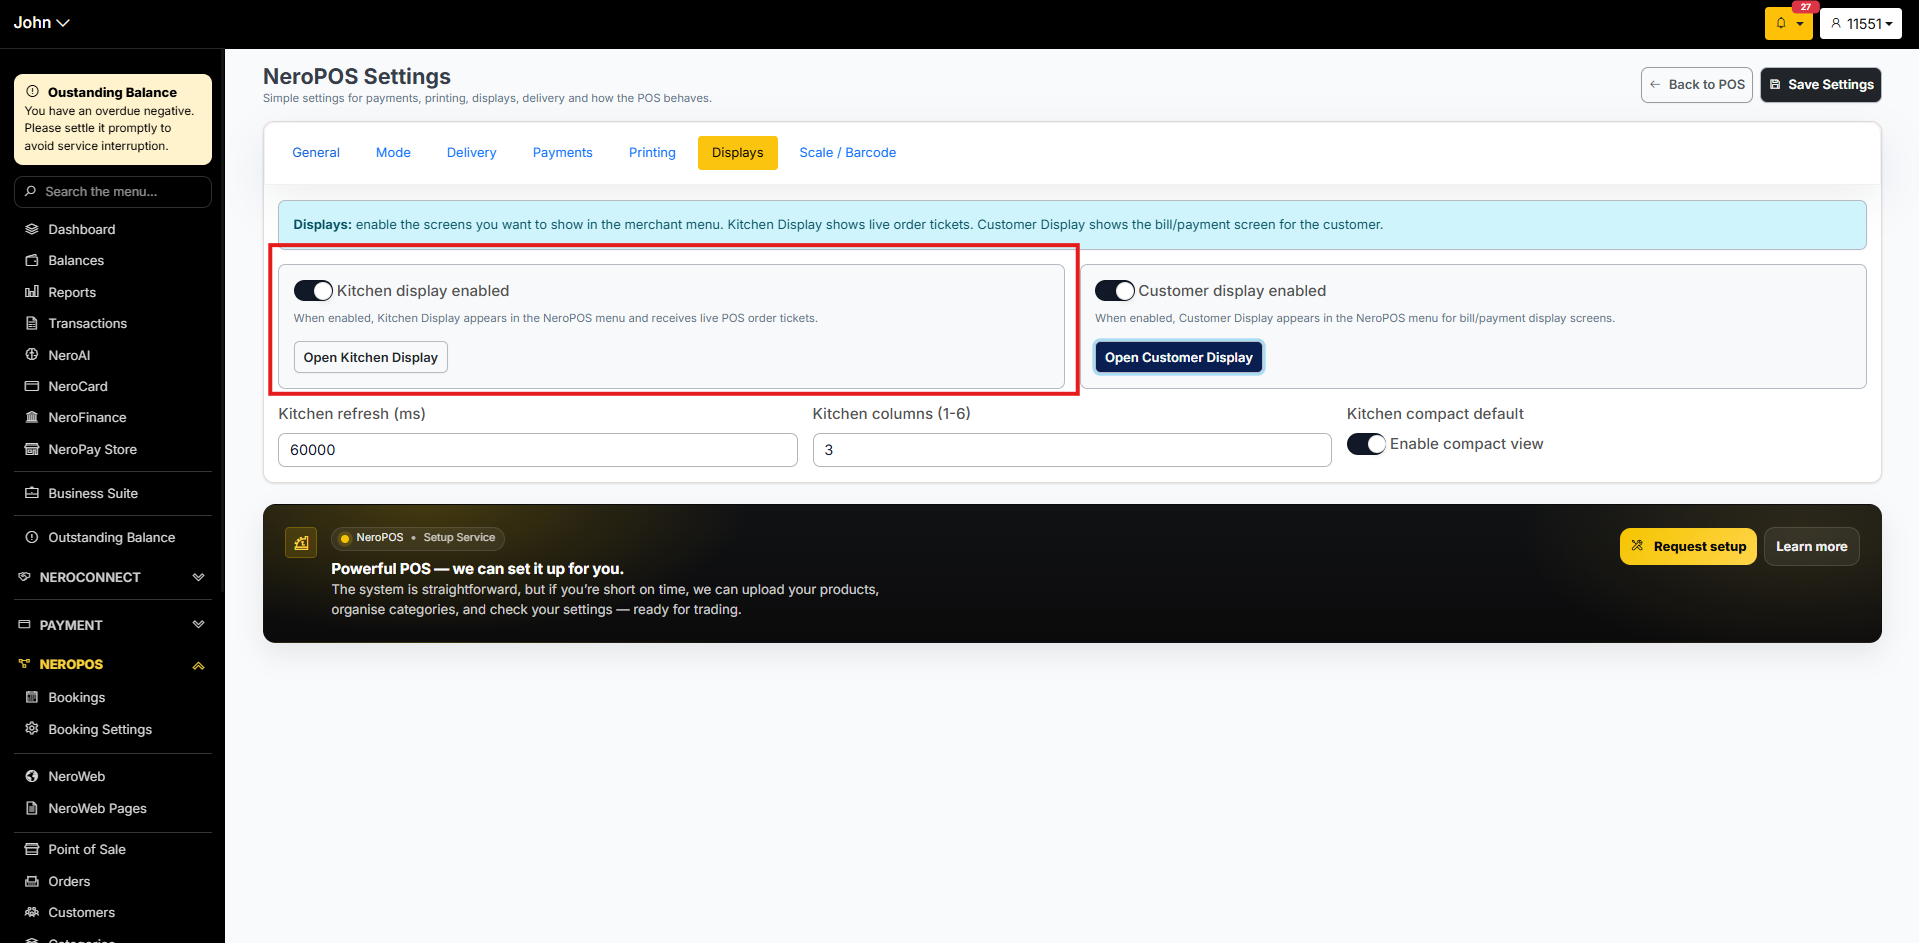
- Make sure the Kitchen display enabled is switched on in NeroPOS Settings -> Display.
📸
Part 5 — Customer Display
How to get there
From your dashboard, follow this path:
NeroPOS → Customer Display
The Customer Display is the screen on the customer-facing side of your EPOS terminal. While staff use one side to take the order, the customer can see their order summary and total on the other side in real time.
NeroPay terminals support dual screens — one for staff and one for customers — giving your checkout a professional, transparent feel.
📸
Frequently asked questions
Q: Where do I find the POS login link to share with staff? A: Go to NeroPOS → POS Settings → General. The POS login link is at the top of the page — click Copy to copy it to your clipboard.
Q: Can a register be used at more than one location? A: Yes. Leave the Allowed Locations field empty when creating the register to allow it to be used at all locations, or select specific branches to restrict access.
Q: Can staff access the main dashboard through the POS login link? A: No. The POS login link takes staff directly to the EPOS order-taking screen only. They will not be able to access financial reports, transaction history, or business settings.
Q: Why should I create separate logins for each staff member? A: Individual logins allow you to track which staff member processed each order, making it much easier to manage discrepancies and maintain accountability across your team.
Q: Do I need a separate screen for the Kitchen Display? A: Yes. The Kitchen Display is designed to run on a separate screen or tablet placed in the kitchen. It connects to your NeroPay account and syncs automatically.
Q: What does the customer see on the Customer Display? A: A live view of their order and running total as items are added to the basket — increasing transparency and reducing disputes at the till.
Still need help? Contact us at support@neropay.app or create a ticket