Setting up a mobile app takes four steps in the dashboard: choose a plan, enter your app details, pay, and let NeroPay prepare the app. You choose iOS, Android or both in the first step, and the rest of the setup works the same way for each. Have your website address, privacy policy link and logo ready before you start.
Before you begin
| What you need | Details |
|---|---|
| Your website address | The full URL of your NeroBooking widget, NeroWeb store or own website |
| A privacy policy link | A public page the app stores can check |
| Your icon | A square logo file, or a letter or emoji and a background colour |
| Developer account details | Account or team ID and invitation status, if publishing through your own developer account |
| A payment card | For the monthly subscription, VAT included |
New to Mobile Apps? Start with the Mobile Apps overview for what each plan includes.
Step 1 — choose iOS, Android or both
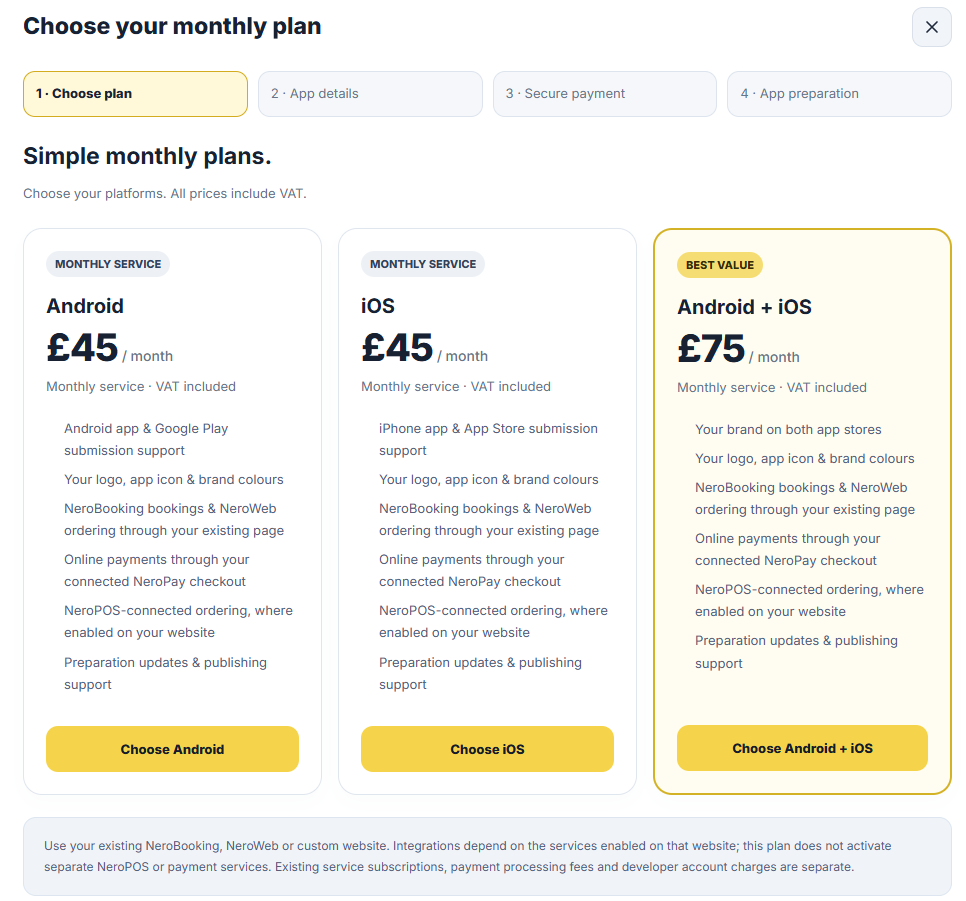
Go to NeroPOS → Mobile Apps in the dashboard sidebar and select Create my app. The first step asks which platforms you want.
| Plan | Choose it if |
|---|---|
| Android | You want an Android app listed on Google Play |
| iOS | You want an iPhone app listed on the App Store |
| Android + iOS | You want to reach customers on both; the best-value plan |
Select Choose Android, Choose iOS or Choose Android + iOS to continue.
📸 Step 1: pick the platform for your app. Prices include VAT. Figures shown are illustrative.
💡 Note: The screenshots in this guide show an Android app. The steps are the same for iOS; where a field refers to Google Play, an iOS app refers to your Apple developer account instead.
Step 2 — enter your app details
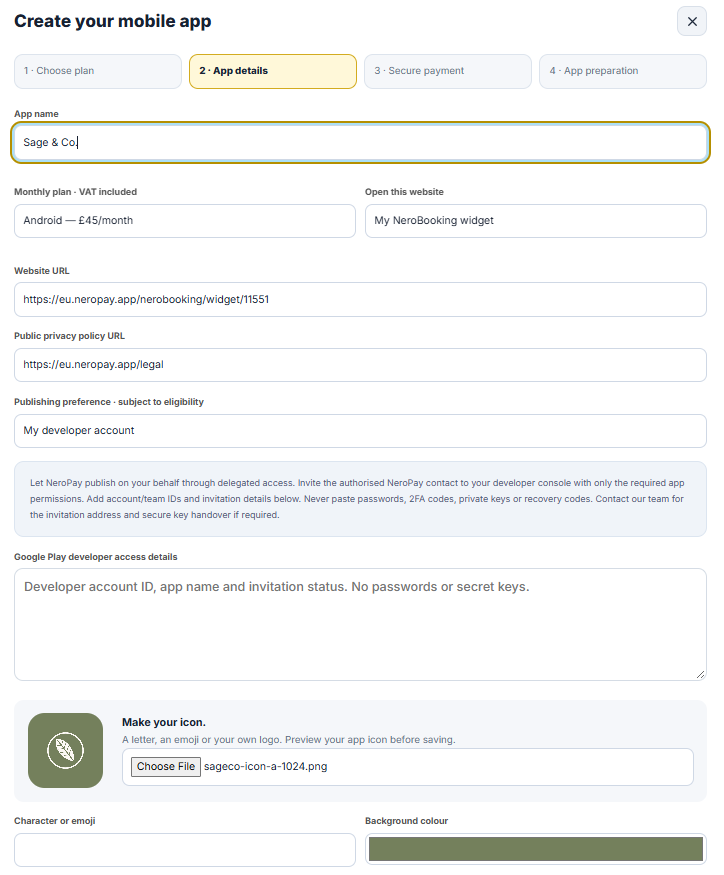
| Field | What to enter |
|---|---|
| App name | The name shown under the icon on customers’ phones, usually your business name |
| Monthly plan | The plan from step 1; change it here if you need a different platform |
| Open this website | Which site the app opens: your NeroBooking widget, NeroWeb store or own website |
| Website URL | The full web address of that page, as shown in the browser address bar |
| Public privacy policy URL | A public link to your privacy policy; the field starts with NeroPay’s legal page, so replace it with your own if you have one |
| Publishing preference | How the app is published to the store; options depend on eligibility |
| Developer access details | Developer account ID, app name and invitation status only |
📸 Step 2: app details for an Android app, with a custom logo uploaded as the icon. Figures shown are illustrative.
Publishing preference and developer access
With My developer account, your app is listed under your own Google Play or Apple developer account and NeroPay publishes it on your behalf through delegated access. Invite the authorised NeroPay contact to your developer console with only the permissions the app needs, then add your account or team ID and the invitation status in the developer access field. Contact support for the invitation address. Other options appear in the list when your account is eligible for them.
⚠️ Never enter passwords, two-factor codes, private keys or recovery codes in any field. NeroPay does not need them to publish your app.
Make your icon
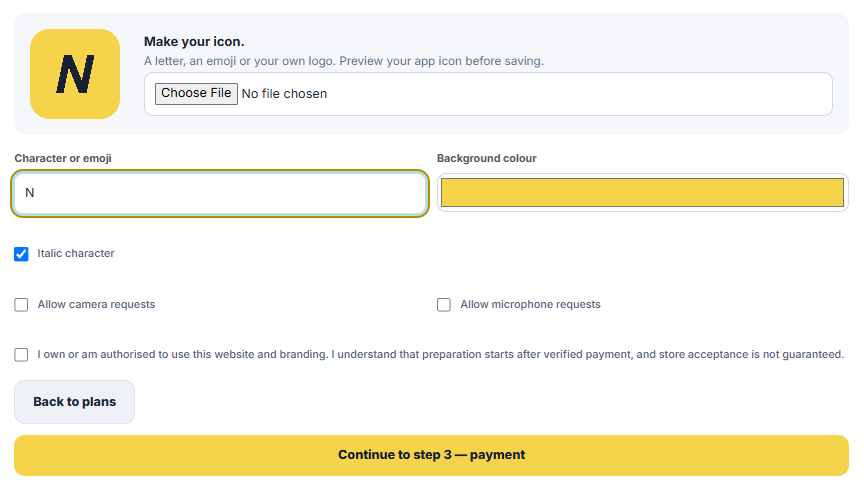
| Option | How to set it |
|---|---|
| Your own logo | Select Choose File and upload a square image |
| Letter or emoji | Type one character or emoji in Character or emoji |
| Background colour | Pick the colour behind the letter or emoji |
| Italic character | Tick to slant the letter |
The preview beside Make your icon updates as you change it, so you can check the icon before continuing.
Camera and microphone
| Setting | Tick it if |
|---|---|
| Allow camera requests | Your website asks customers to take or upload photos |
| Allow microphone requests | Your website records audio or uses voice features |
💡 Note: Leave both unticked if your website does not need them. The app stores check why an app asks for camera or microphone access.
📸 An icon made from a letter, with the permission options and confirmation below.
Confirm and continue
Tick the box to confirm you own or are authorised to use the website and branding, and that you understand preparation starts after verified payment and store acceptance is not guaranteed. Then select Continue to step 3 — payment. Back to plans returns you to step 1.
Step 3 — pay securely
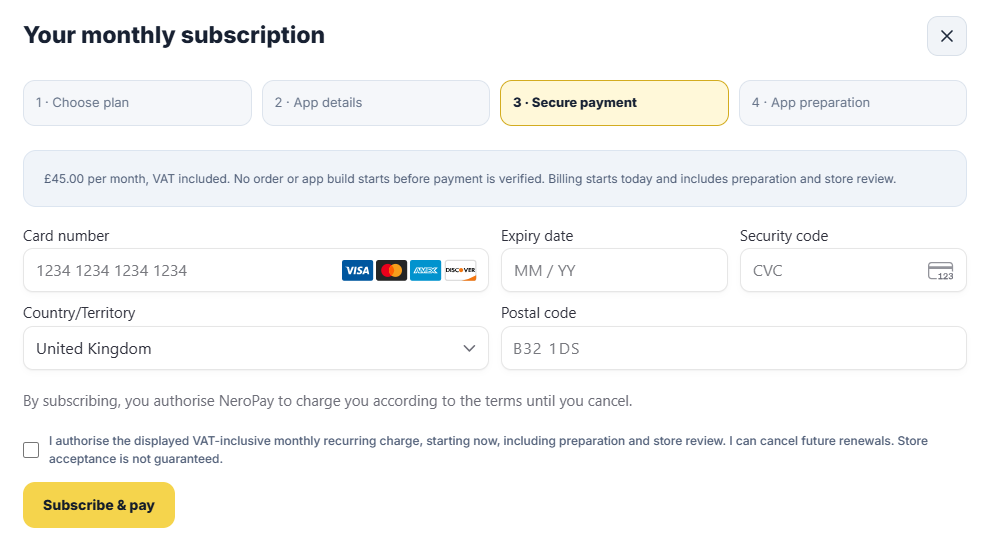
The payment step shows the monthly price for your plan, VAT included. No order or app build starts until payment is verified, and billing starts on the day you pay.
| Field | What to enter |
|---|---|
| Card number | The long number on your card |
| Expiry date | Month and year, as MM / YY |
| Security code | The CVC on your card |
| Country/Territory | The country the card is registered in |
| Postal code | The billing postcode for the card |
Tick the box to authorise the monthly recurring charge, starting now and including preparation and store review, then select Subscribe & pay. You can cancel future renewals at any time.
📸 Step 3: secure payment for the monthly subscription. Figures shown are illustrative.
⚠️ Pay once. If the next step says payment is still being confirmed, select Refresh status rather than paying again.
Step 4 — app preparation
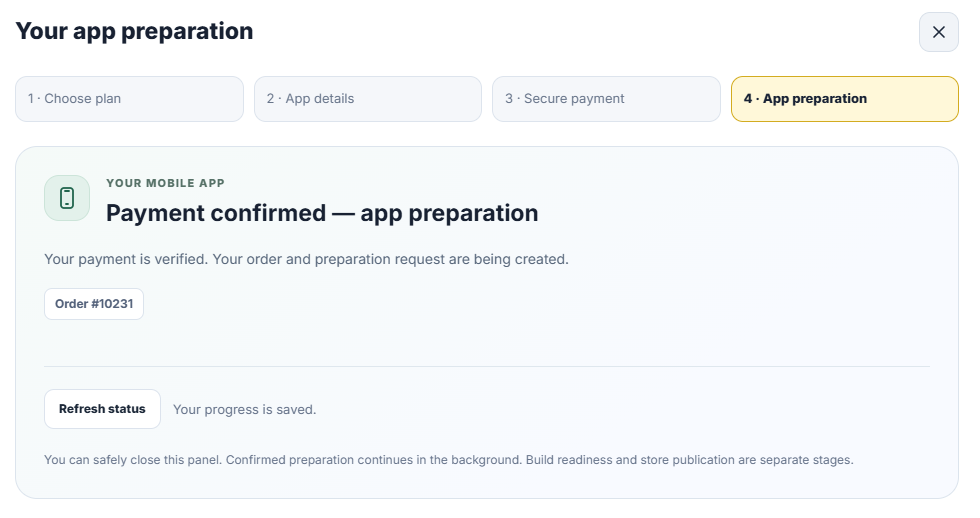
Once payment is verified, the panel shows Payment confirmed — app preparation with your order number. Your progress is saved, so you can close the panel; preparation continues in the background.
| Status | What it means |
|---|---|
| Payment confirmed — app preparation | Payment is verified and your order and preparation request are being created |
| Waiting for payment confirmation | Payment is not verified yet; select Refresh status and do not pay again |
| Ready to download | The build is prepared and can be downloaded from the app card |
| Store status: Not yet submitted | The build has not been sent to the store for review yet |
📸 Step 4: payment confirmed and preparation under way.
💡 Note: Preparation usually takes 1–5 hours after payment and receipt of all required details. This is an estimate, not a guaranteed deadline, and store review takes additional time.
When your app is ready, Managing your mobile app explains downloads, store artwork, billing and cancelling.
Frequently asked questions
Where do I choose between iOS and Android?
In step 1, when you pick a plan. Before you pay, you can still change it in the Monthly plan field in step 2.
What should I put in the developer access details?
Your developer account or team ID, the app name and the status of the invitation you sent to NeroPay. Never enter passwords, two-factor codes or keys.
Which privacy policy link should I use?
A public page describing how your business handles customer data. If your website already has a privacy policy, use its link.
What happens if I close the panel during preparation?
Nothing is lost. Your progress is saved and confirmed preparation continues in the background. Open Preparation progress on the app card to check it later.
I paid, but the panel says it is waiting for payment confirmation. What should I do?
Select Refresh status and do not make another payment. If the status does not change, contact support with your order number.
Still need help? Contact us at support@neropay.app or create a ticket.