📹 Video tutorial
How to get there
From your terminal home screen, follow this path:
More → Checkout → Tax Fee
Step 1 — Open the More menu
Tap the More button in the bottom-right corner of your terminal screen.
Step 2 — Go to Checkout
Select Checkout from the menu.
Step 3 — Set your Tax Fee
Tap Tax Fee and enter your VAT rate. For standard UK VAT, enter 20%.
Once saved, VAT will be applied automatically to every transaction.
What happens after you enable VAT
Once VAT is enabled, the terminal will automatically calculate and add the tax to every charge:
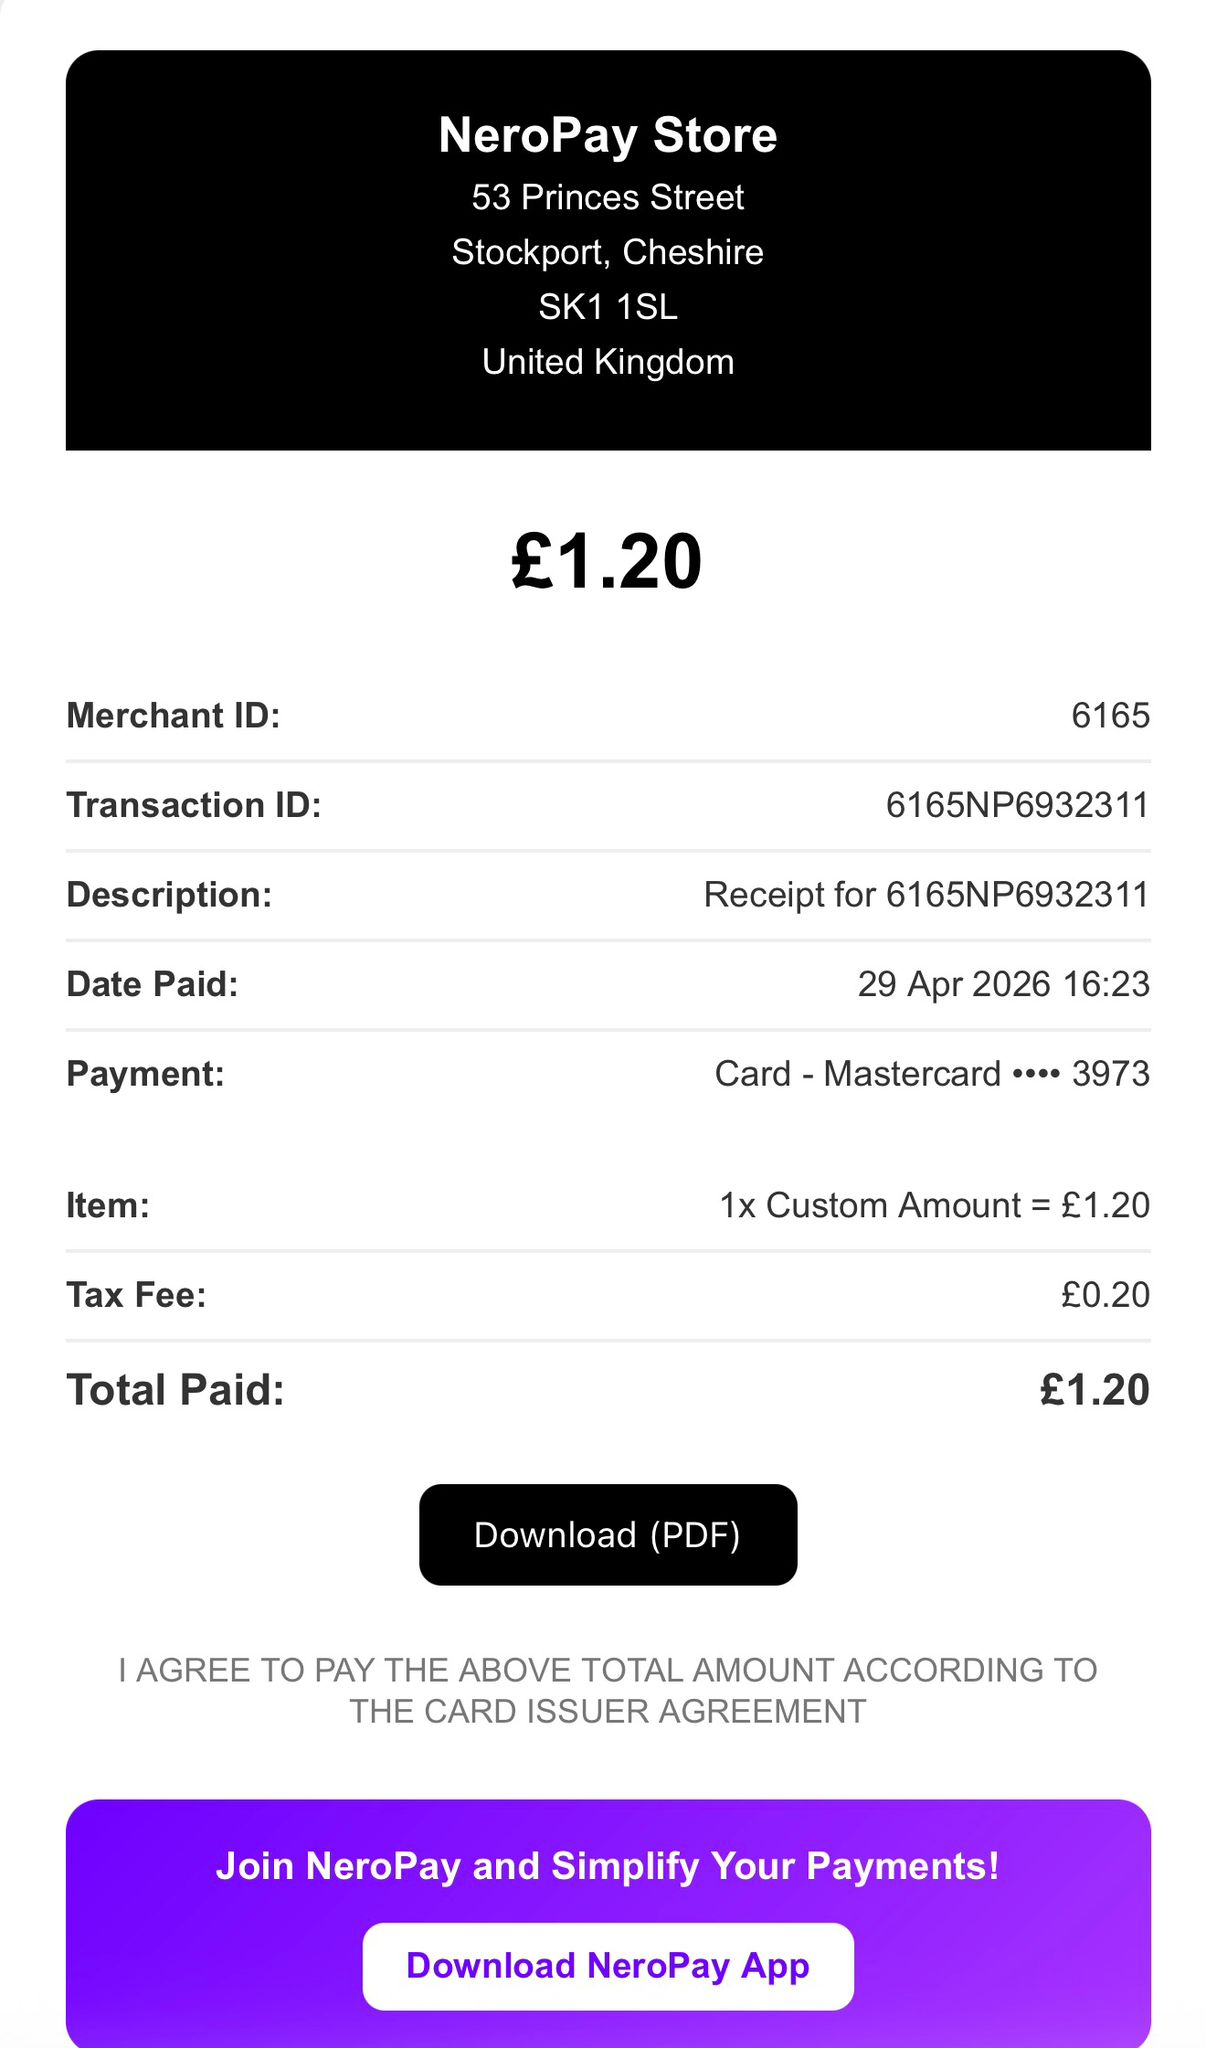
💡 Example: You enter £1.2 — the customer is charged £1.20 automatically, with the 20% VAT included.
The VAT amount will appear as a separate line on the customer's receipt, both printed and digital.
📸
Frequently asked questions
Q: Do I need to enable VAT on every terminal separately? A: Yes. The Tax Fee setting is configured per terminal. If you have more than one terminal, repeat these steps on each device.
Q: Can I set a different VAT rate? A: Yes. Enter whichever rate applies to your business — for example 5% for reduced-rate goods. If you're unsure which rate applies to you, check with your accountant or visit HMRC's VAT rate guidance.
Q: Will VAT show on every receipt automatically once enabled? A: Yes. Once the Tax Fee is set, it applies to all transactions and appears on every receipt without any extra steps.
Q: Can I turn VAT off after enabling it? A: Yes. Follow the same steps and set the Tax Fee to 0% or toggle it off to disable it.
Still need help? Contact us at support@neropay.app or create a ticket