Part 1 — Configuring your printing mode
NeroPay offers two printing modes:
| Mode | How it works |
|---|---|
| Automatic | Receipt prints immediately after every payment |
| Manual | A confirmation window appears after payment — you choose whether to print or skip |
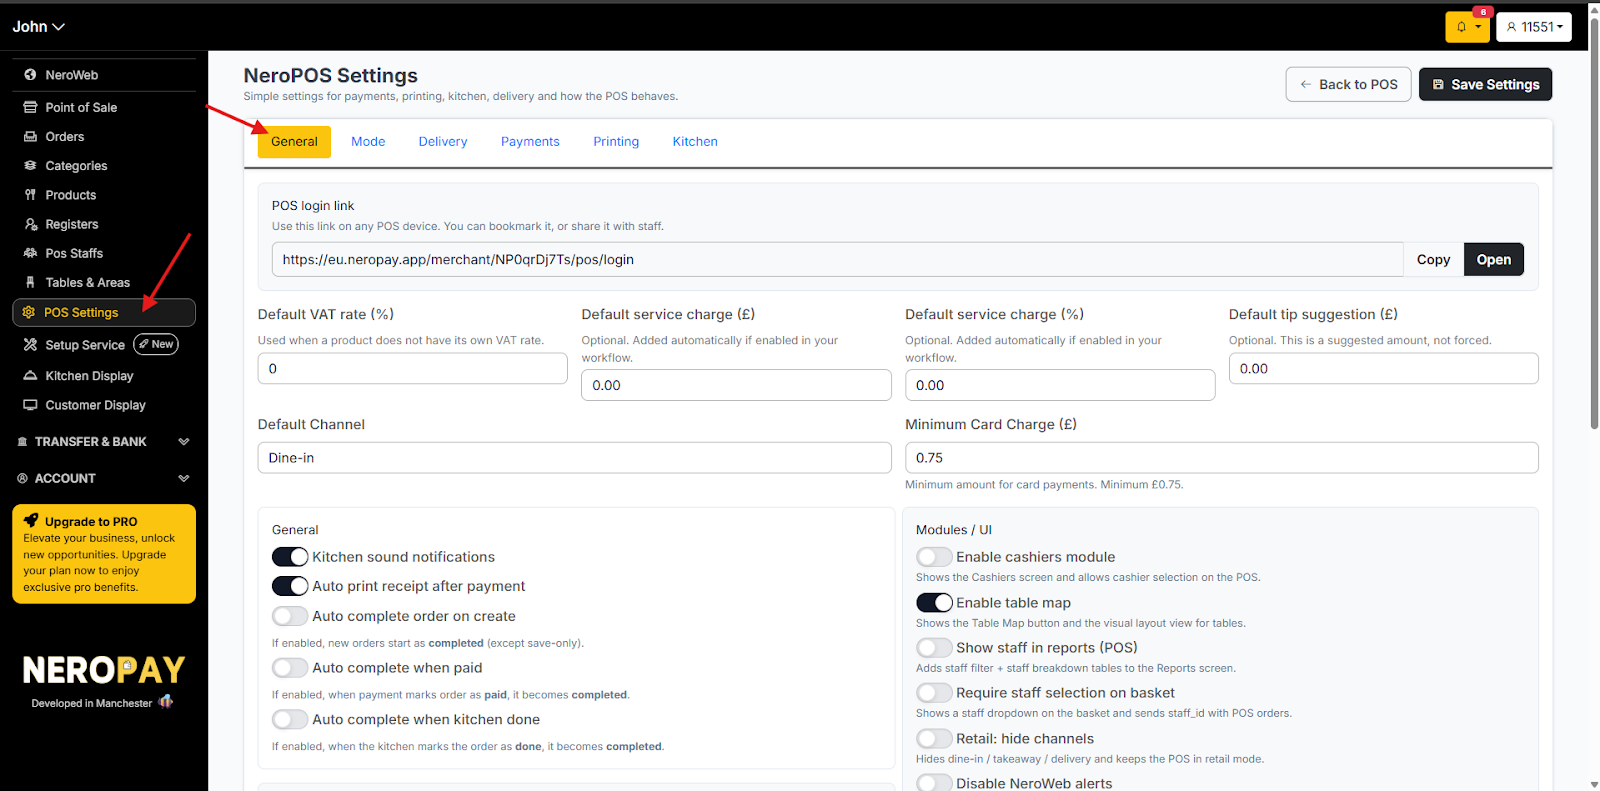
Step 1 — Go to POS Settings
From your dashboard, follow this path:
NeroPOS → POS Settings → General
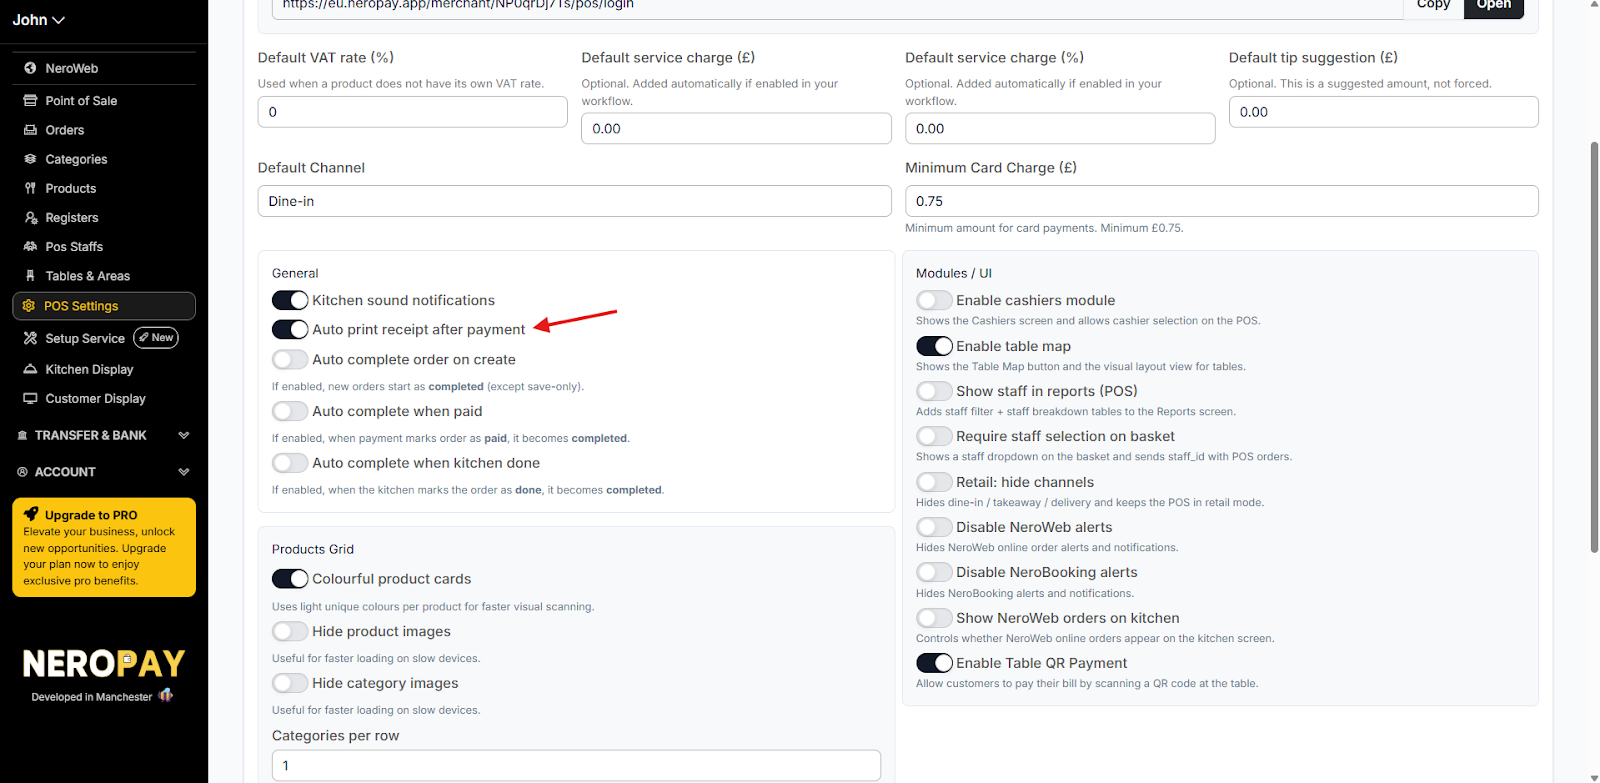
Step 2 — Set your preference
Toggle Auto print receipt after payment to switch between automatic and manual mode.
📸
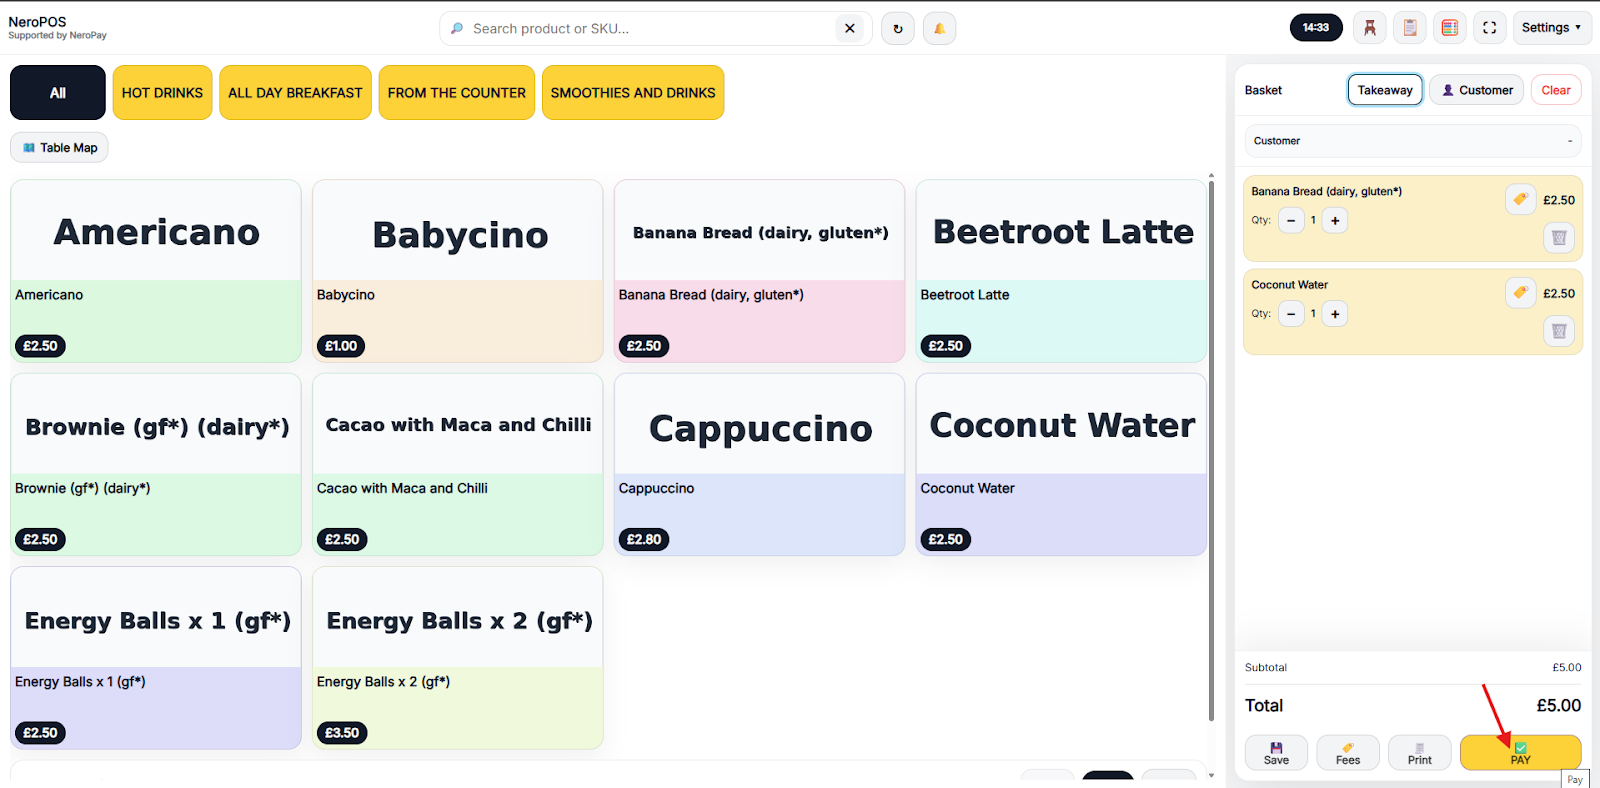
Step 3 — Test your setup
To confirm your settings are working:
- Go to NeroPOS → Point of Sale
- Complete a test order
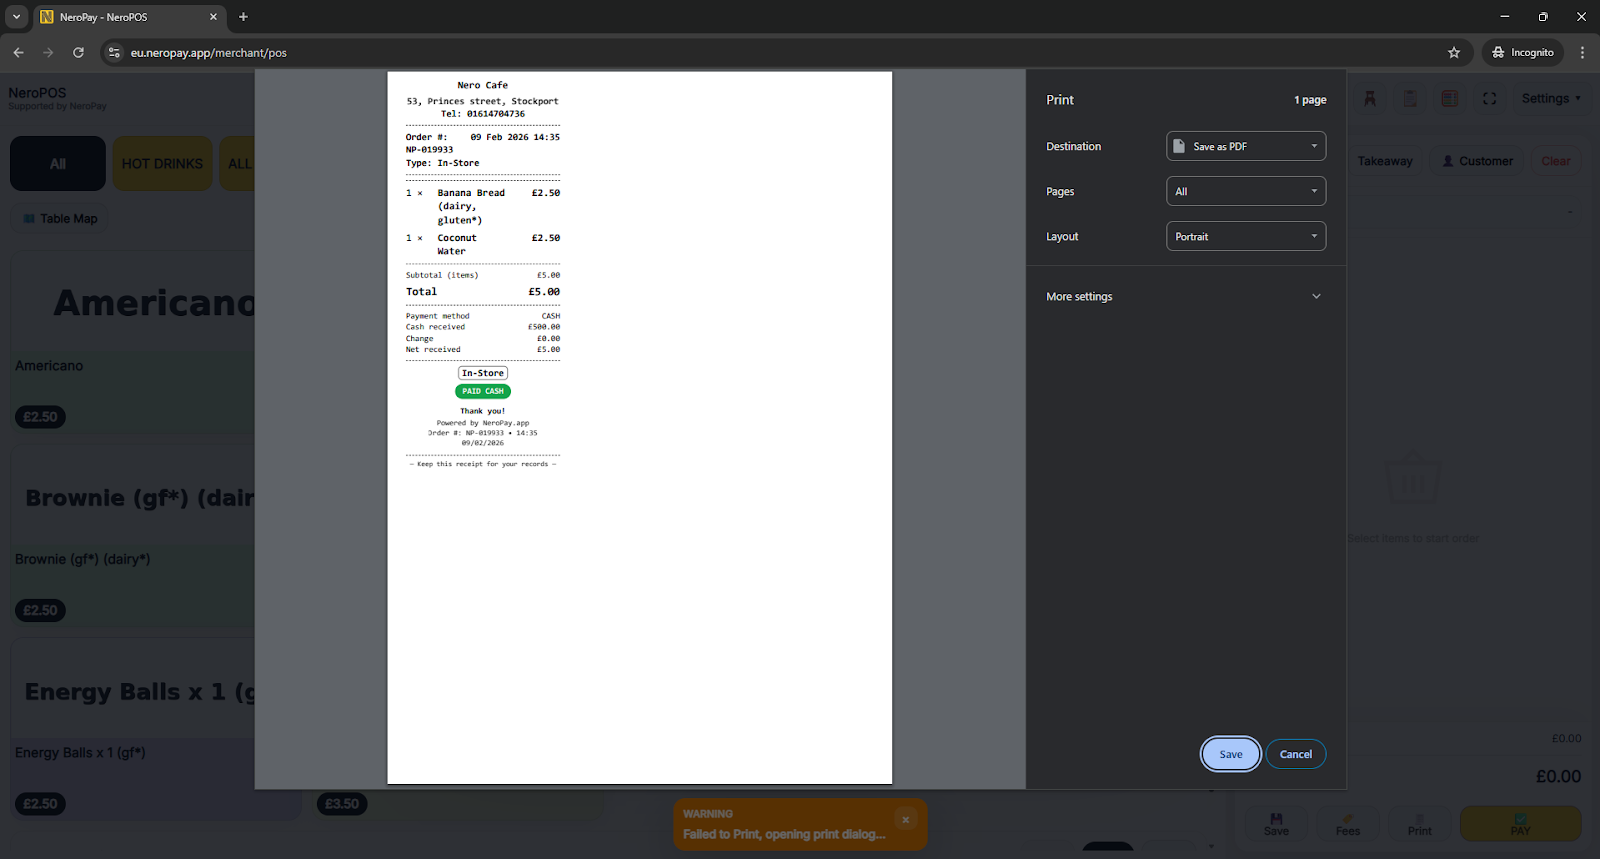
- If Manual mode is enabled, a digital confirmation window will appear — choose to print or skip
📸
Part 2 — Setting up automatic printing for all orders
To automatically print receipts for all orders — including online orders received through NeroWeb — you need to configure the NeroEPOS Print Server. This acts as the bridge between your dashboard and your physical printer.
📸
Step 1 — Go to Printing settings
From your dashboard, follow this path:
NeroPOS → POS Settings → Printing
📸
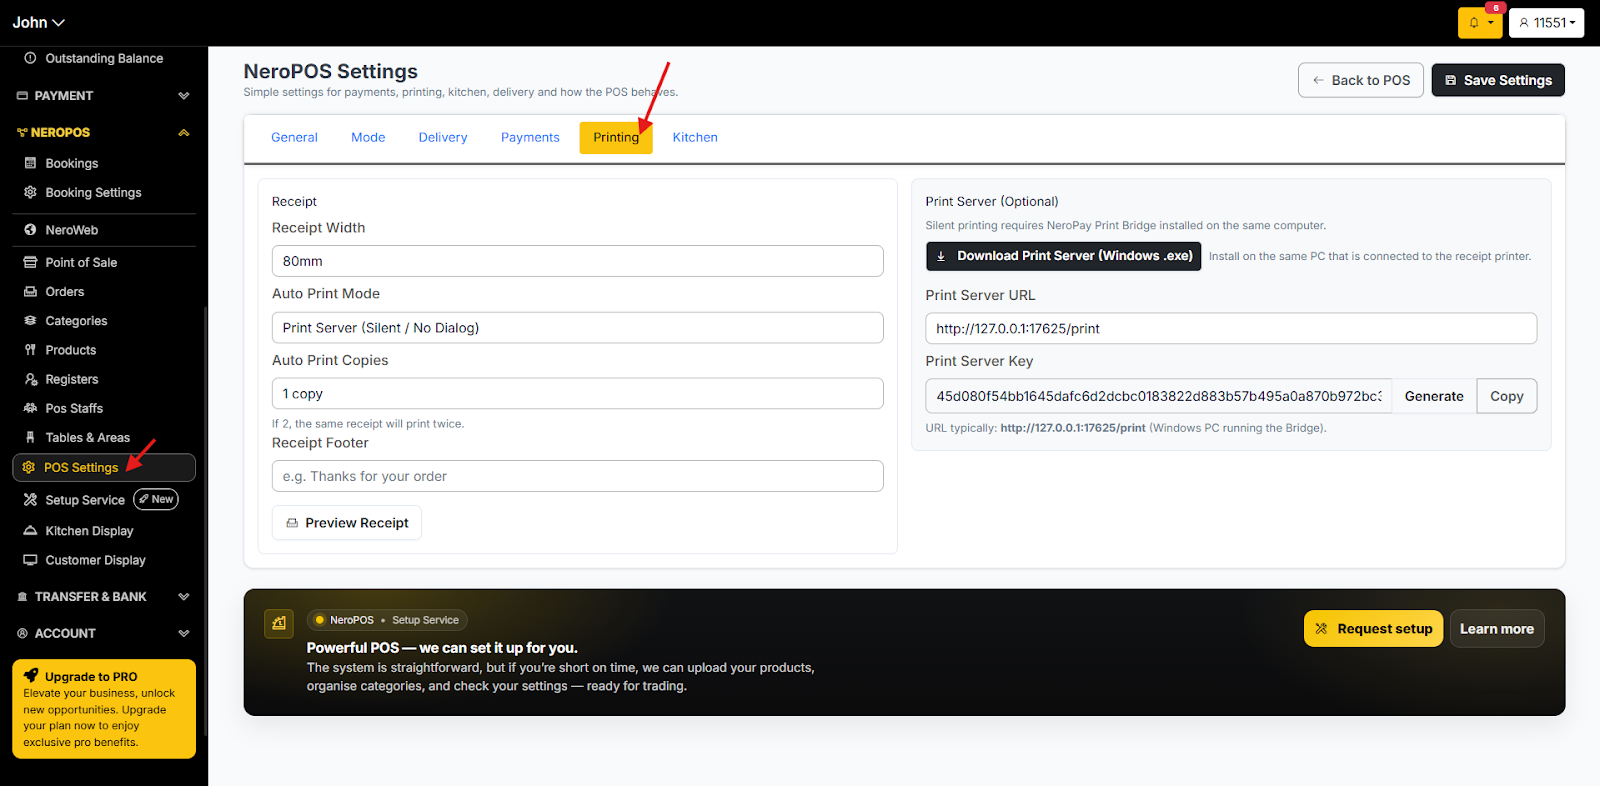
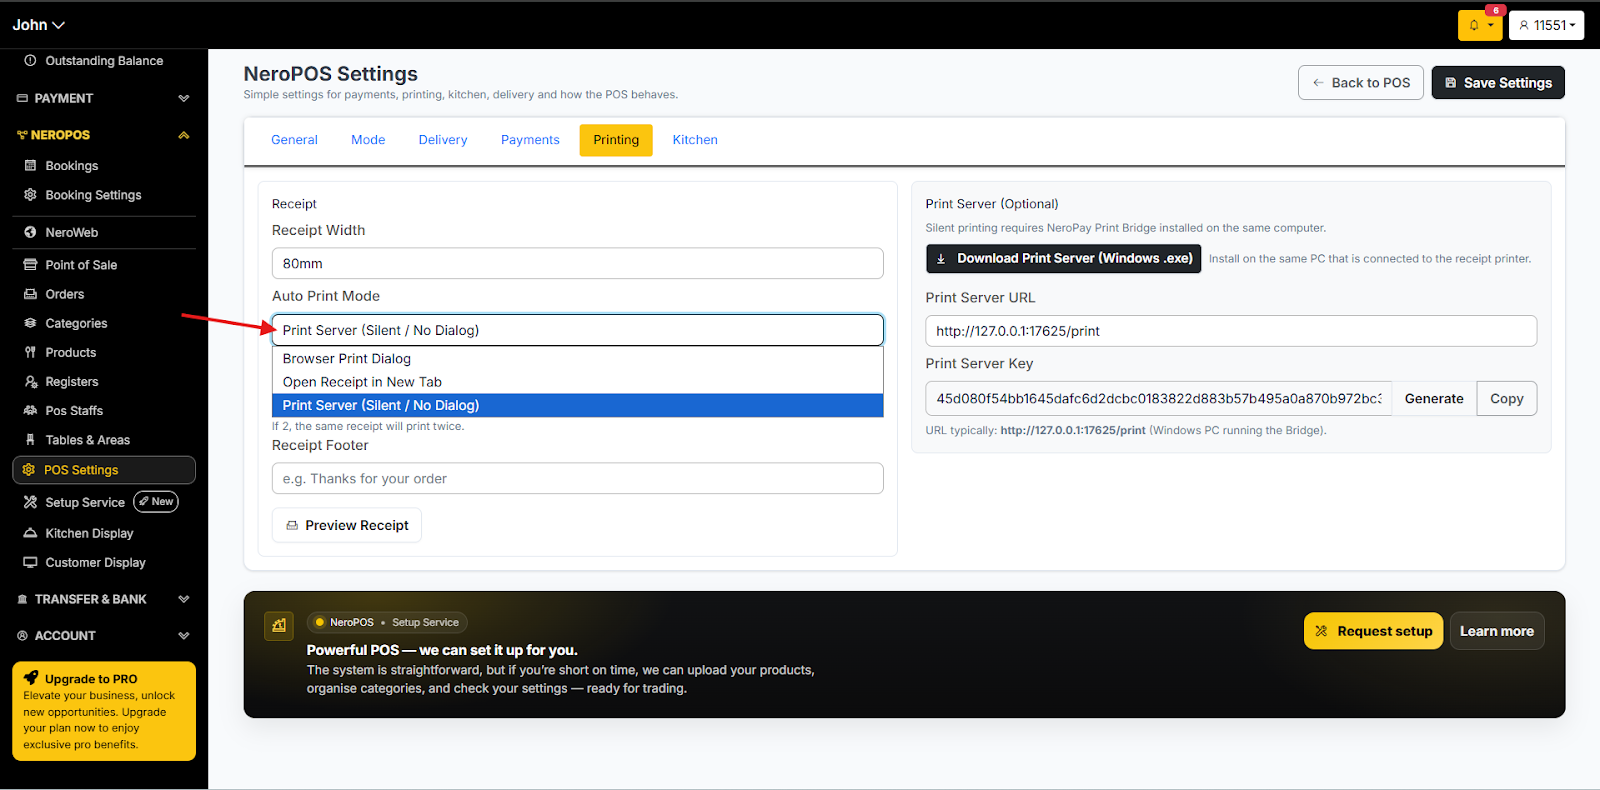
Step 2 — Choose your Auto Print Mode and download the Print Server
Under Auto Print Mode, select Print Server. Download the Print Server application and generate a Print Server URL.
📸
Step 3 — Configure the Print Server
- Open the Print Server application you just downloaded
- Copy your NeroEPOS Print Server Key and paste it into the corresponding field
- Select the correct printer in the NeroPOS Printer field
📸

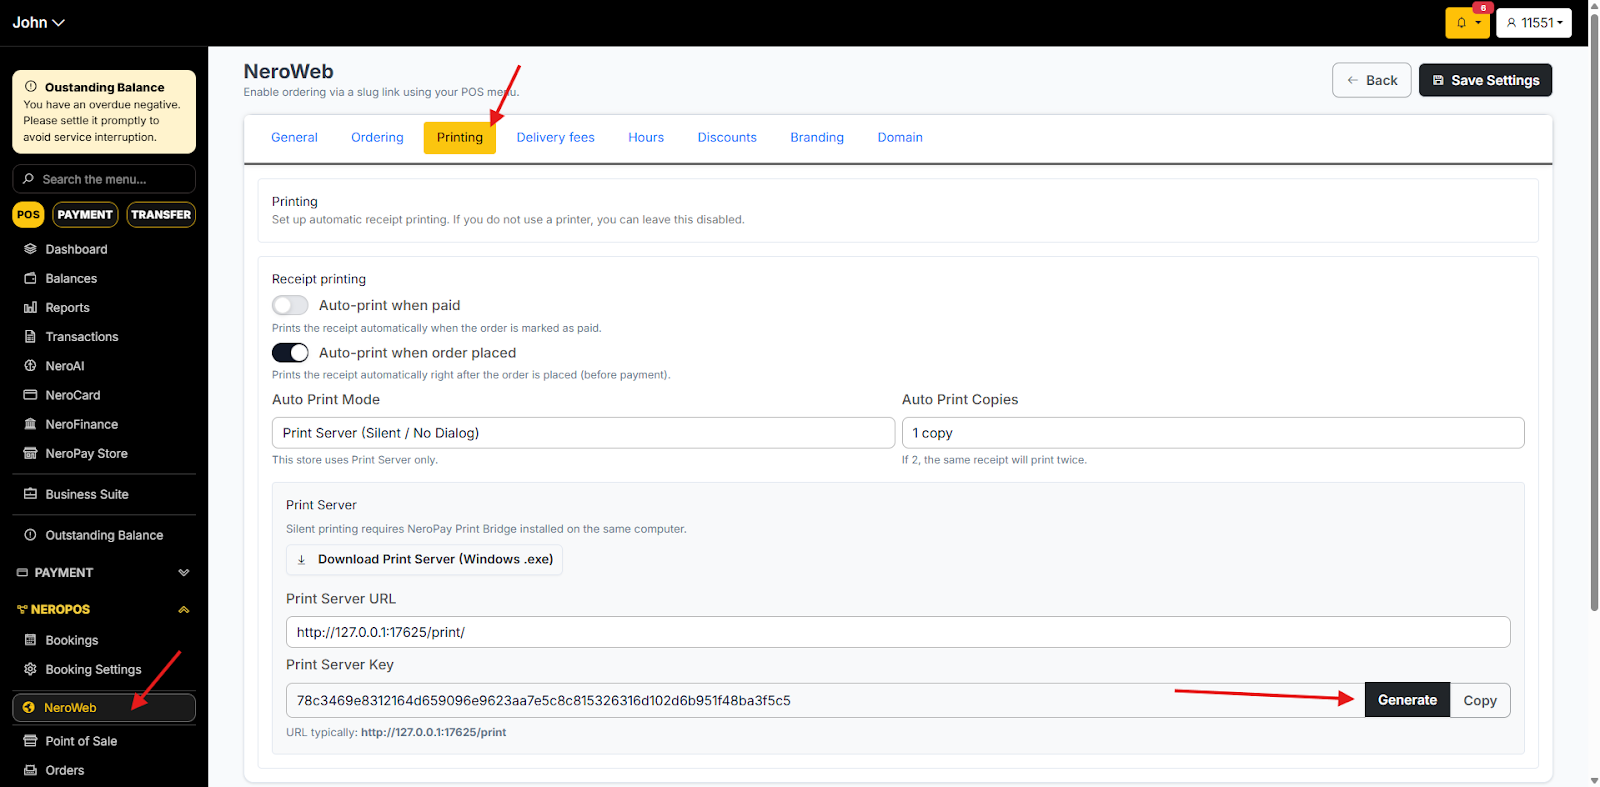
Step 4 — Connect NeroWeb printing
- Go to NeroPOS → NeroWeb
- Click the Printing tab
- Generate the key shown there
- Copy and paste it into the corresponding field on the Print Server
📸
Step 5 — Save all settings
Make sure you click Save on the Print Server application before closing it. Settings will not be applied until saved.
⚠️ Note: Both the dashboard and the Print Server must be configured and saved for automatic printing to work correctly for online orders.
Part 3 — Customising your receipt
You can personalise your receipts by adding your shop name, phone number, address, and custom footer text.
📸
Step 1 — Go to Printing settings
From your dashboard, follow this path:
NeroPOS → POS Settings → Printing
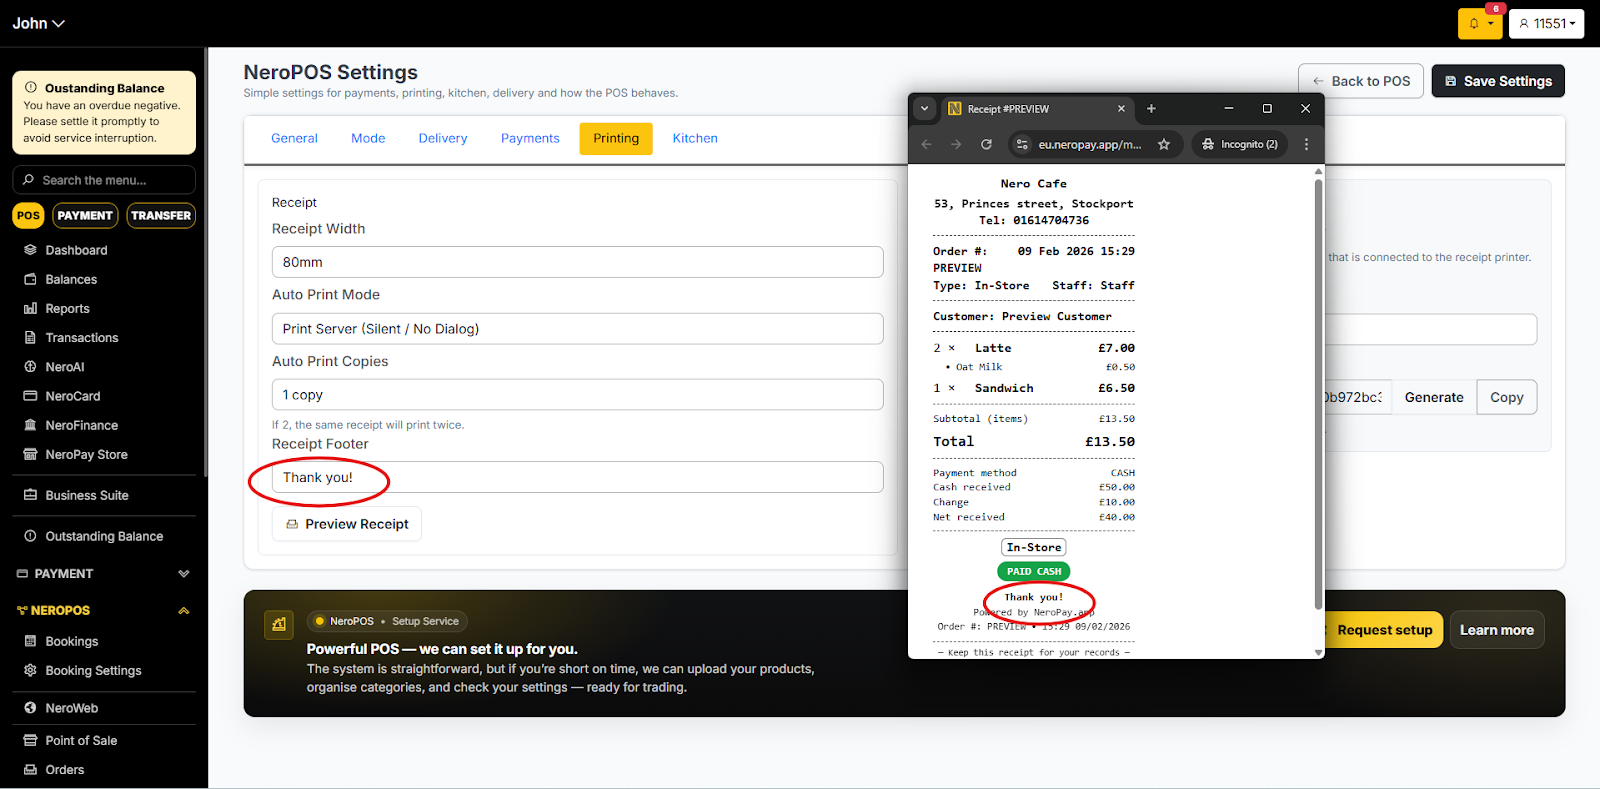
Step 2 — Edit your receipt footer
Scroll to the footer section to add or update any text you want to appear at the bottom of every receipt — for example, a thank-you message, your website, or your returns policy.
📸
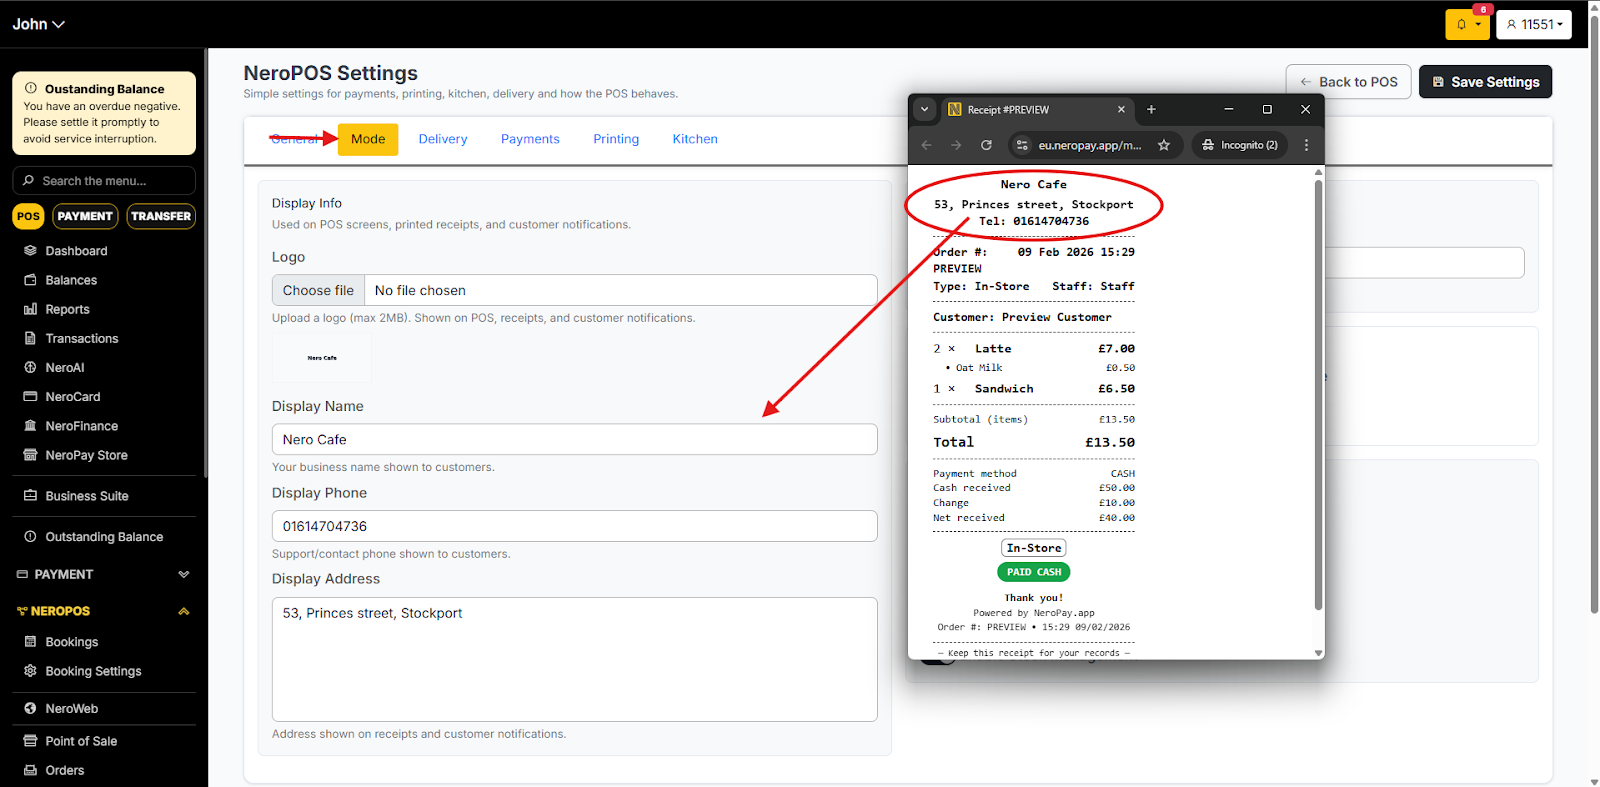
Step 3 — Update your shop name, phone number, or address
To change the business details displayed on your receipt:
- Go to NeroPOS → POS Settings → Mode
- Update your shop name, phone number, and address as needed
📸
Frequently asked questions
Q: What is the difference between Automatic and Manual printing mode? A: Automatic prints a receipt immediately after every payment with no extra steps. Manual shows a confirmation window after each payment so you can choose whether to print or skip.
Q: Do I need the Print Server for in-store printing? A: Not necessarily. The Print Server is required if you want to automatically print receipts for online orders received through NeroWeb. For in-store only, the standard printing settings in POS Settings are sufficient.
Q: My printer is not showing up in the NeroPOS Printer field — what should I do? A: Make sure your printer is connected to the same network as the device running the Print Server. If it still doesn't appear, restart both the printer and the Print Server application and try again.
Q: Can I add a logo to my receipt? A: Receipt customisation options are available in the Printing tab. If you cannot find a logo option, contact support for guidance.
Q: Can I have different footer text on different receipts? A: Currently, the footer text applies to all receipts. You cannot set different footers per product or transaction type.
Still need help? Contact us at support@neropay.app or create a ticket