📹 Video tutorial
Before you start
- You have an active NeroPay account with NeroPOS enabled
- You have your menu, product names, prices, and images ready
- You have decided how you want to organise your categories — for example, Starters, Mains, Drinks
Part 1 — Setting up categories
Before adding products, you need to create categories — think of these as folders that group your products together.
Step 1 — Go to Categories
From your dashboard, follow this path:
NeroPOS → Categories
Step 2 — Create a category
Click Add Category and enter the name of your first section — for example, Starters, Mains, or Drinks. Repeat for each category you need.
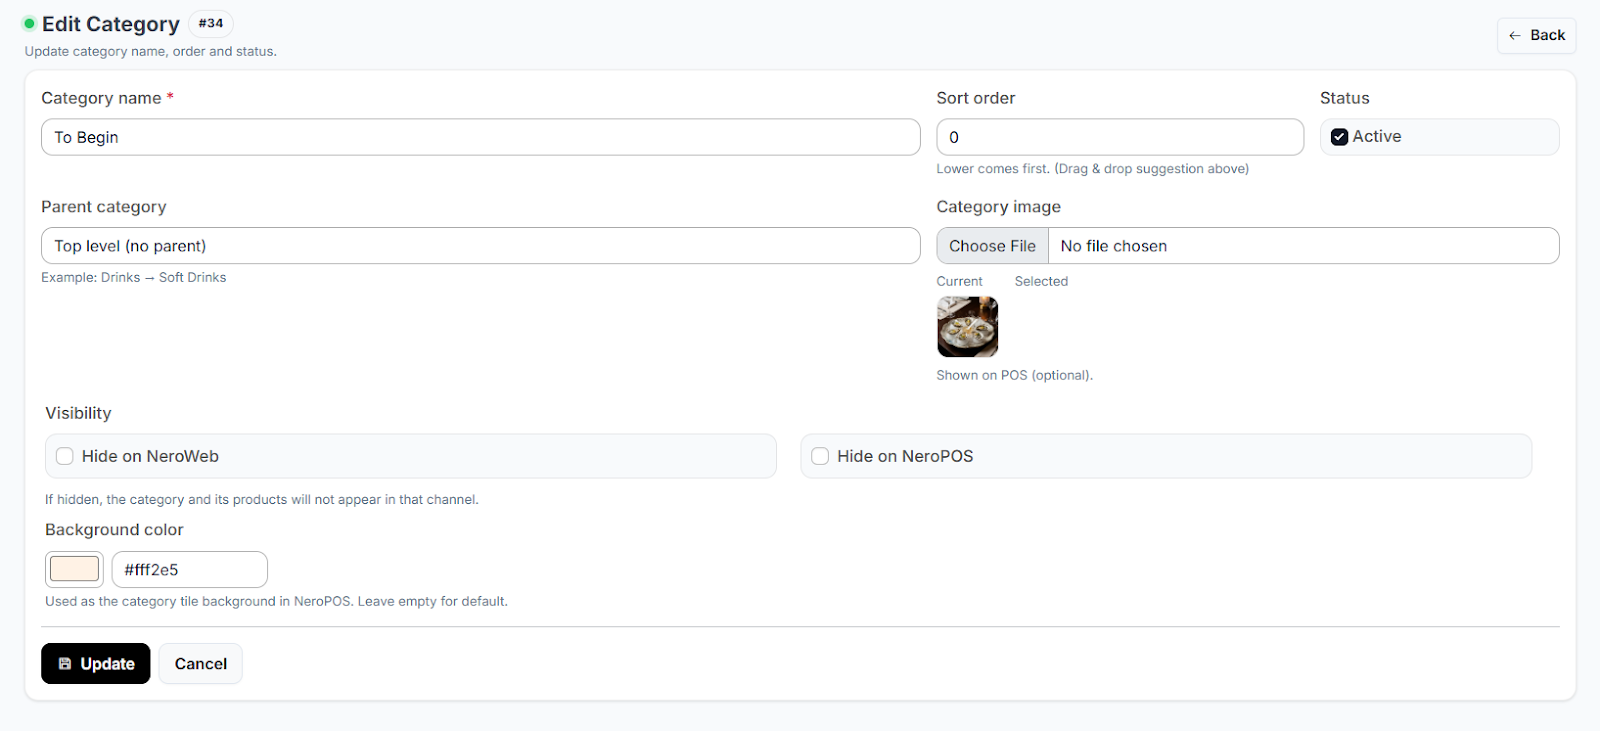
Step 3 — Arrange your categories
To change the order in which categories appear on your store, click and drag the icon on the far left of each category row to reposition it.
📸
Part 2 — Adding products
Step 1 — Go to Products
From your dashboard, follow this path:
NeroPOS → Products
Step 2 — Create a new product
Click the green Add Product button at the top right of the page.
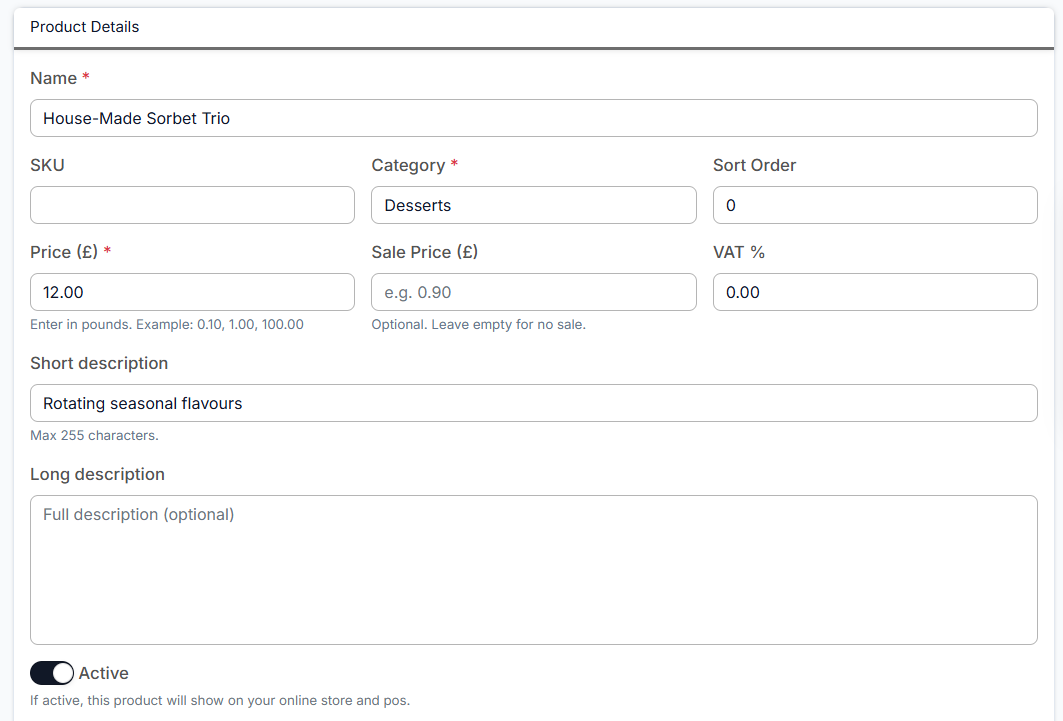
Step 3 — Enter the basic details
Fill in the following fields:
- Name — give your product a clear, descriptive title
- Category — select the category you created in Part 1
- Price — enter the standard price
- Discounted price — optional, use this if you are running a promotion
📸
Part 3 — Product customisation and images
Once the basic details are saved, scroll down the product page to configure additional settings:
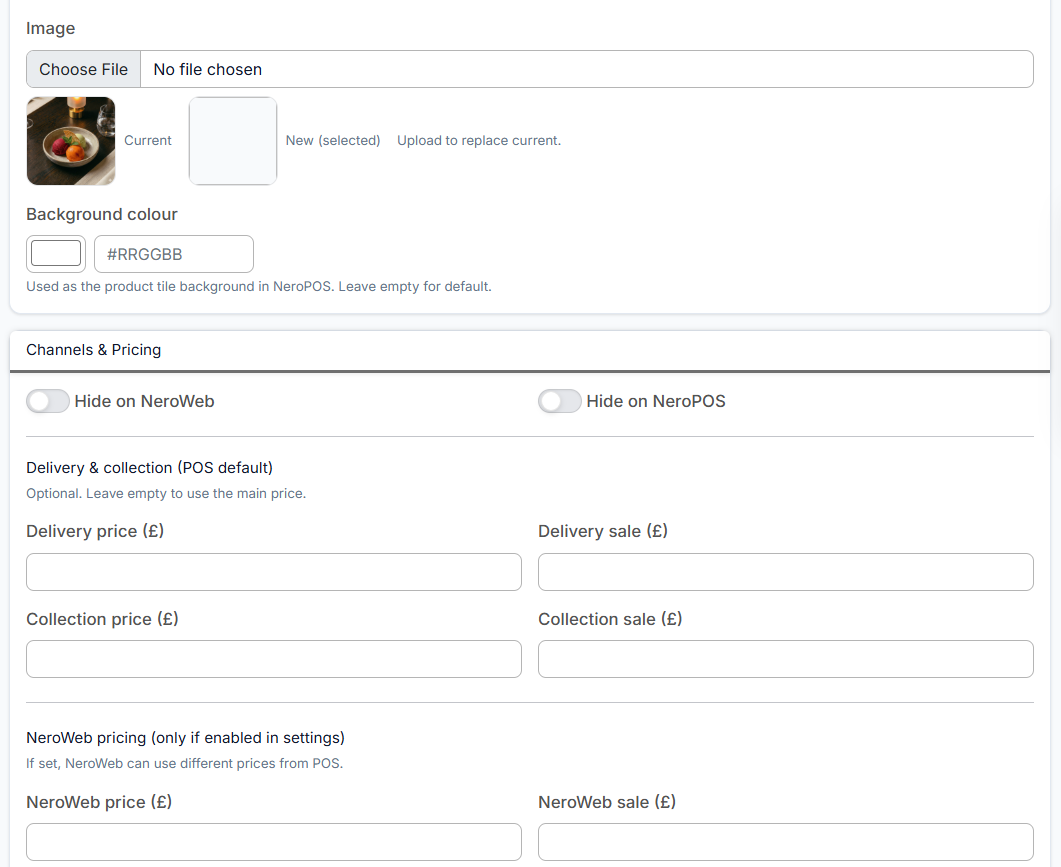
Product image Upload a high-quality image — this is what customers will see when browsing your online store.
Hide on NeroWeb Toggle this on if you want the item to be available in your POS but not visible on your website — useful for in-store-only items or seasonal products you are temporarily removing from online ordering.
Separate delivery price If a specific product requires a unique shipping cost — for example, a heavy or oversized item — you can set a separate delivery price for that product here.
📸
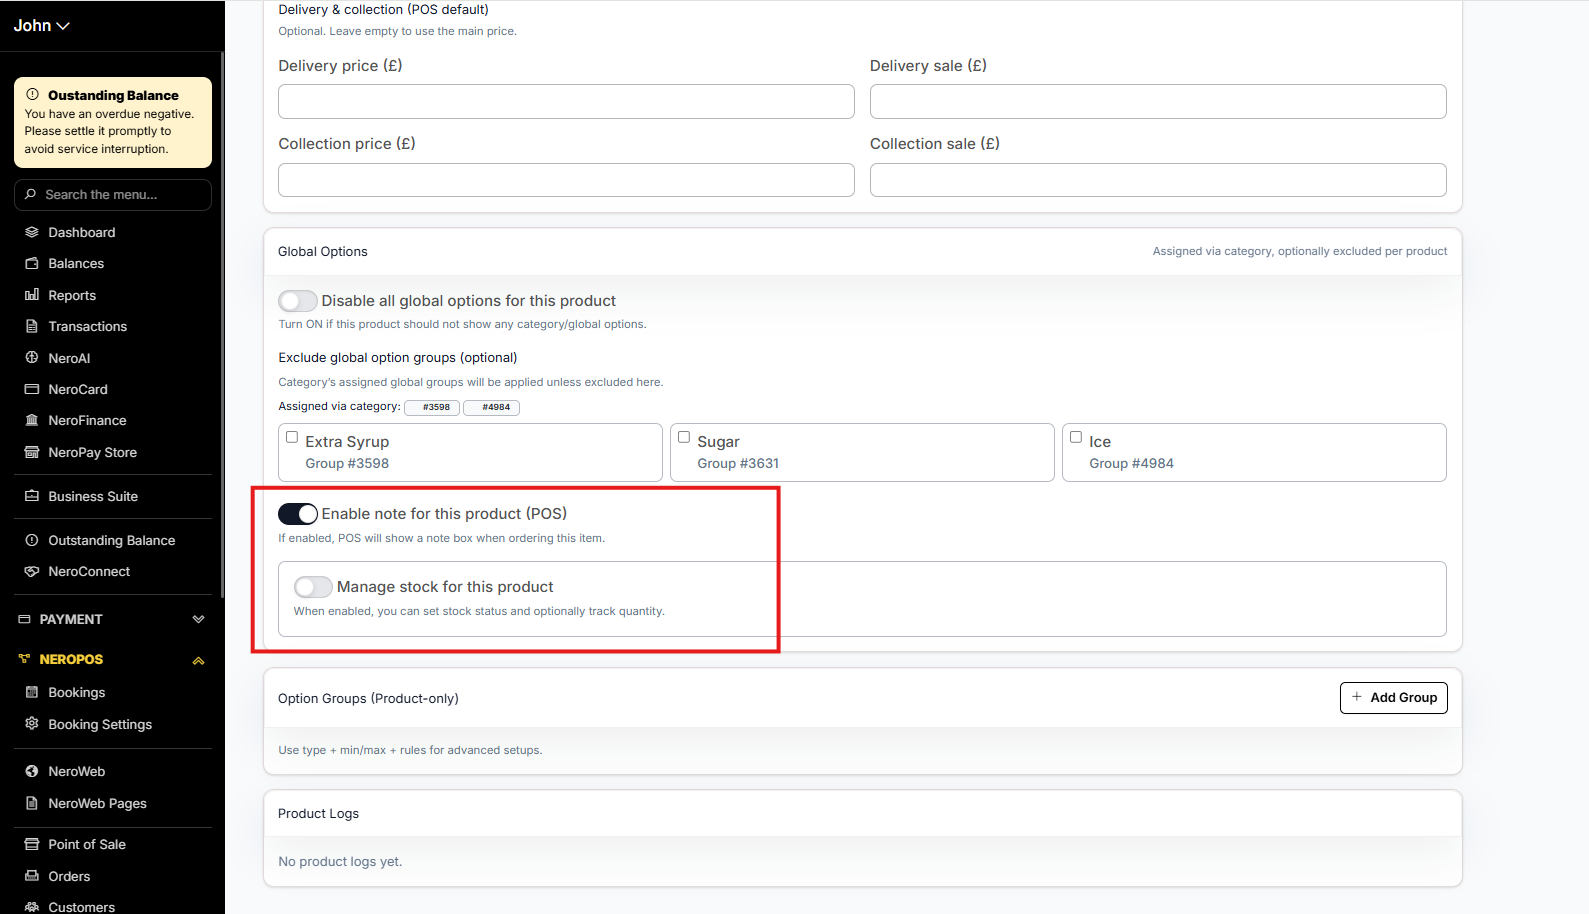
Part 4 — Staff notes
Towards the bottom of the product page, you can enable a Note Section. This allows your staff to add specific details or customer requests to an item when adding it to the basket in the POS — for example, allergy notes or special preparation instructions.
📸
💡 Check your work: After adding a product, refresh your NeroWeb site to see how the image and price appear to a customer before going live.
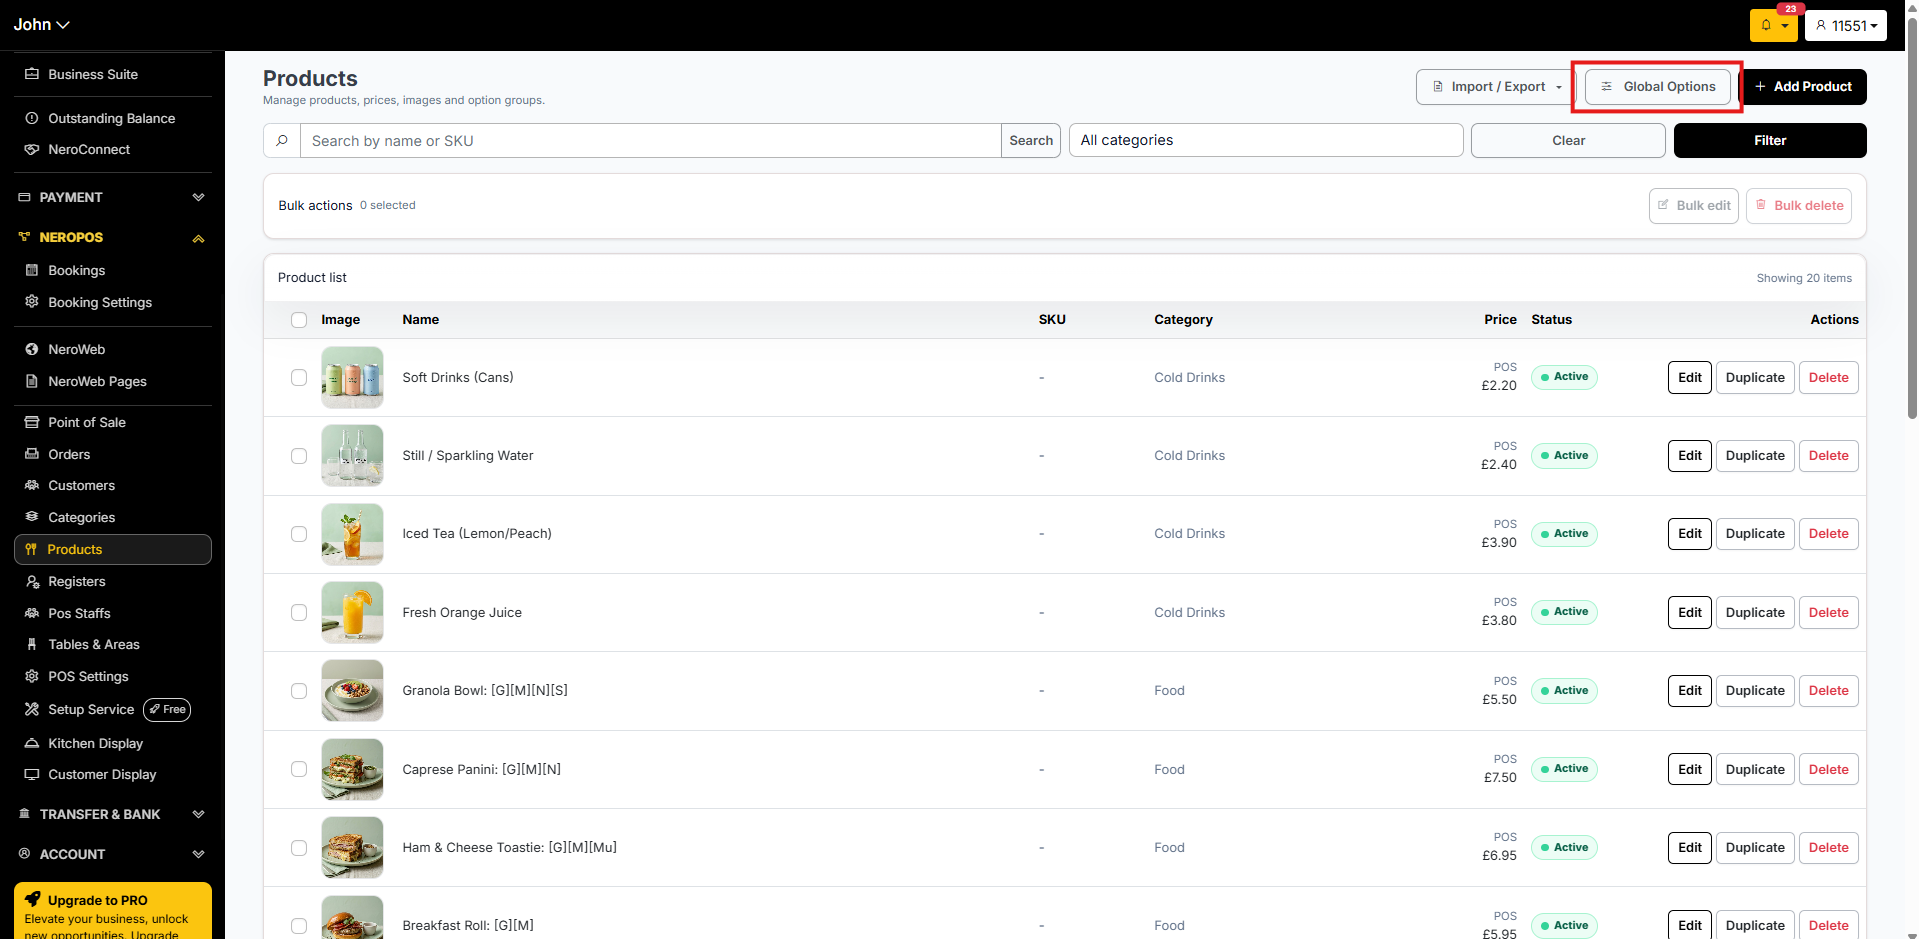
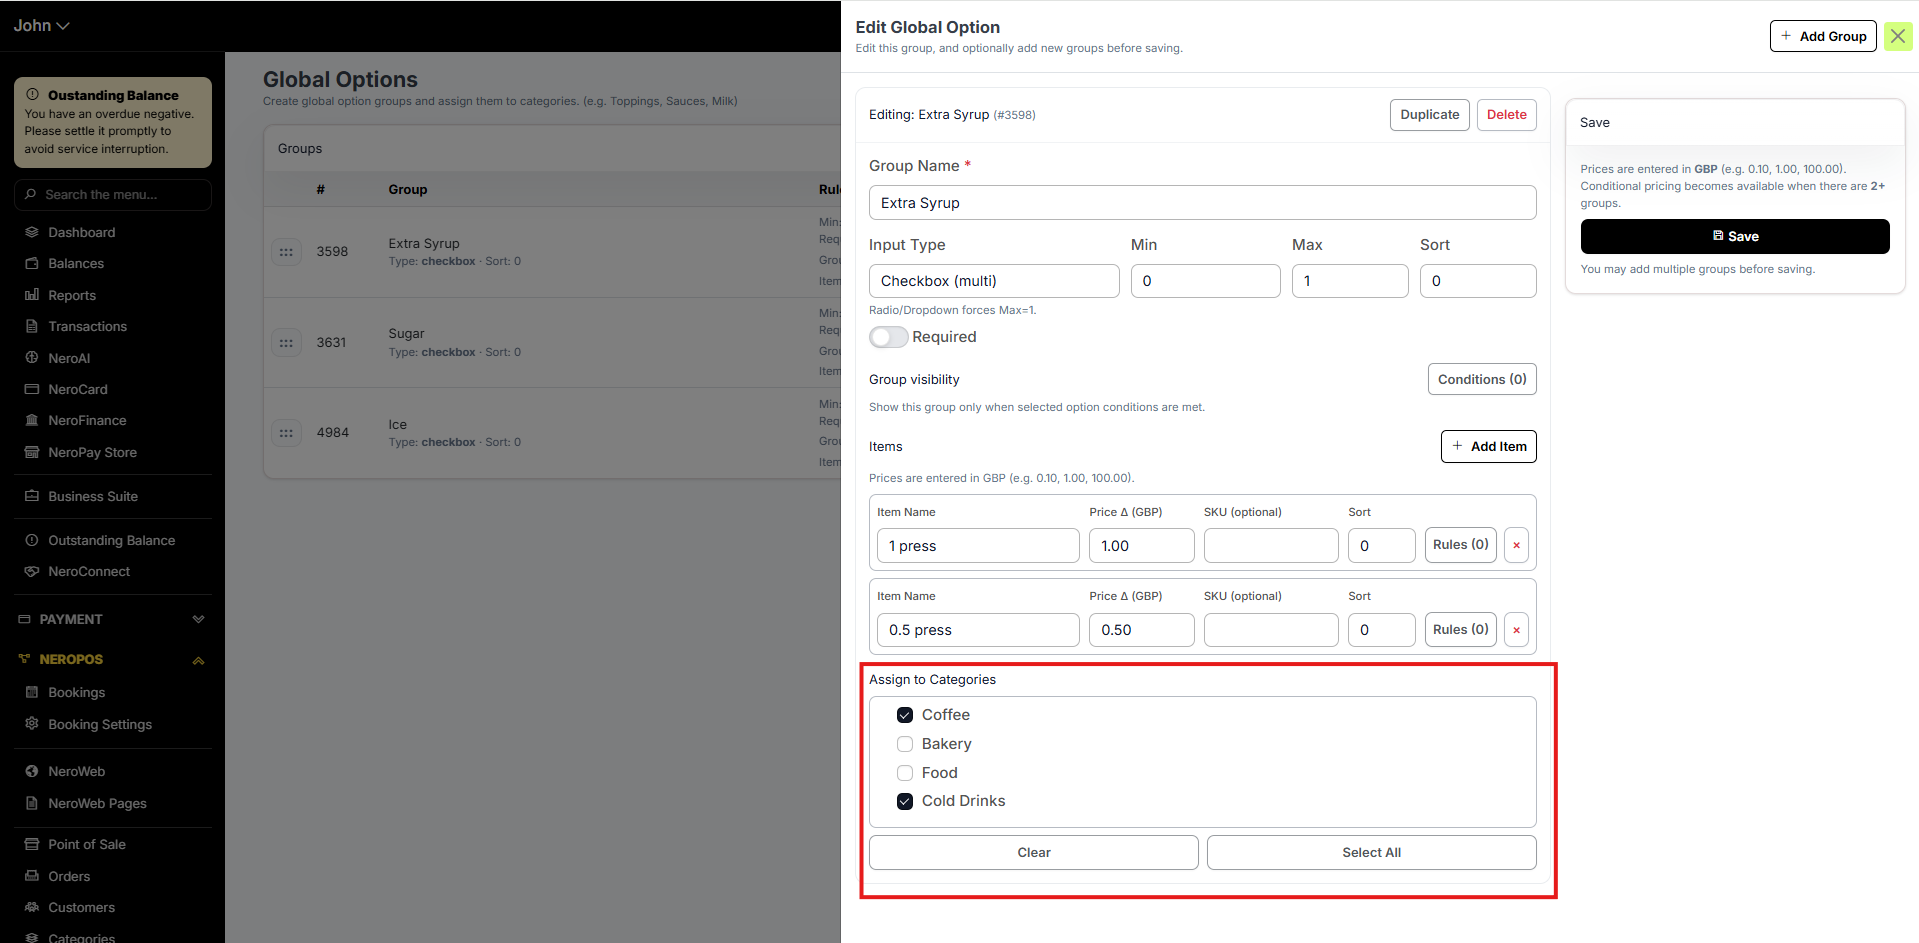
Part 5 — Using global options
Global options let you create reusable customisation choices — such as size, ice level, or extras — and apply them in bulk to an entire category or multiple products at once, instead of setting them up individually for each item.
How to use global options:
- Create your global option — for example, Size: Small / Medium / Large
- Apply it to the category or products you want
- The option will appear automatically on every product it is assigned to
💡 Tip: Mark an option as required with an asterisk so customers must make a selection before adding the item to their basket — for example, size is required for drinks.
📸
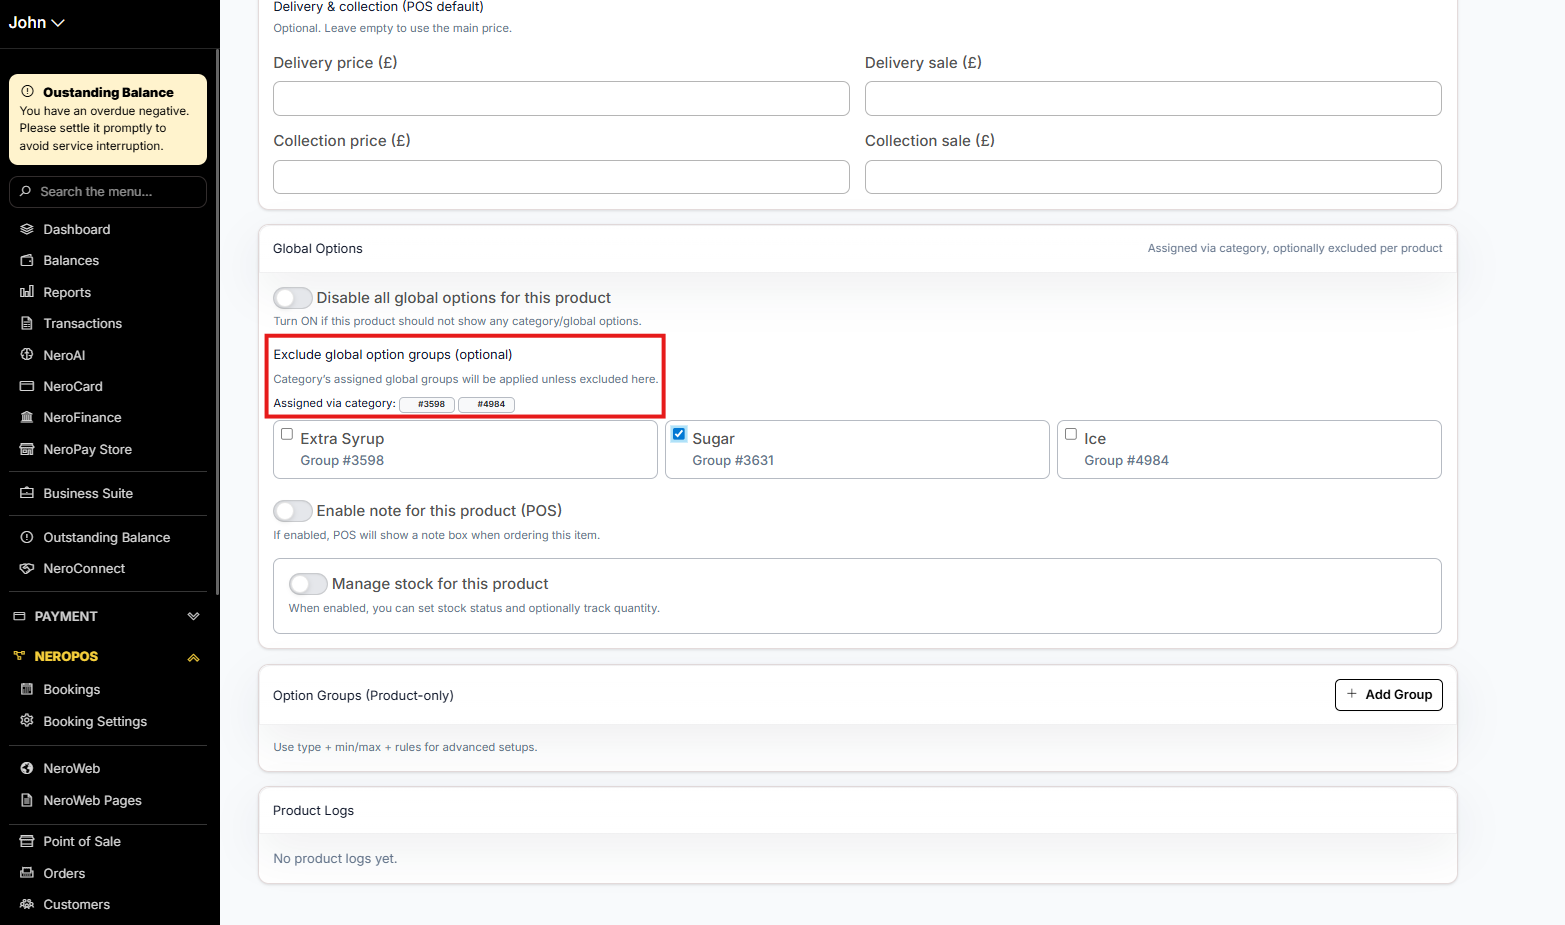
Disabling a global option for a specific product
If a global option applies to a whole category but you want to exclude one particular product:
- Open that specific product
- Find the global option applied to it
- Disable it for that product only
This overrides the category-level setting without affecting any other products.
📸
Part 6 — Adding products with NeroAI
If you have an existing menu, you can skip manual entry entirely. NeroAI scans a photo or PDF of your menu and automatically populates your POS and online store in one go.
⚠️ Please note: Uploads are subject to limits within a certain time period. Bulk or repeated uploads are not supported.
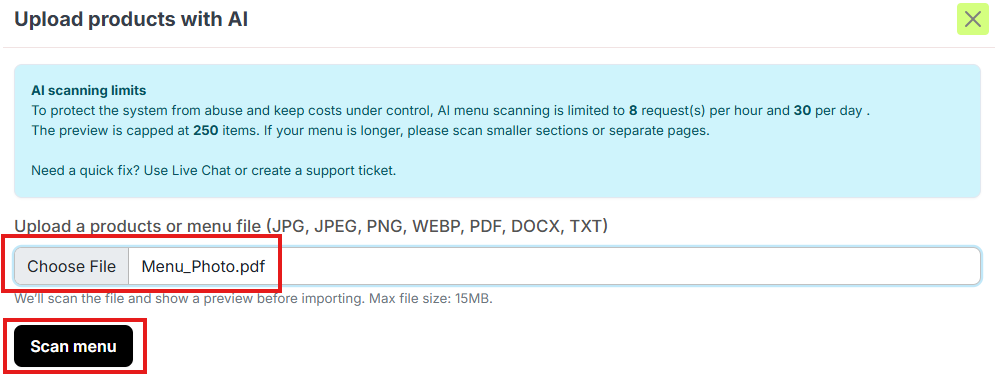
Step 1 — Open the AI importer
From your dashboard, follow this path:
NeroPOS → Products → Import/Export → Upload Products with AI
📸

Step 2 — Upload your menu
Click the upload area and select a clear photo or digital copy of your menu. Make sure product names and prices are legible.
💡 Tip: For the most accurate scan, ensure the lighting is good and the menu is flat. If NeroAI misses a price, you can manually edit the item after the import is complete.
📸

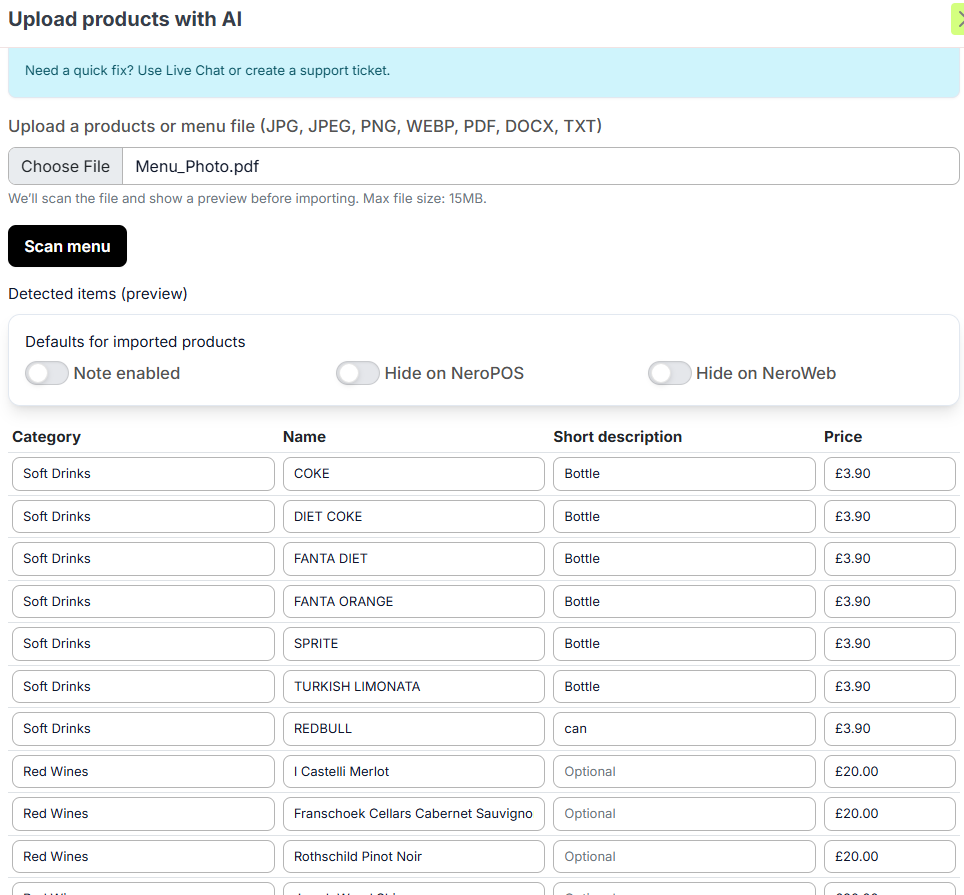
Step 3 — Scan the menu
Click Scan Menu. NeroAI will analyse the content and identify your categories, product names, and prices.
📸
Step 4 — Review the scanned data
Once the scan is complete, your menu will appear as an organised list. Check that all categories and prices have been captured correctly.
If there are items you sell in-store but do not want on your website, use the bulk selection tool to click Hide on NeroWeb.
📸
Step 5 — Import your products
Once you are happy with the list, click Import. The system will automatically create all categories and products in your database. They will be visible in both your NeroPOS terminal and your NeroWeb online store immediately.
📸

Frequently asked questions
Q: Can a product belong to more than one category? A: No. Each product is assigned to one category. If you need the same item in multiple categories, create it as a separate product.
Q: Can I hide a product temporarily without deleting it? A: Yes. Toggle Hide on NeroWeb to remove it from your online store while keeping it in your POS. You can turn it back on at any time.
Q: What is the difference between a global option and a product-specific option? A: A global option is created once and applied across multiple products or a whole category. A product-specific option only applies to one item. Use global options to save time when many products share the same choices.
Q: Can I change the order products appear in on my store? A: Yes. Reorder products within a category the same way you reorder categories — by dragging the row handle on the left.
Q: Can I use NeroAI if my menu is handwritten? A: NeroAI works best with printed or clearly typed menus. Handwritten menus may produce inaccurate results — we recommend manually entering any items that are not captured correctly after the scan.
Q: Can I run NeroAI multiple times to add more products? A: Uploads are subject to time-period limits and bulk or repeated uploads are not supported. For additional products, use the manual Add Product method.
Still need help? Contact us at support@neropay.app or create a ticket