A complete guide to understanding all back-office settings.
NeroWeb: Store Setup & Configuration Guide
This guide will walk you through setting up and managing your NeroWeb online ordering platform via the NeroPay dashboard.
Getting Started
- Log In: Access your NeroPay Account.
- Navigate to NeroWeb: From the main dashboard, select the “NeroWeb” tab. This is your central hub for all website customisations.
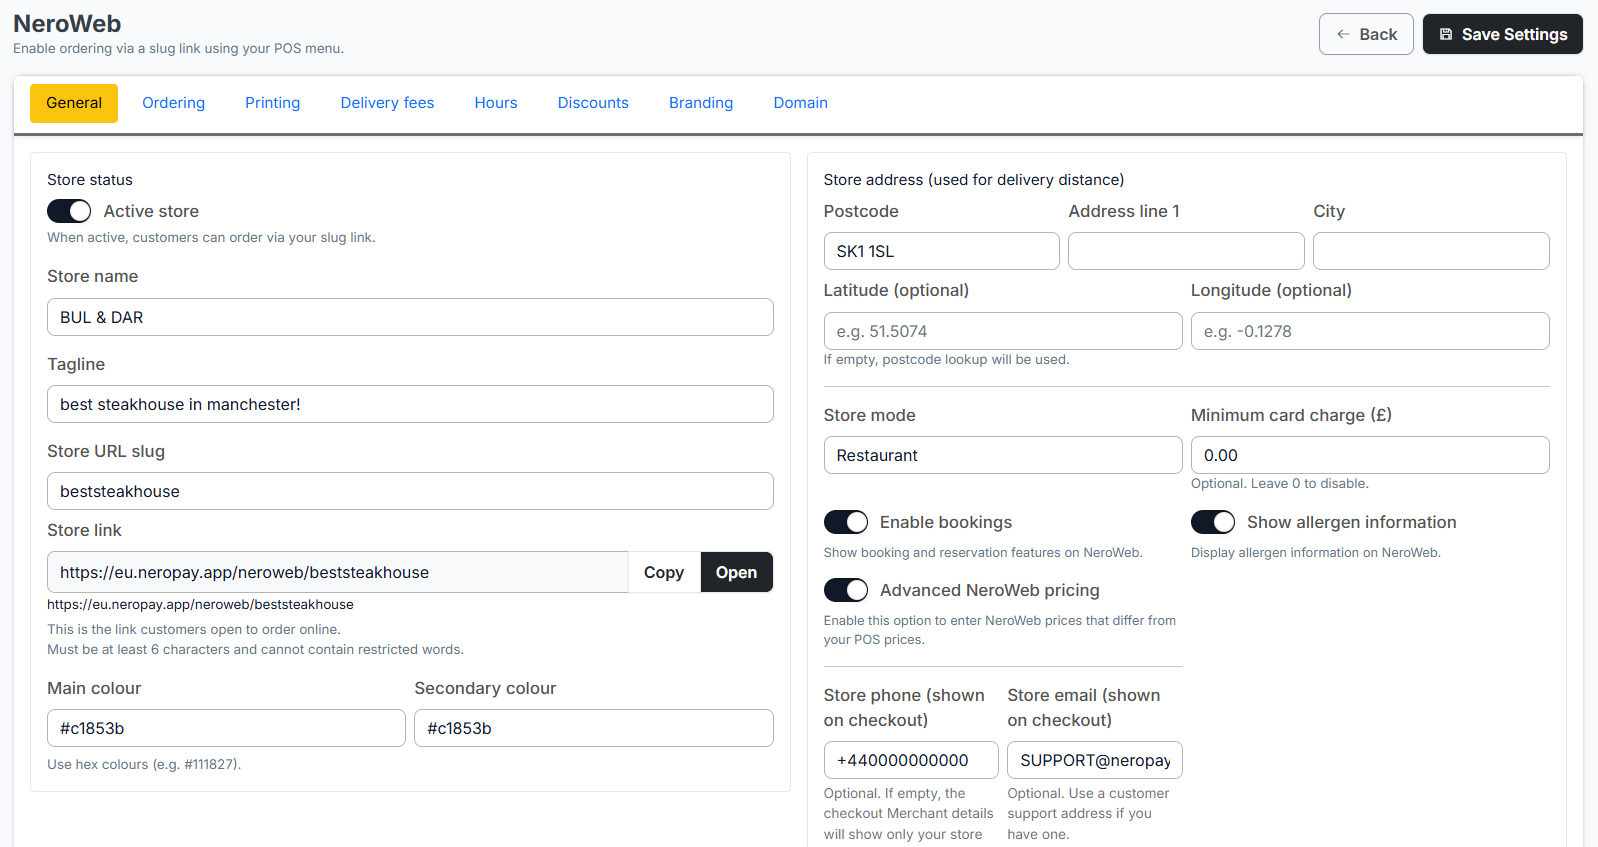
1. General Settings
The General tab is where you define your store’s identity and look.
- Store Branding: Enter your Store Name and a catchy Short Tagline.
- URL Customisation: Edit your unique website URL here.
- Visual Style: Customise your website’s theme using Hex Colour Codes to match your brand.
- Safety & Contact: Enable/Disable Allergen Information.
Input your Store Address, Phone Number, and Email Address for customer inquiries.
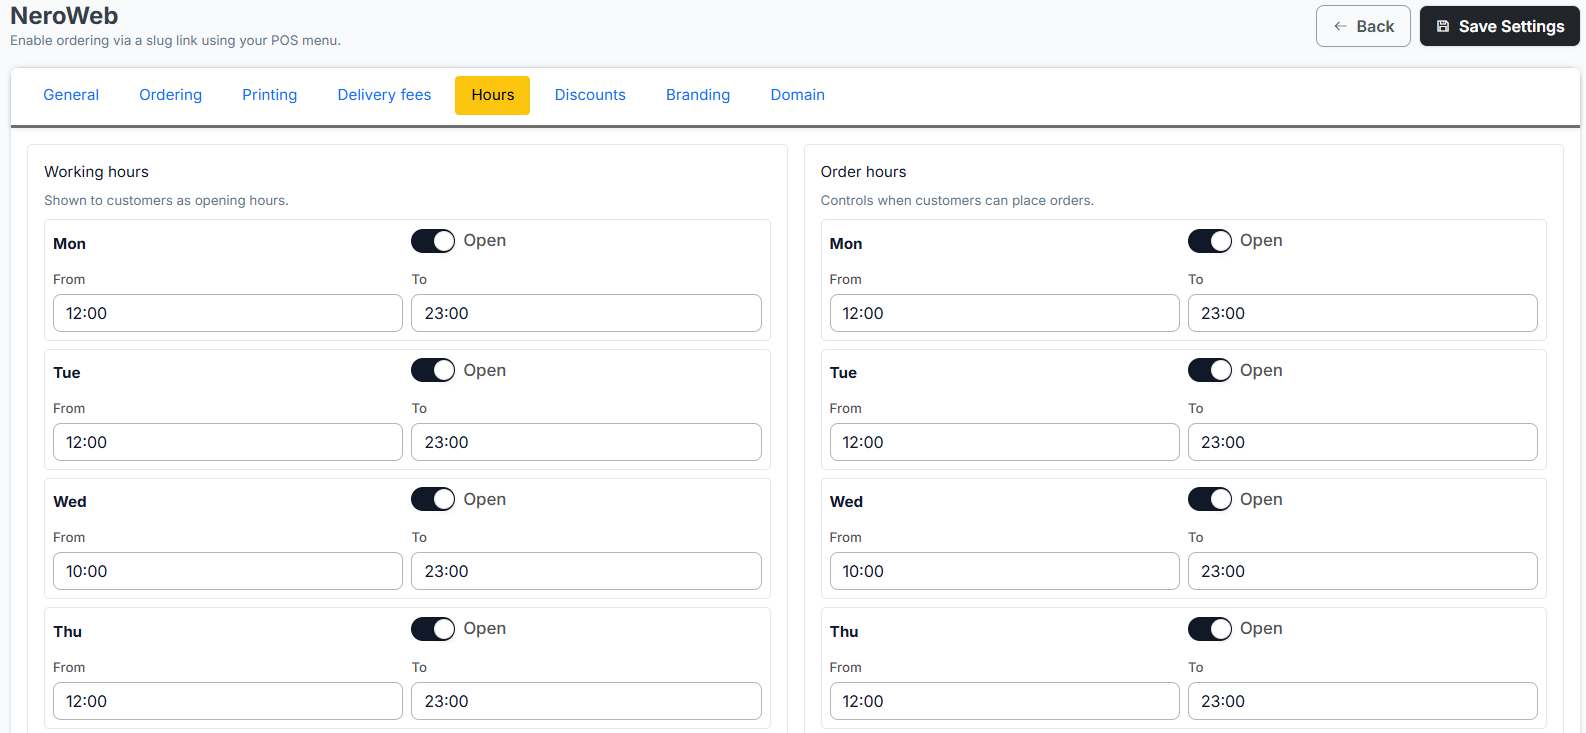
2. Business & Ordering Hours
Navigate to the Hours tab at the top.
- Operational Hours: Set your standard business opening and closing times.
- Online Ordering Hours: You can set these separately if you wish to stop taking online orders before the physical store closes.
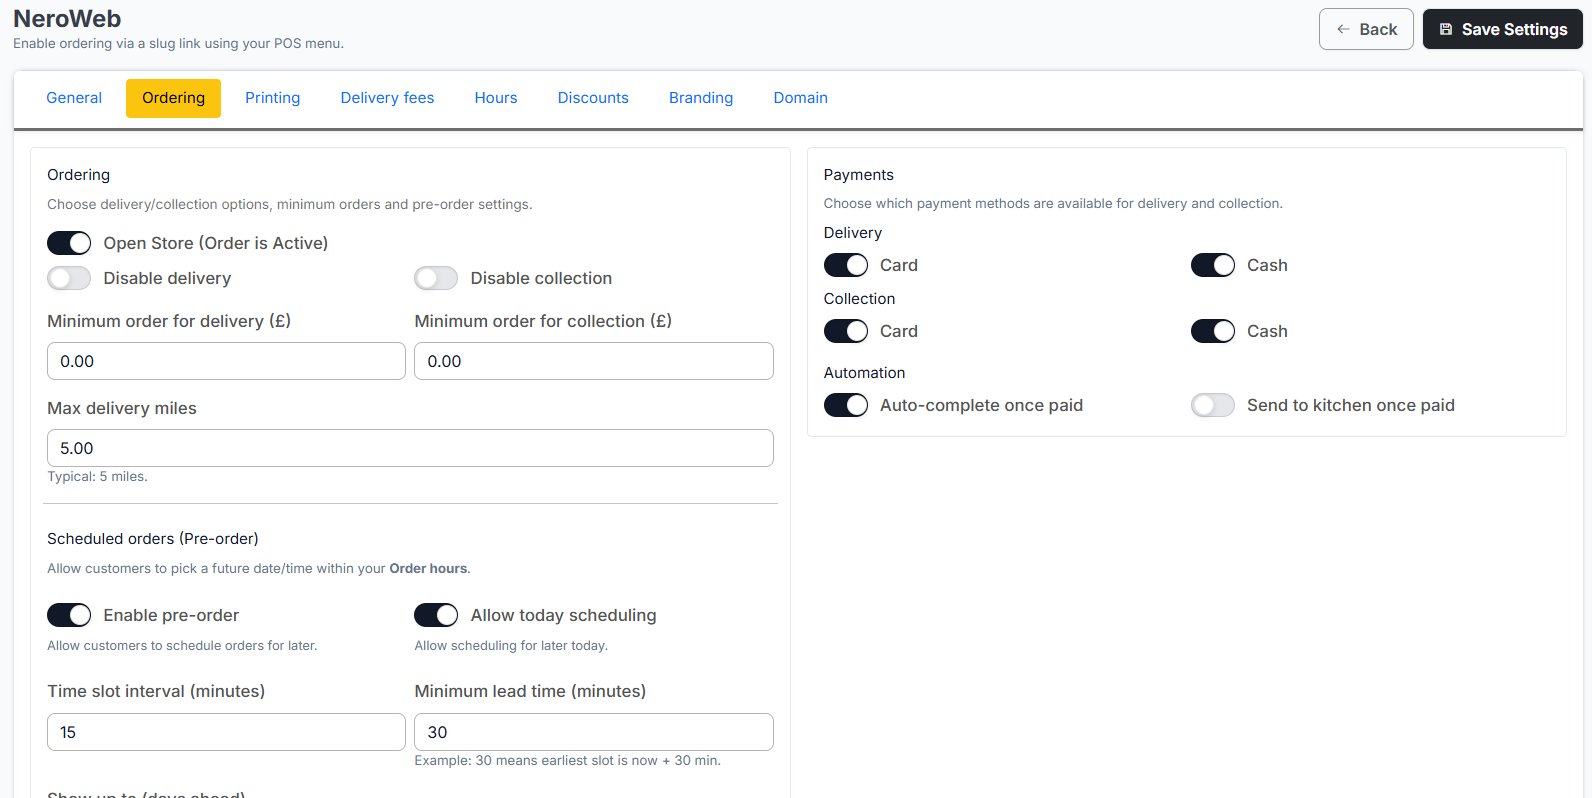
3. Ordering & Payment Configuration
Navigate to the Ordering tab to manage how customers interact with your shop.
- Delivery Logistics: * Set your Maximum Delivery Range.
Set Minimum Order Amounts for both delivery and collection.
Toggle Delivery or Collection services on or off independently.
- Payment Methods: In the Payment Section, choose how you want customers to pay (e.g., Card, Cash).
- Advance Orders: Configure settings for Pre-orders and Scheduled Orders to manage kitchen flow.
4. Printing Settings
Navigate to the Printing tab to automate your kitchen workflow.
- Auto-Print: Enable Auto Receipt Printing for incoming orders.
- Server Setup: Install and configure your receipt printing server.
- Server Key: Your unique Print Server Key is located here; you will need this during the setup process.

5. Delivery Fees & Distance
Navigate to the Delivery Fee tab.
- Pricing: Create different delivery charges based on the distance from your store to the customer.
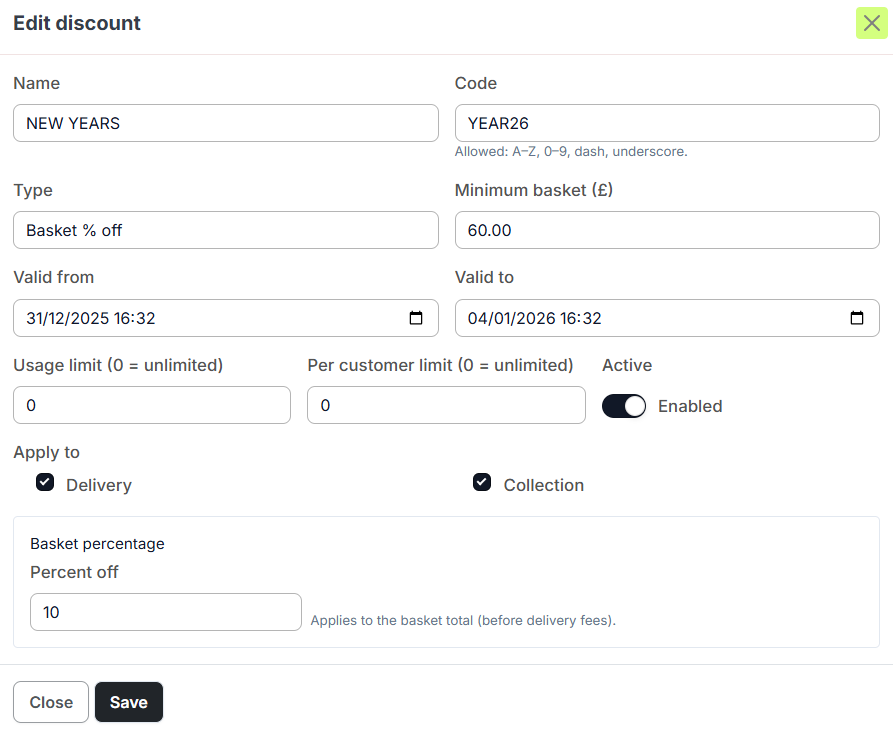
6. Managing Discount Codes
Navigate to the Discount Code tab to create promotions.
- Create/Edit Codes: Define the Code Name (Internal) and the Actual Code (Customer-facing).
- Customisation: Set the discount value (Percentage or Fixed amount).
Set Usage Limits per code.
Restrict codes to specific order types (Delivery or Collection).
7. Branding & Assets
Navigate to the Branding tab to finalise your site\'s professional look.
- Visual Assets: Upload your Business Logo and a high-quality Banner Image.
- Checkout Contact: Add a specific store number and email that will be displayed exclusively during the checkout process.
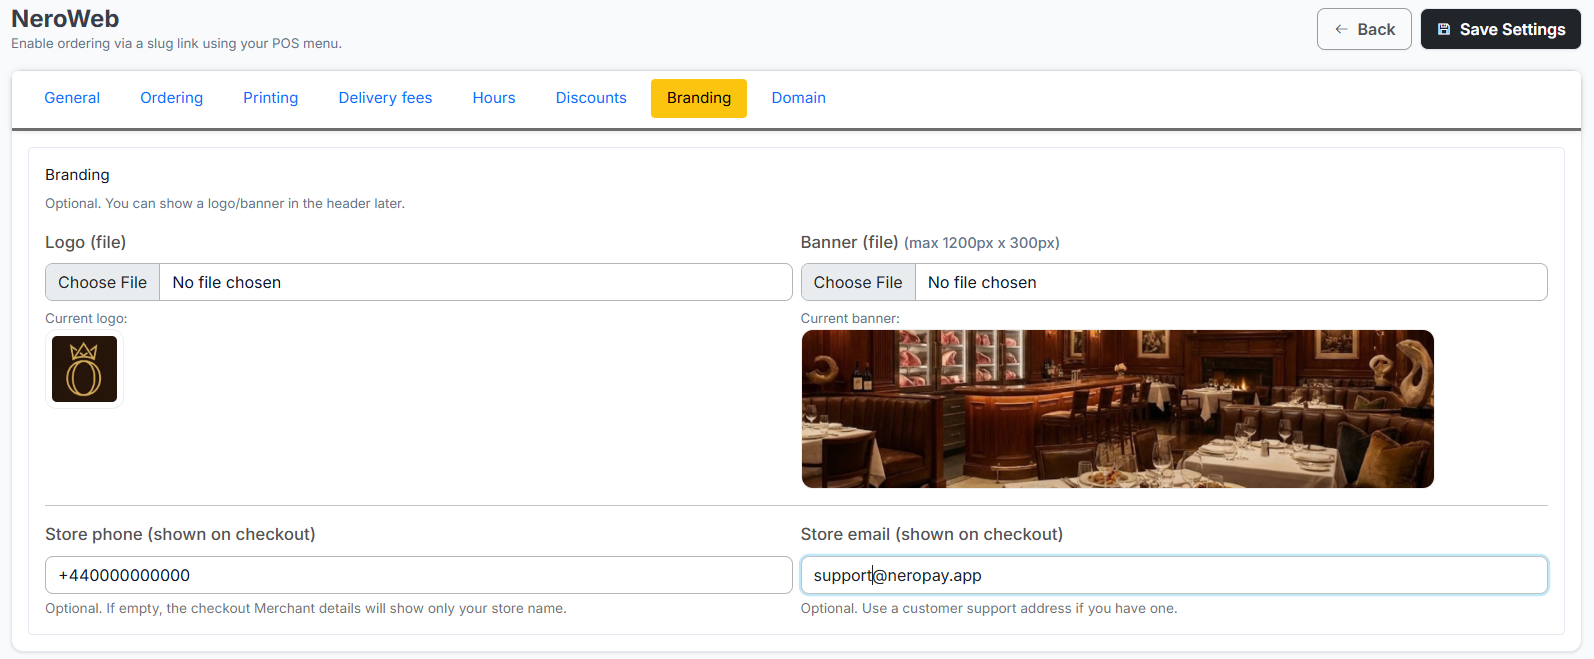
[IMPORTANT] Always click the "Save Settings" button in the top right corner before leaving a tab or refreshing the page to ensure your changes are applied.
If you have any questions, please contact us at support@neropay.app