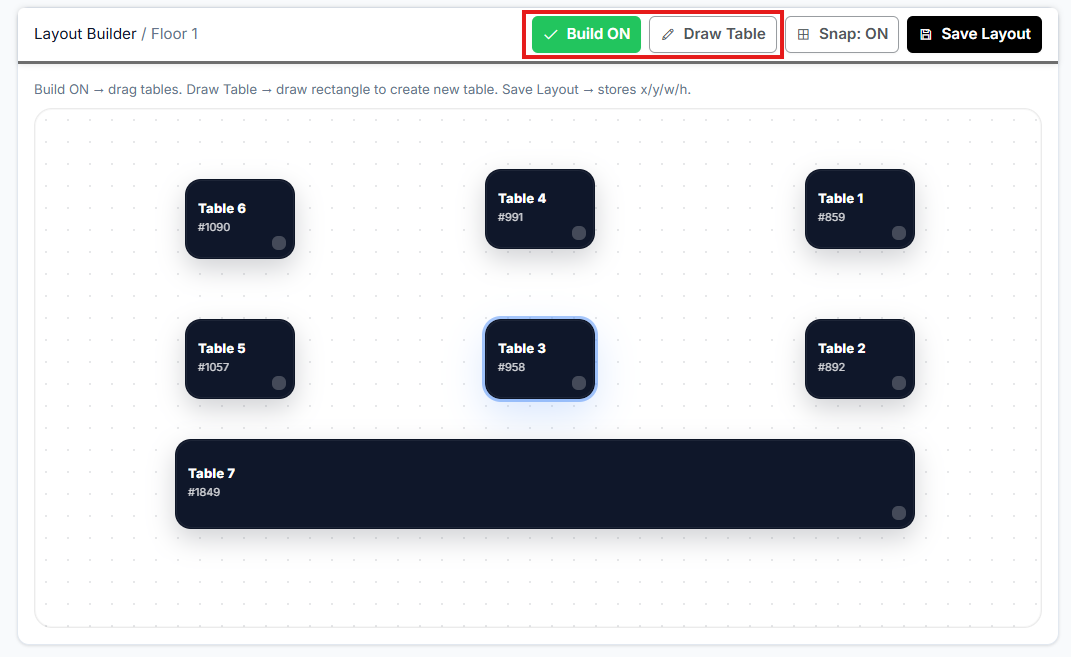
You can set up tables in a way that suits your venue. If you have different areas or layouts, you can drag and arrange the table map to match your floor plan, making order management easier.
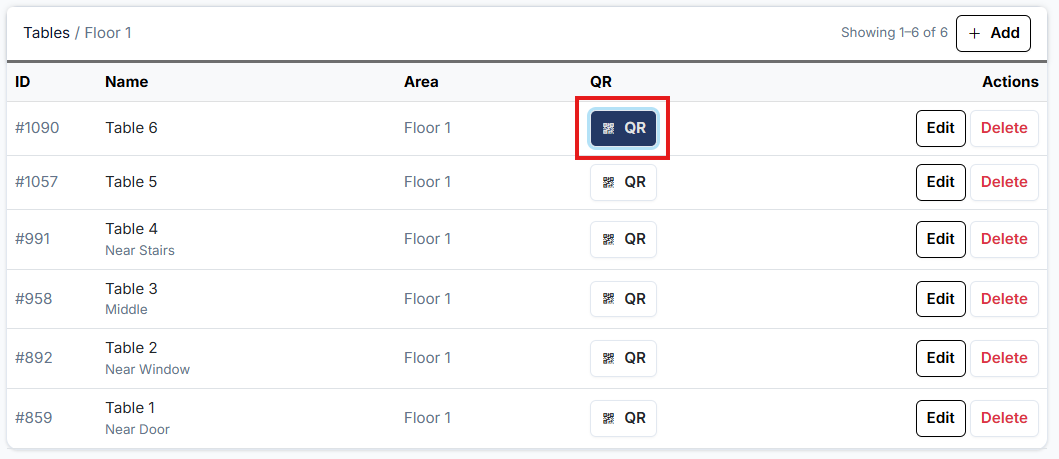
Once tables are set up, each table will have its own QR code. You can print and place the QR code on the table so customers can scan it to view the menu and place orders directly.
NeroPOS: Tables, Areas & QR Code Setup
Use this guide to organise your floor plan and set up QR Code Ordering for your customers.
1. Accessing Tables & Areas
- Log In: Go toNeroPay Account.
- Navigate: From the main dashboard, click on “NeroPOS” in the left sidebar.
- Select Layout: From the dropdown menu, click on “Tables & Areas”.
2. Organising Your Space (Areas)
If your shop has multiple floors or sections (e.g., Garden, Upstairs, Main Floor), use Areas to keep them organised.
- Create Area: Click “Add Area” at the top right.
- Name & Confirm: Give the area a name and click “Create Area”.
- Note: You can create multiple areas to reflect your actual shop layout

3. Adding and Designing Tables
- Create Table: Click “Add Table” at the top right.
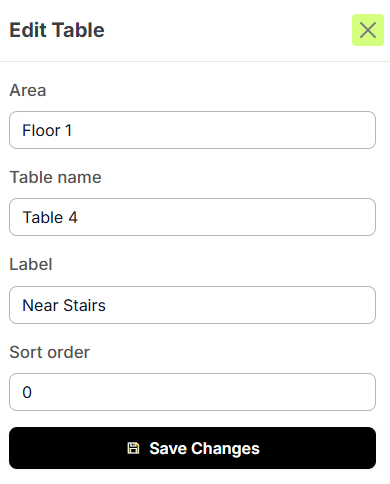
- Details: * Name: Enter the table number (e.g., Table 1).
- Label: Add a staff reference (e.g., By the Window).
- Custom Layout: * Click “Build Mode” to drag and drop your tables into their physical positions.
- Use “Draw Table” to create custom shapes (circles or rectangles) for a more accurate map.
4. Generating & Printing QR Codes
Once your tables are created, you can access the unique ordering link for each one.
- Locate the QR Icon: In the table list or layout view, look for the "QR" icon next to each table.
- Open & Save: Click the "QR" button to open the unique code for that specific table.
- Print: From here, you can save the image or print it directly.
- Deployment: Stick the unique QR code on its corresponding table so customers can scan, browse your NeroWeb menu, and order directly to their seat.
5. Finalising Your Changes
- Save: Be sure to click “Save Settings” (or "Save Changes") at the top right of the page once you are finished.
[!IMPORTANT]
Test your code! Before the shop opens, scan a few of the printed QR codes with your phone to ensure they lead to the correct table number on your NeroWeb store.
If you have any questions, please contact us via email at support@neropay.app