Skip to the content

NeroPay DocsNeroPay Docs

  • Docs
  • NeroPay Website
  • System Status
  • Contact Support
  • Docs
  • NeroPay Website
  • System Status
  • Contact Support
  • Common Questions

    • About NeroPay

    • Devices & Solutions

    • Setup & Onboarding

    • Fees, Rewards & Pricing

    • Payments & Payouts

    • Security, Disputes & Compliance

    • Support

    • Identity Verification

  • Security

    • Reserve Balance & Extra Security Verification

  • Dashboard

    • Pay Out Funds

    • Creating A Ticket For Customer Support

    • Sign Up and Apply for a NeroCard

    • NeroCard PIN Management

    • Refund

    • Set Up and Use NeroPay’s Transfer Schedule

    • Link Your Bank Account

    • Transactions

    • Reports Overview

    • Add Bank Account

    • Rewards & Gifts

    • Transfer Money

    • Transfer History

    • Account & Profile Settings

    • Money Payout Schedule

    • Top Up Money

    • Tap to Pay

  • NeroPay Terminal

    • Use The NeroPay Card Terminal

    • NeroPay Terminal Onboarding Guide

    • How to Return Your NeroPay Terminal

    • Setup Card Terminal

    • Install NeroPay Terminal to Tablet

    • Terminal Security Settings

    • Display Timeout

  • Checkout API

    • Rest API

    • Ready-to-Use Plugins

      • WooCommerce
      • NeroPay for Odoo
      • NeroPay for Wix
      • NeroPay for Perfex Crm
      • NeroPay for Zapier
  • Account Setting

    • Verification

    • Sign Up

    • Reactivation Guide

    • Complete Your Registration

    • Verify Bank Account

  • Bookings

    • Bookings Overview

    • Booking Settings

  • Nero Partner Programme

    • FAQ

    • Earnings & Commission

    • Referral Process

    • Merchant Eligibility

    • Programme Rules & Terms

    • Tools & Support

    • Practical Scenarios

    • Growth & Performance

  1. Docs
  2. Account Setting
  3. Verification

Verification

1. Registration Form

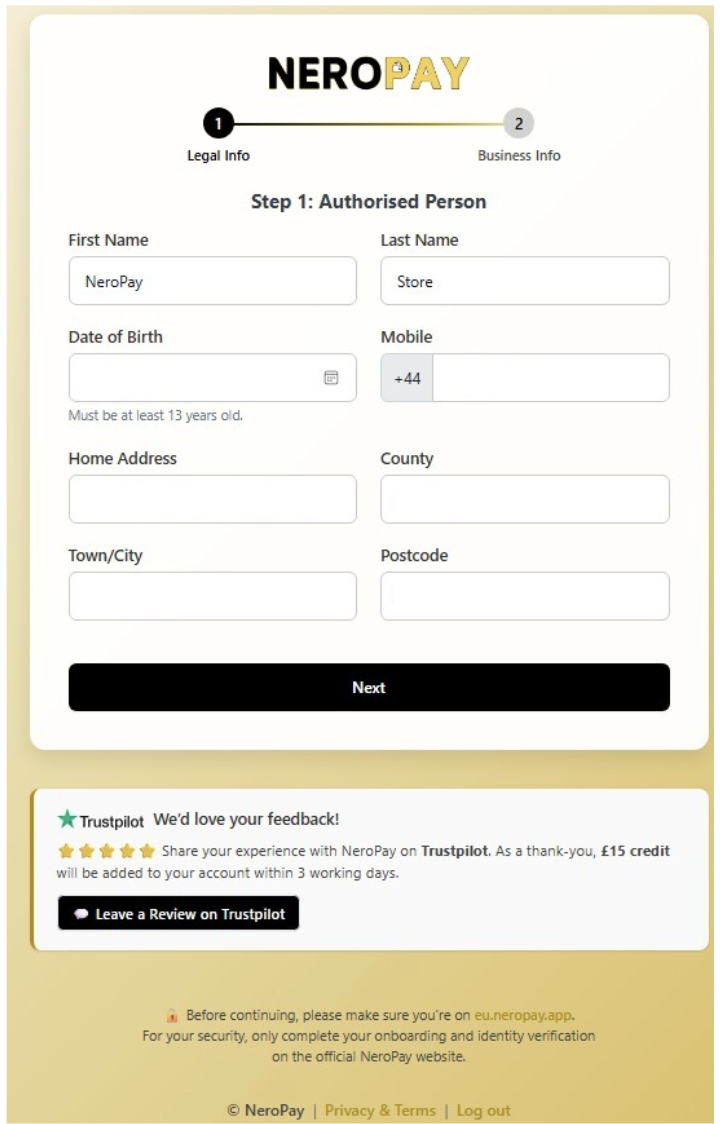
Merchants begin by completing the two-step onboarding form:

Step 1 — Legal Info (Authorised Person)

Merchants provide:

  1. First Name
  2. Last Name
  3. Date of Birth
  4. Mobile Number
  5. Home Address
  6. County
  7. Town/City
  8. Postcode

After filling in the details, the merchant clicks Next to continue.


Step 2 — Business Info

Merchants enter:

  1. Business Name
  2. Business Type
  3. Trading Address
  4. Industry
  5. Other relevant business information

Once these two steps are completed, registration is marked as Completed.

Identity Verification is not included in this form anymore.


2. Dashboard Activation Steps – Complete Your Account Setup

After registration, the merchant is redirected to the Dashboard, where they will see their activation progress.

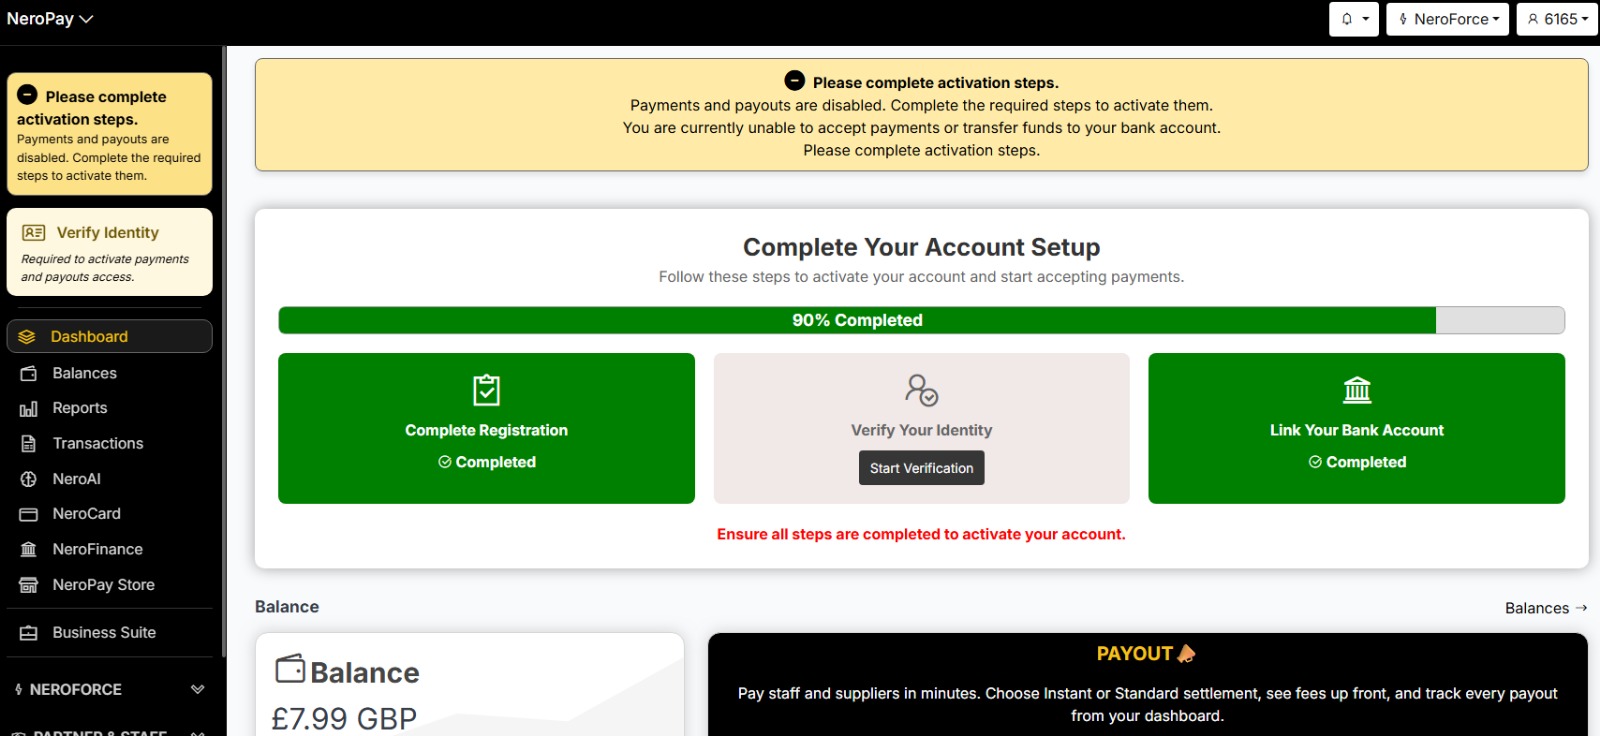
Progress Overview (e.g., 90% Completed)

Three boxes display status:

Complete Registration

✔ Completed automatically after Legal Info + Business Info

Verify Your Identity

⚪ Not completed

  1. Merchant clicks Start Verification
  2. Uploads ID
  3. Completes face verification
  4. Waits for approval
Link Your Bank Account

✔ Completed (if already linked)

Otherwise, merchant must add bank details.


Views: 65
How do you feel about this docs?
0 0 0
In this page:

    © 2025 NeroPay Docs

    Supported by Nero Group

    To the top ↑ Up ↑