Skip to the content

NeroPay DocsNeroPay Docs

  • Docs
  • NeroPay Website
  • System Status
  • Contact Support
  • Docs
  • NeroPay Website
  • System Status
  • Contact Support
  • Common Questions

    • About NeroPay

    • Devices & Solutions

    • Setup & Onboarding

    • Fees, Rewards & Pricing

    • Payments & Payouts

    • Security, Disputes & Compliance

    • Support

    • Identity Verification

  • Security

    • Reserve Balance & Extra Security Verification

  • Dashboard

    • Pay Out Funds

    • Creating A Ticket For Customer Support

    • Sign Up and Apply for a NeroCard

    • NeroCard PIN Management

    • Refund

    • Set Up and Use NeroPay’s Transfer Schedule

    • Link Your Bank Account

    • Transactions

    • Reports Overview

    • Add Bank Account

    • Rewards & Gifts

    • Transfer Money

    • Transfer History

    • Account & Profile Settings

    • Money Payout Schedule

    • Top Up Money

    • Tap to Pay

  • NeroPay Terminal

    • Use The NeroPay Card Terminal

    • NeroPay Terminal Onboarding Guide

    • How to Return Your NeroPay Terminal

    • Setup Card Terminal

    • Install NeroPay Terminal to Tablet

    • Terminal Security Settings

    • Display Timeout

  • Checkout API

    • Rest API

    • Ready-to-Use Plugins

      • WooCommerce
      • NeroPay for Odoo
      • NeroPay for Wix
      • NeroPay for Perfex Crm
      • NeroPay for Zapier
  • Account Setting

    • Verification

    • Sign Up

    • Reactivation Guide

    • Complete Your Registration

    • Verify Bank Account

  • Bookings

    • Bookings Overview

    • Booking Settings

  • Nero Partner Programme

    • FAQ

    • Earnings & Commission

    • Referral Process

    • Merchant Eligibility

    • Programme Rules & Terms

    • Tools & Support

    • Practical Scenarios

    • Growth & Performance

  1. Docs
  2. Dashboard
  3. Sign Up and Apply for a NeroCard

Sign Up and Apply for a NeroCard

NeroPay offers two types of business spending cards — Virtual and Physical. Follow this guide to set up your account and apply for your card.

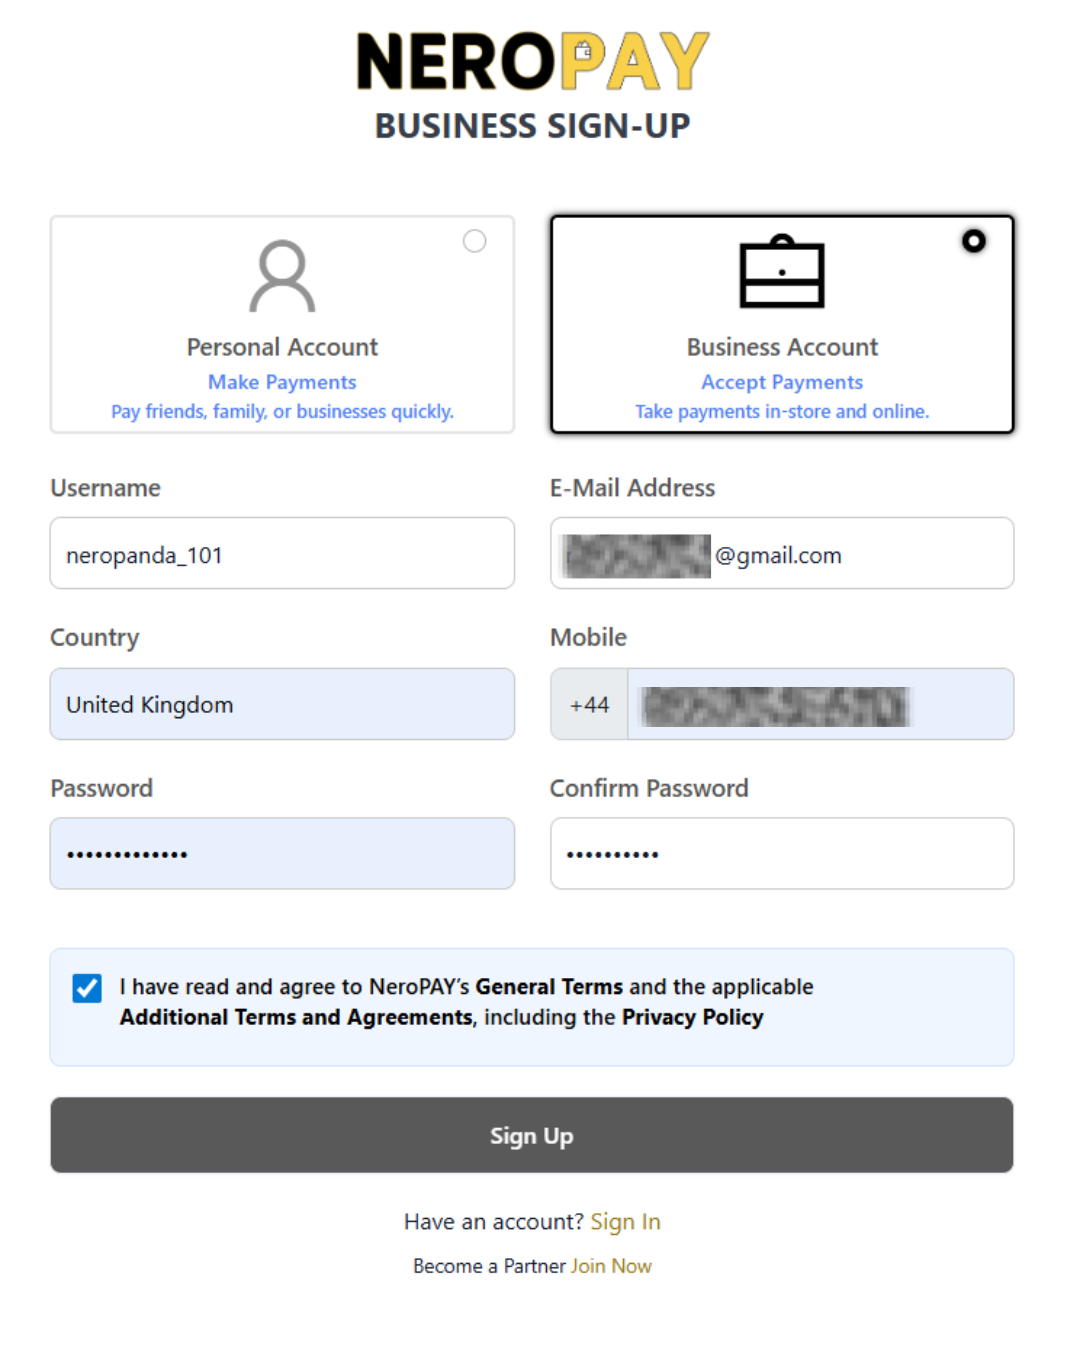
1. Sign Up & Register on NeroPay
  1. Download the NeroPay App (from App Store or Google Play).
  2. Create an account by entering your email, password, and verifying your identity.
  3. Complete your profile – You may be asked to provide:
  4. Full Name
  5. Address
  6. Date of Birth
  7. Business details (if applicable)

NeroPay profile setup screenshot

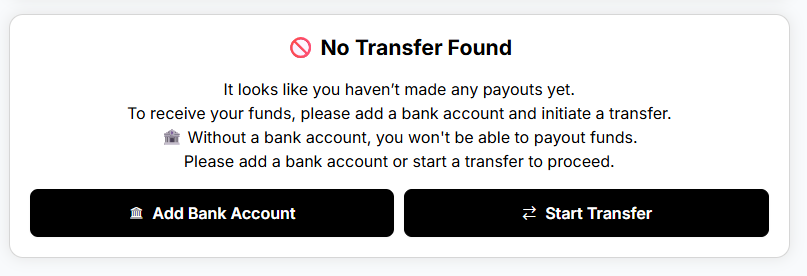
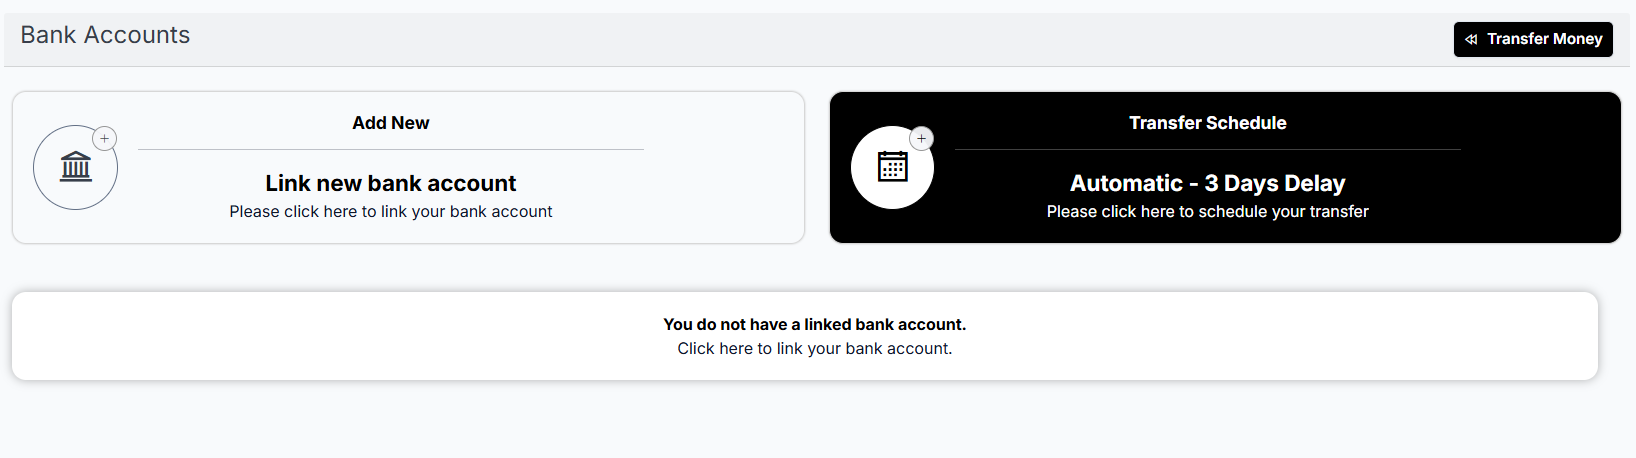
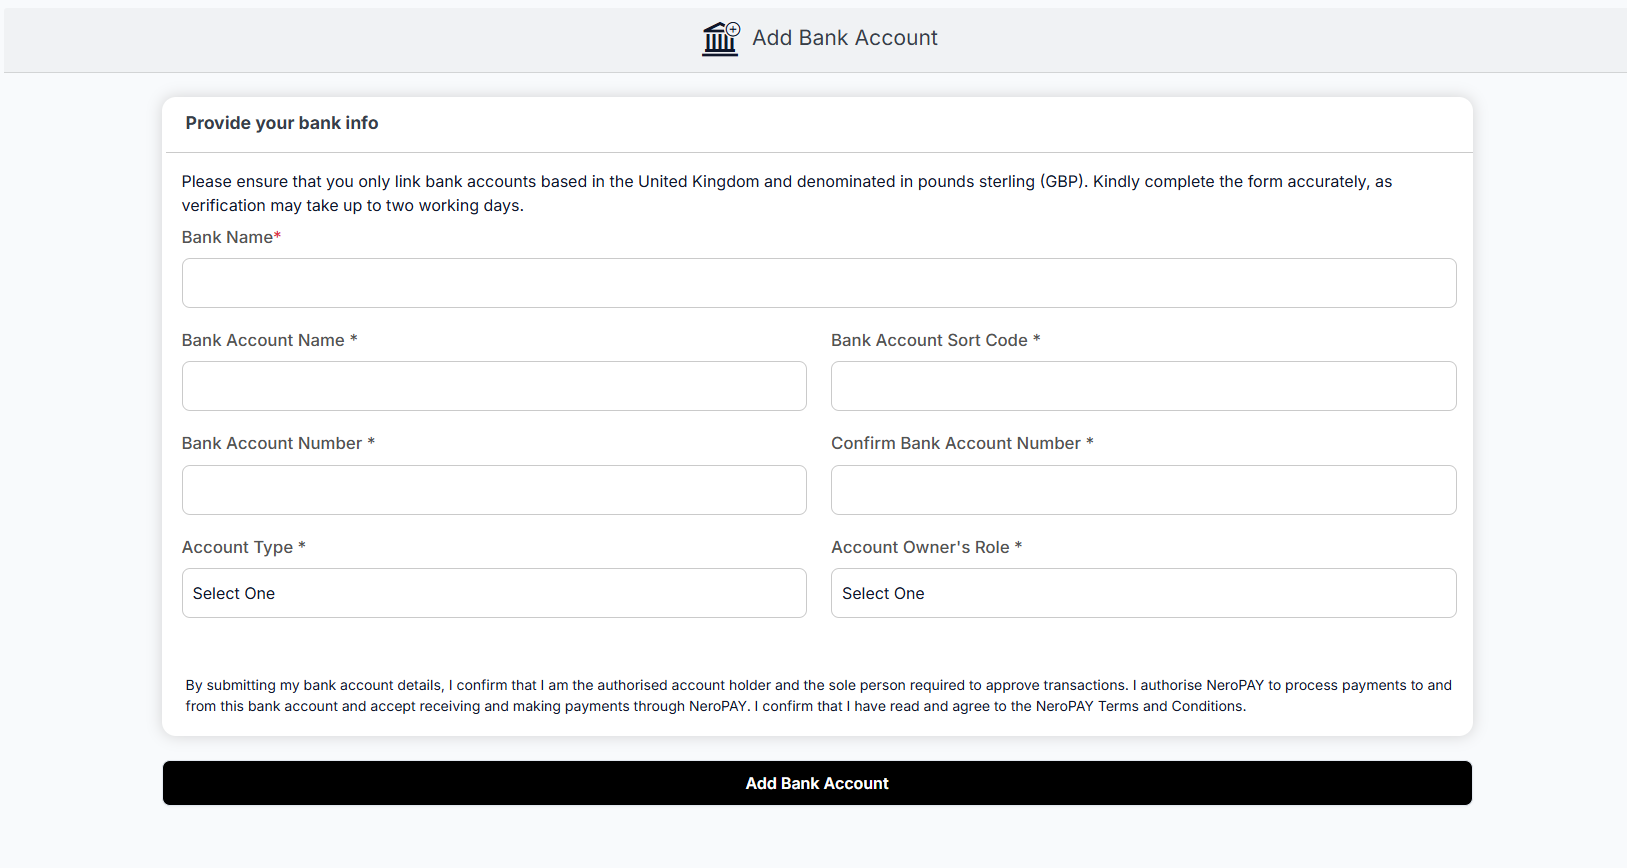
Link a bank account (needed for top-ups and transfers).

Go to Bank Accounts → Link new bank account and follow the prompts to connect securely.

Bank account linking screenshotBank linking step 2Bank linking step 3

2. Add Funds to Your Balance

Before creating a NeroCard, you need at least £20 in your Payment Balance or NeroCard Balance.

  1. Tap Transfer Money on your dashboard.
  2. Choose your linked bank account or merchant wallet.
  3. Deposit at least £20 to unlock card creation.
3. Apply for a NeroCard

Once your account has funds, you can create a new card:

  1. Navigate to the NeroCard section in the app.
  2. Tap Create Card.
  3. Choose between:
  4. Virtual Card (£1 fee) – instantly created, ready for online use.
  5. Physical Card (£19.90 fee) – shipped to your registered address.
  6. Confirm your details (address required for physical cards).
  7. Review the fees and confirm your request.
4. Managing Your NeroCard
  1. View balance & transactions – Check your NeroCard dashboard anytime.
  2. Top up instantly – Add funds through your merchant wallet or linked bank.
  3. Use anywhere – Pay online, in-store, or internationally.
  4. Real-time alerts – Stay updated on every transaction.
Quick Notes
  1. You need at least £20 in your account to create a card.
  2. A virtual card is cheaper and faster if you need immediate access.
  3. A physical card takes longer (shipping time) but works everywhere.
Views: 45
How do you feel about this docs?
0 0 0
In this page:

    © 2025 NeroPay Docs

    Supported by Nero Group

    To the top ↑ Up ↑