Transactions
Transaction History Overview
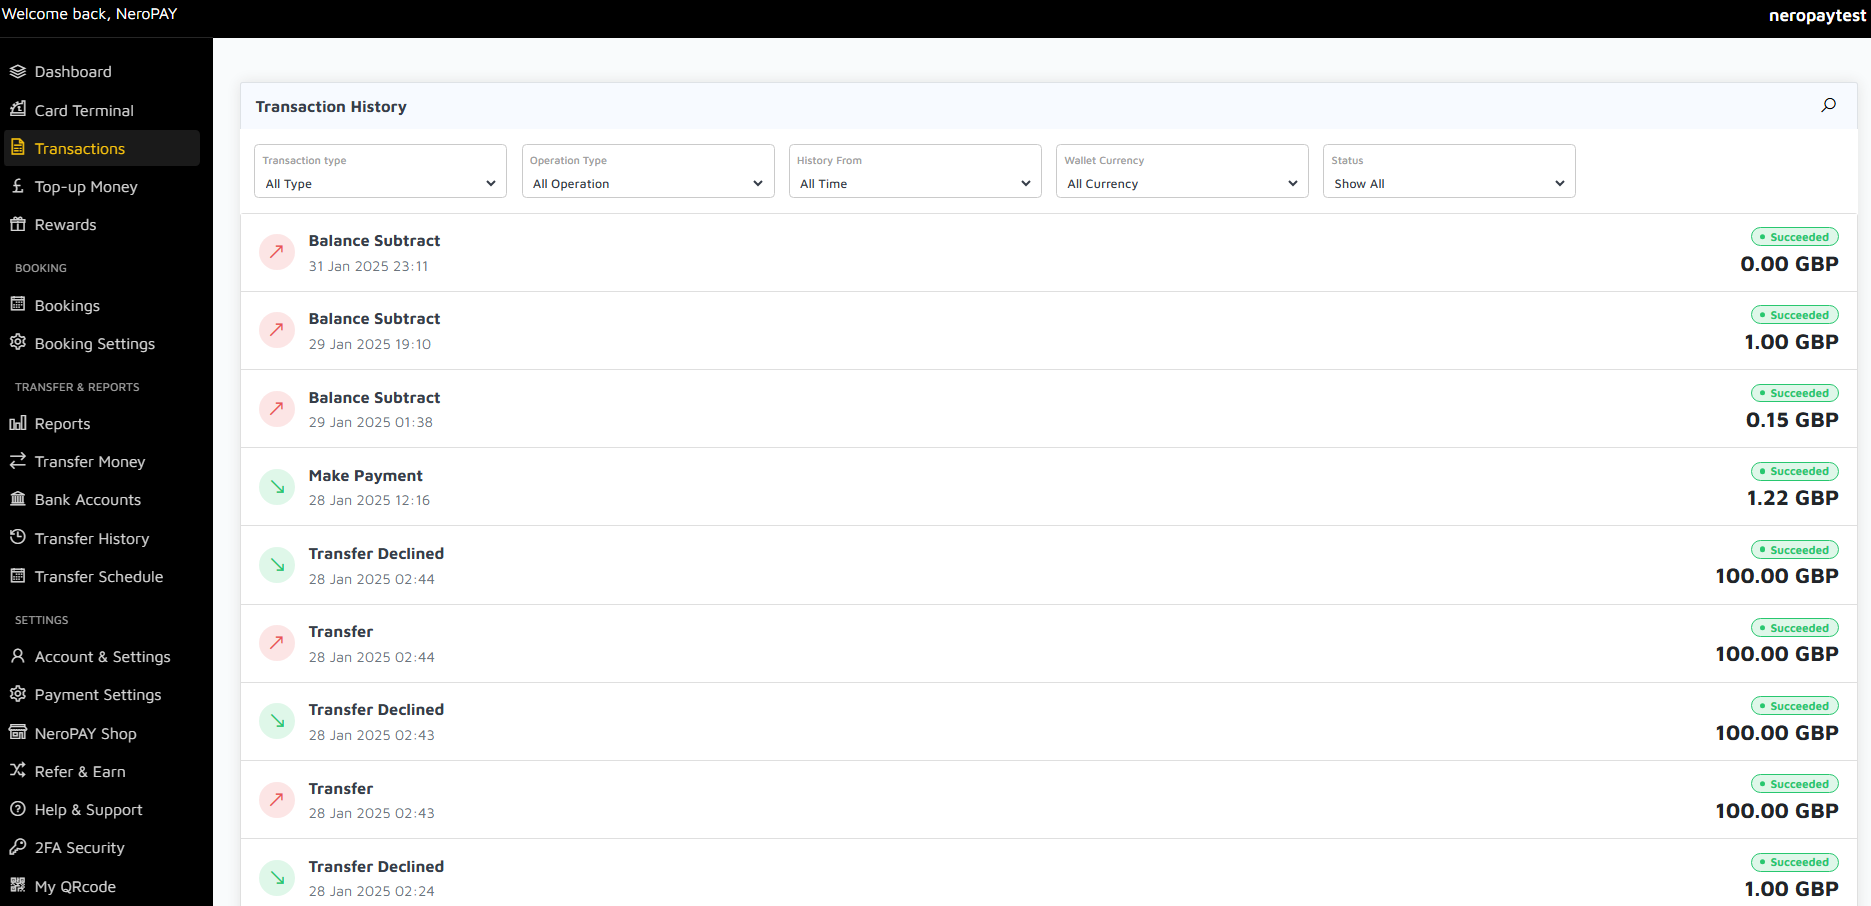
The Transaction History section provides a comprehensive record of all activities related to your account. It allows you to monitor and review transactions such as payments, transfers, and balance adjustments. This feature is essential for tracking financial movements and ensuring accurate account management.
Filter Options
Transaction Type
You can filter transactions by type, such as Balance Subtract, Payments, Transfers, or Refunds. This helps you narrow down specific categories of activity for easier analysis.
Operation Type
Select the operation type (e.g., Deposits, Withdrawals) to focus on particular actions within your account.
History From
Adjust the date range to view transactions from a specific period. This is particularly useful for monthly reviews or preparing financial reports.
Wallet Currency
Choose the currency of the transaction (e.g., GBP, USD, EUR). This is helpful for accounts handling multiple currencies.
Status
Filter by transaction status, such as Succeeded, Pending, or Declined, to quickly identify the outcomes of your activities.
Transaction Details
Each transaction is displayed with the following key information:
Type of Operation
The nature of the transaction, such as Balance Subtract, Make Payment, or Transfer.
Date and Time
The exact date and time the transaction occurred, allowing for precise record-keeping.
Status
The current status of the transaction, such as Succeeded, Pending, or Declined, providing clarity on its outcome.
Amount
The total value of the transaction, displayed in the relevant currency.
Status Indicators
Transactions include colour-coded or labelled status indicators to help you quickly identify their outcomes:
Succeeded
Indicates the transaction was completed successfully.
Declined
Shows that the transaction was not processed, possibly due to insufficient funds or other issues.
Pending
Represents a transaction that is currently being processed and has not yet been completed.
Importance of Transaction History
The Transaction History section is designed to provide transparency and ensure you have complete control over your account's activities. It serves as a valuable tool for:
- Tracking all incoming and outgoing payments.
- Identifying any discrepancies or errors in your transactions.
- Organising financial data for reporting and analysis.
- Ensuring accountability and compliance with financial regulations.
How to Use Transaction History
To make the most of the Transaction History feature, follow these steps:
Step 1: Select Filters
Use the filter options at the top of the page to refine your search. For example, you can search for transactions within a specific date range or select a particular currency.
Step 2: Review Details
Click on individual transactions to view more information if needed. This is helpful for understanding the context of larger or unusual amounts.
Step 3: Take Action
If you notice any unexpected transactions, contact support immediately for clarification or dispute resolution.